Why a Great Portrait Fails as a Profile Icon
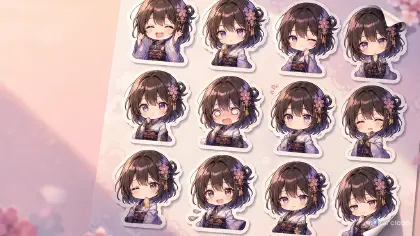
An anime avatar can look impressive at full size and still fail the moment it becomes a profile icon. The hair detail disappears, the eyes turn into two bright dots, the shoulder crop cuts off the signature jacket, and the character looks like any other cute face in a comment thread. That is the avatar problem: it is not a poster. It has to survive as a tiny identity mark.
Good avatar prompts start with recognition, not decoration. The viewer should be able to tell who the character is from the head shape, eye light, silhouette, color contrast, and one memorable accessory. If the prompt asks for a full costume, elaborate background, floating props, dramatic lighting, and a complex expression, the result may be beautiful but useless as a small icon.
This guide explains how to build anime avatar prompts that stay readable in profile images, game handles, social headers, creator channels, and character pages. It covers core principles, a step-by-step structure, an ArcLoop workflow, three copy-ready examples, common mistakes, and FAQ answers. Start with Character Sheet Templates when you need a stable original character before cropping a face.
Things That Keep an Avatar Readable
The first principle is silhouette before detail. A strong avatar can be recognized in grayscale or at a small size because the head shape, hair outline, and shoulder crop are distinct. Spiky hair, a side braid, a square hood, a sailor collar, or a single large accessory can do more than dozens of tiny costume notes.
The second principle is one expression, one read. Avatars are usually seen quickly. Choose calm confidence, startled delight, sleepy suspicion, battle focus, or mischievous pride. Mixing five emotions makes the face muddy.
The third principle is controlled cropping. Head-and-shoulders framing is usually best. Too close and the hair silhouette disappears. Too wide and the face loses impact. Tell the prompt where to crop: top of hair visible, shoulders included, no cut-off chin, accessory inside frame.
The fourth principle is color contrast. The background should make the face and hair easy to read. If the character has pale hair, avoid a pale sky behind it. If the outfit is dark, give the shoulder line a lighter rim or a contrasting shape.
The fifth principle is a single identity anchor. Pick one: crescent hair clip, cracked visor, tiny crown pin, striped scarf, green headphones, red ribbon knot. Repeat it across the character sheet and avatar prompt.
The sixth principle is no fake branding. An avatar for your own OC should not rely on borrowed logos, famous mascot shapes, or recognizable product marks. Make the accessory original and simple enough to repeat.
How to Build an Avatar Prompt: From Use Case to Final Check
Start with the avatar use case. A profile icon, channel avatar, character cast page portrait, and visual novel dialogue portrait need different crops. Write the format first: square avatar, head-and-shoulders, centered face, readable at small size.
Define the character identity. Keep it compact: age range or role, hair shape, eye color, outfit collar or shoulder line, and one accessory. If the OC already exists in ArcLoop, reference its character asset instead of inventing a new face.
Choose one expression. Write it as an acting note, not only an emotion label. "A tiny confident smile like she has already solved the puzzle" is clearer than "smart expression."
Set the crop and angle. Front view is the safest for recognizability. A slight three-quarter angle adds personality. Extreme angles usually weaken avatar clarity unless the silhouette is already famous inside your project.
Control the background. Use a simple shape, flat color, soft gradient band, or minimal world hint. The background can imply the character's setting, but it should not compete with the face.
Add style and finish. Clean 2D anime line art, crisp cel shading, bright eye highlights, strong rim separation, and simplified fabric folds are useful. Avoid tiny jewelry, micro-patterns, and text.
End with review checks. Ask whether the avatar is readable at small size, whether the accessory stays visible, whether both eyes keep their shape, and whether the shoulder crop supports the silhouette.
Making Anime Avatars in ArcLoop
The lazy reliable workflow is character sheet first, avatar crop second. Use OC Character Sheet Front Turnaround or another Character Sheet Template to lock the OC before you ask for an avatar. This prevents the avatar from becoming a one-off face that cannot be reused in later videos.
Inside ArcLoop Worlds, keep the approved character asset beside the avatar prompt. The asset carries identity: hair shape, eye style, palette, accessory, and outfit collar. The avatar prompt carries only the crop, expression, background, and readability checks. That split saves retries because you are not asking one prompt to design and crop the character at the same time.
Review the first draft at small size. Do not judge only the full canvas. Zoom out or compare it beside a few thumbnails in the project. If the character reads full-size but not small, fix the silhouette, contrast, crop, or accessory. Do not add more lore.
If the avatar will be used with animation later, keep the prompt connected to the world. A tiny harbor icon, classroom window color, shrine cord, or cockpit light can hint at the setting without turning the avatar into a busy poster.
Example 1: Puzzle Club Avatar
Create a square anime avatar for Rume, an original after-school puzzle club captain. Head-and-shoulders crop, slight three-quarter view, top of hair and shoulders fully inside frame. Character identity: short mint bob with one longer strand on the left, warm brown eyes, navy cardigan over a cream shirt, and a small orange triangle hair clip. Expression: calm, amused confidence, like she has just noticed the solution before everyone else. Background: simple pale lavender circle with faint notebook grid lines, no text. Style: clean 2D anime line art, crisp cel shading, bright but small eye highlights, clear hair silhouette, readable shoulder line, warm skin tone. Keep the triangle hair clip visible and orange. Avatar must remain recognizable at small size. No logo, no text, no extra accessories, no detailed classroom crowd, no photorealism, no heavy shadow hiding the eyes.
This prompt treats the avatar as an icon. The hair clip, bob shape, and cardigan shoulder line carry the identity.
Example 2: Night Ferry Avatar
Generate a square 2D anime avatar for Beni, an original night ferry ticket keeper. Crop from chest to top of hair, centered face, front view with a slight downward chin tilt. Character identity: deep blue wavy hair tucked behind one ear, amber eyes, a dark green coat collar, and a tiny brass ticket punch hanging from a short red cord near the collar. Expression: alert but kind, lips closed, eyes focused as if listening to a passenger's strange request. Background: flat moonlit teal with a soft circular ferry-window shape behind the head. Use clean cel shading, strong separation between blue hair and teal background, simple coat folds, and sharp eye light. Keep the ticket punch visible but not oversized. No text, no logo, no ship name, no crowd, no rain streaks over the face, no cropped chin, no realistic rendering.
The world hint is just the ferry-window shape. That is enough for mood without burying the face.
Example 3: Snack Shop Rival Avatar
Create a square anime profile avatar for Juno, an original snack shop rival who acts tougher than she is. Head-and-shoulders crop with both puffy sleeves visible. Character identity: fluffy peach hair in two low buns, sharp gray eyes, black choker, striped lime-and-white shop jacket, and a tiny silver spoon pin on the left collar. Expression: exaggerated skeptical squint with one eyebrow raised, slight pout, playful comedy energy but still appealing. Background: clean coral rectangle with a small cream oval behind the head for contrast, no food photos. Style: bright 2D anime, bold outline, simplified shapes, readable at phone-notification size. Keep the spoon pin, hair buns, and striped jacket consistent. No text, no mascot logo, no extra hands, no open mouth with warped teeth, no cluttered shelves, no photorealism.
Comedy avatars need stronger shapes than serious portraits. The buns, eyebrow, and striped jacket make the attitude readable even when small.
The Most Common Avatar Prompt Mistakes
The first mistake is writing a full character illustration prompt and hoping it will crop well. Avatar design needs crop, contrast, and thumbnail readability from the start.
The second mistake is using too many accessories. Tiny chains, badges, ribbons, earrings, pins, and hair ornaments compete with each other. Keep one anchor and make it visible.
The third mistake is choosing a background that blends into the hair or outfit. A dark-haired character on a dark night sky may look cinematic at full size but vanish in a small circle.
The fourth mistake is overacting the face. Wide-open mouth, tears, wink, blush, and angry eyebrows all at once can distort the character. Pick one expression with one reason.
The final mistake is creating an avatar disconnected from the reusable OC. If the profile image does not match the character sheet, later storyboards and videos will drift.
FAQ
What should an anime avatar prompt include?
Include format, crop, character anchors, expression, background contrast, style, and small-size checks. Keep it shorter than a poster prompt because the avatar has less room to carry detail.
Should I make the character sheet before the avatar?
Yes, if the character will appear again. Build the OC in ArcLoop first, then crop an avatar from the approved identity. That keeps the face, hair, colors, and accessory reusable.
What crop works best for anime avatars?
Head-and-shoulders crop usually works best. It keeps the face large while preserving hair shape, collar, and one accessory. Extreme close-ups are harder to reuse.
How do I make an anime avatar readable at small size?
Use a clear silhouette, strong background contrast, one expression, one accessory, and simple shapes. Check the result as a thumbnail before polishing.
How do I keep an avatar tied to a character used elsewhere in the project?
Yes. Build the character once as a character asset in My Assets, bind reference images for different expressions to it, then reuse that same asset for the avatar crop, the storyboard, and any later shot prompts. The profile image stays tied to that one identity instead of becoming a separate one-off image.