OpenAI has released GPT Image 2.5, and social feeds are already several rounds deep in comparison shots. For creators making OCs and short dramas, what matters isn't the spec sheet — it's two things: which tasks this generation actually handles more reliably than Image 2, and whether your current "reference image + canvas + asset library" workflow needs to change.
This piece breaks down the model tiers themselves, then ties that back to what you're actually doing every day: how to lock in characters and products with reference images, how to change one thing per round, and when to stop and check your work.
What GPT Image 2.5 Actually Is
GPT Image 2.5 comes in two tiers. Flare is built for daily production — social posts, product drafts, covers, anything you need to iterate on quickly. Sunburst is for final shots meant to be viewed up close: complex materials, product detail, dense text. Both tiers support text-to-image and reference-image editing with the same input structure, so switching tiers doesn't mean rewriting your prompts.
This tiering lives on the model side. Whether a creative tool lets you pick a tier, and which ones, depends on which tier(s) it has integrated — more on that below.
What Changed from Image 2
OpenAI's release notes point to four improvements: more natural lighting, richer textures, better subject consistency across reference images, and better understanding of "only change this" during multi-turn edits. OpenAI also cites a speed benchmark — generation latency cut by up to roughly half.
Of these four, the third and fourth matter most for ongoing creative work. A character keeping the same face on the fifth image, a product's branding staying intact after a scene change — that's the capability you're actually paying for.
| Workflow step | Common practice in the Image 2 era | Worth changing on 2.5 |
|---|---|---|
| Reference images | Upload one image and reroll repeatedly | Spell out which elements must stay fixed — treat the reference as a constraint, not inspiration |
| Editing | Compare before/after to spot drift | Request one change per round; put everything else in a "keep" list |
| Detail | Zoom in repeatedly to check materials | Hand material, structure, and small text work to the Sunburst tier |
| Batching | Generate in bulk, then pick by hand | Explore directions on the fast tier, then finish on the precise tier |
How the Five Quality Levels Work
On the API side, GPT Image 2.5 offers five quality levels: low, medium, high, xhigh, and max. low is for checking layout, medium is the starting point for most images, high suits marketing visuals and text-heavy scenes, and xhigh/max are for assets meant to be enlarged or printed.
One thing to watch for: don't map 2.5's tier names directly onto Image 2's. If you want something close to the old medium look, starting from 2.5's high will get you closer.
Worth noting: these five levels are a model API parameter. In ArcLoop, what you're actually adjusting is resolution and aspect ratio — three resolutions (1K, 2K, 4K) paired with three ratios (16:9, 9:16, 1:1). Lock in the composition at 1K first, then scale up once it's approved. Same logic as picking a quality tier: don't pay a premium for a composition that isn't finalized yet.
Reference-Image Editing: Lock What's Approved, Change One Thing
The real value of reference-image editing isn't getting the model to redraw something better — it's stopping it from touching the parts you've already approved. Structure your instructions in three parts: which approved image you're referencing, the single thing to change this round, and what must stay exactly as-is.
Use the attached product photo as the only reference for the item.
Only replace the clear glass cup with a plain dark blue ceramic mug — keep the same position, height, and handle direction.
Keep the person, the wood-grain desk, the computer, the window, the camera angle, the crop, the light direction, and the shadow softness unchanged.
Do not add any text, do not change any other props, do not redraw the room.
On the flip side, if one instruction tries to change the background, the outfit, add text, and adjust the pose all at once, even a strong model will fail somewhere and you won't know which line it missed. If an edit goes wrong, roll back to the last approved version instead of stacking more instructions on top of a broken one.
When to Use Flare and When to Use Sunburst
Use the fast tier for the first pass: swapping a character into a new scene, exploring compositions, social aspect ratios, cover layouts with negative space — generate a batch of candidate directions at once. Use the precise tier for the second pass: product labels, materials, mechanical structure, close-up textures, small Chinese-language titles, and the final ad hero image.
Both tiers share the same request structure, so the same prompt and reference image carry over directly — you're just swapping the model. That's also why it's worth writing structured prompts from the start: the more structured they are, the cheaper it is to switch tiers.
Same off-white travel mug. Produce three e-commerce drafts: a front-facing hero shot on white, a lifestyle shot by a window, and an ad background with empty space on the right.
Keep the cup's proportions, lid seam, handle position, and front logo exactly consistent.
Do not add any text beyond the brand logo. Confirm the composition at 1K first.
How to Use GPT Image 2.5 in ArcLoop
GPT Image 2.5 is now one of the image models you can pick in ArcLoop: open Story Settings from the model chips under the chat box and choose GPT Image 2.5 Flare as the image model, with the image resolution and the ratio next to it. Everything else in this article — locking subjects with reference images, changing one thing per round, reviewing before you bind — is the same workflow, run on the new model.
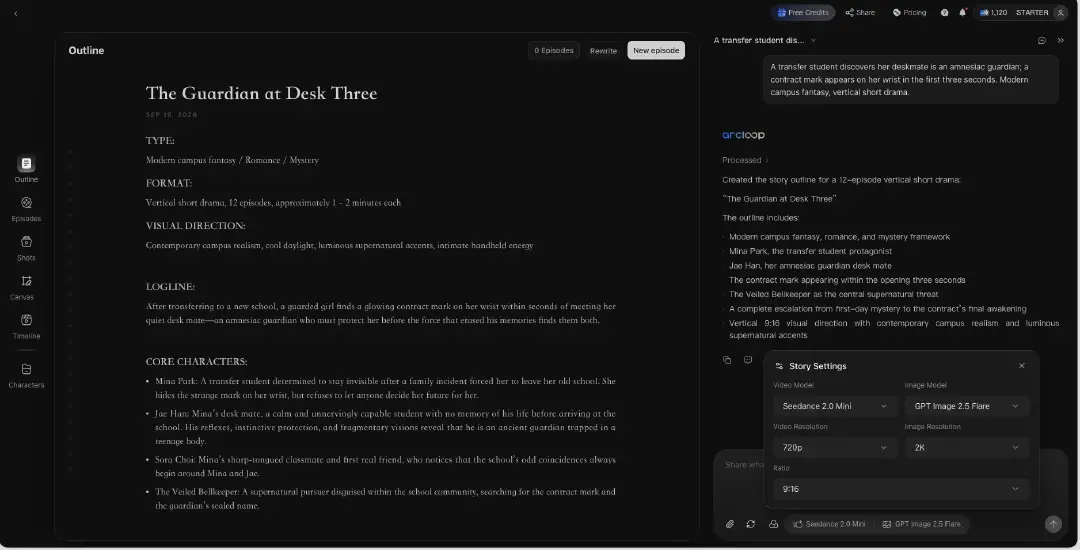
- Pick the model in Story Settings. GPT Image 2.5 Flare for the everyday tier; set the image resolution to match what the frame is for (lower for drafts, higher for the frames that ship) and the ratio for your delivery.
- Build the subject as an asset first. A character or product in My Assets with a Main image and a few Reference images covering angles and states. Reference that asset with
@every time you generate, so identity does not come down to luck. - Draft at a lower resolution, check the composition, then scale up. If the framing is off, fix the description; do not jump tiers to rescue a bad composition.
- Edit by reference, one change per round. Write what must stay fixed, then the one thing that changes. Keep the original next to the result.
- Bind approved frames to the asset with a note of the model, resolution, ratio, and prompt, so a re-generation months later reproduces it.
- Do a last pass for text, edges, and small details before delivery — a stronger model still trips on small text.
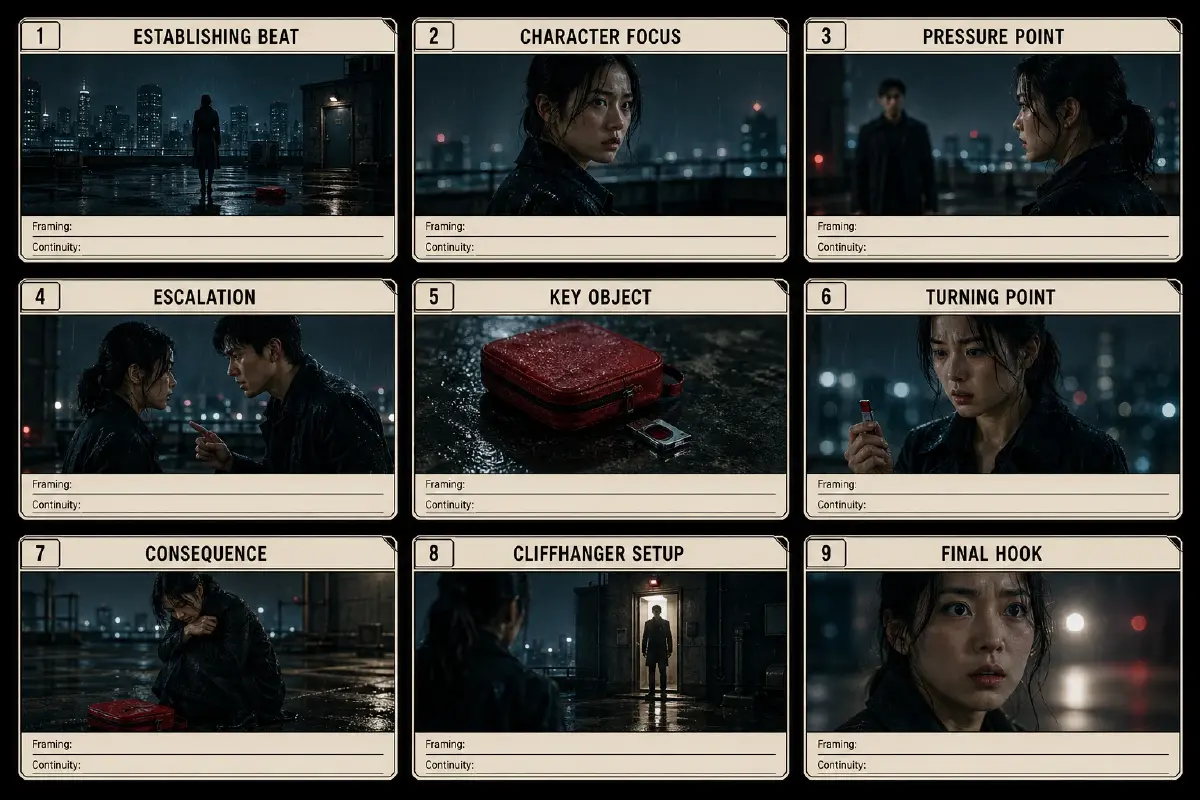
For the full workflow applied to storyboards and covers, see How to Make Short-Drama Character Sheets, Storyboards, and Covers with GPT Image 2; the steps carry over to 2.5 unchanged.
Three Things Worth Changing When You Move from Image 2
- Don't touch validated assets yet. Keep your prompts, reference images, and aspect ratios as they are. Run one comparison pass on the new model first and see where the differences show up.
- Recalibrate your tiers. Don't assume the new
mediummatches the oldmedium. Generate one image at each tier from the same reference and judge by eye. - Don't overwrite past output. Keep approved images from the old model, and save new-model output as a new version. You'll want both if you ever need to roll back or show a client how things evolved.
A model upgrade never really means "more buttons" — it means the same reference image can turn into a full set of deliverable assets more reliably. Build your assets properly, write down exactly what changes each round, and your workflow survives every model generation.