
Why the Change Has to Live in the Shot
You generate five good-looking shots for a short about a stubborn apprentice captain. In the first shot she is defiant. In the second she looks shy for no reason. In the third she has a new jacket. By the ending she smiles, but the viewer cannot tell whether she earned that smile or the model simply made a pleasant face. The animation moves, the lighting works, and the comments still say, "What changed?" This guide shows you how to plan a character's turning point so the change actually reads on screen, beat by beat.
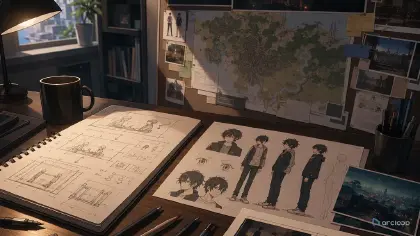
That failure is not a rendering problem. It is an arc design problem. A character arc has to survive as visible evidence: posture, distance from other characters, hand position, costume damage, color pressure, eye contact, camera height, and the one action the character could not do at the beginning. If the change only exists in your private synopsis, the audience will not feel it in a short clip.
For AI anime shorts, design the arc before generating the batch. Build the character once as a character asset in My Assets, then let the arc beats live as separate shots in the episode's storyboard, each one referencing that same asset with @ — identity holds while the visible traits around it change. Start from character profile fields, build the project in ArcLoop Worlds, and compare versions with continuity checks.
This guide shows how to design a character arc and visualize character growth as one production asset: what the character wants, what they avoid, what pressure forces a choice, and which visual traits change across the short.
Rules for an Arc That Reads on Screen
A short arc needs one pressure line, not a full biography. "Tavio wants to keep his repair crew safe, but he refuses to ask for help" is usable because it creates behavior. "Tavio is complicated and haunted by the past" is too cloudy for shot planning.
Growth must change something the camera can see. Confidence can become a lifted chin, steadier hands, a wider stance, or a move from the edge of the frame to the center. Treat inner change as a visual ladder.
Keep identity stable while behavior changes. Hair shape, face proportions, outfit silhouette, and signature prop should not mutate just because the character grows. If the story needs a costume shift, mark exactly what changes. Growth is not random redesign.
Show resistance before release. If the ending shot has the character trust someone, the opening should show what distrust looks like: crossed arms, no eye contact, back turned, or holding a tool alone.
Use color as a story signal, not a mood shuffle. Assign a limited palette rule to the arc: cold work lights for isolation, warmer bounce light when the crew gets closer, a clean white rim only when the choice is made. This keeps visual growth from becoming random color grading.
Review the arc in order: want, resistance, choice, visible change. If a generated shot is beautiful but does not answer one of those four items, it belongs in the reject pile or needs a narrow revision.
How to Build the Arc Before You Generate
Start with a one-sentence promise for the short: "A guarded mechanic learns to trust her crew before the airship falls." This is the rule that decides which shots matter.
Write four arc beats below it. The want beat names the goal. The resistance beat names the defensive habit. The pressure beat names the scene that makes the old habit fail. The reveal beat names the new behavior the audience can see. Keep each beat concrete enough to draw.
Create a visual growth ladder. For each beat, list posture, camera distance, palette, prop state, and relationship to the frame. Early shots might use cramped framing and a clenched wrench; later shots might widen the frame and show the wrench placed in someone else's hand.
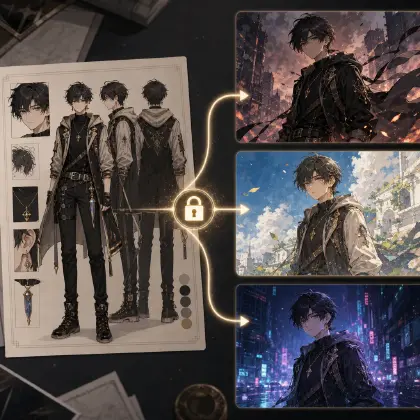
Lock the identity anchors in the character asset. Use character profile fields to define the face, hair, outfit silhouette, and signature object, then write a separate line for growth variables.
Turn the ladder into storyboard beats. Do not ask one prompt to cover the whole transformation. Make a short opening shot, a pressure shot, and a reveal shot. Each shot gets one primary action and one visible growth signal.
Generate a small batch of variants for each beat inside the same ArcLoop project. Review the takes against the ladder before polish. If the handoff fails, revise the weak layer only: action, camera, palette, prop state, or expression.
Save the approved arc beats in Story Outline with the final shots so later episodes inherit how the character changes without drifting.
Growth Lives in the Shots, Identity Lives in the Asset
Character growth is a continuity problem wearing a writing-advice costume: the character asset carries what never changes — name, description, main image, reference images, voice — and each arc beat is a shot in the episode's storyboard that references that asset with @ while its shot description carries what's different this time: posture, distance, prop state, expression.
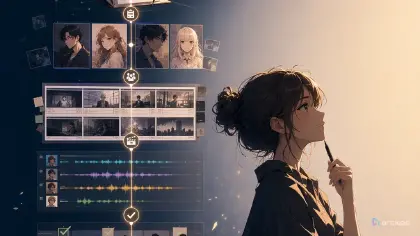
Build the project in ArcLoop Worlds when the character belongs to a continuing setting. Put the pressure line and the four arc beats into the Story Outline, one paragraph per beat — it autosaves, so you can adjust the sequence as the arc firms up. Keep the character asset as the identity source, and use scene assets only for space, lighting, or prop placement.
For each shot, use 2D Animation AI templates as a starting point, then replace the generic action with the arc beat. If the shot is supposed to show trust, write the exact behavior: shared grip, matching eyeline, stepping into the group, or handing over the object.
Review with continuity checklist. Score identity first, then arc readability, then shot quality. If the character looks right but growth is unclear, change the action or final pose.
Build Tavio once, in My Assets, before you touch a single shot. Bind his main image, then add reference images for the physical states the arc actually needs — sleeve rolled up, wrench mid-handoff — so the asset carries every state you'll pull from later, not just his default look.
Open the episode and click Generate Shots to get a first pass at the beats. Then go beat by beat: in each shot card, keep the @Tavio Vale reference and rewrite only what changed this time — his grip, his distance from Jun, the light through the vents. Generate the still image first and check it against the beat before spending a video generation on it; a wrong hand position is cheaper to catch on a frame than on a clip. Once the opening, pressure, and reveal shots each hold up on their own, use the AI Chat Panel to generate all three together — "Generate videos for Shots 1, 3, and 6." — instead of queuing them one at a time. Drop them into Edit in order and watch the sequence back; if the growth doesn't read against the shot before it, that's the one shot to redo, not the whole arc.
Example 1: Story Outline Arc Beats for a Guarded Airship Mechanic
Tight medium shot in @Engine Room, camera at chest height, boxed close so nothing but the workbench fits in frame. @Tavio Vale kneels alone at the cracked steam valve, both hands locked around his torque wrench, shoulders curled inward and back turned to the door. Someone calls his name off-screen; he doesn't look up, just tightens his grip. Cold blue-white work lights keep the space narrow and isolating, no warmth bleeding in from outside the frame. Low engine hum underneath, a single hiss of steam, no dialogue. The point of the shot is the grip, not his face.
This shot locks in the resistance the rest of the arc has to push against.
Example 2: Pressure Shot for Character Growth
Medium low-angle shot in @Engine Room, camera set at valve height. @Tavio Vale fills the left foreground gripping the torque wrench alone; @Jun is visible over his right shoulder, waiting just out of reach. The valve shakes harder than Tavio can hold, he hesitates, then turns the handle halfway toward Jun — without letting go yet. Keep both sets of hands readable in frame. Warm dawn light starts mixing with the orange alarm glow through the vents. Steam hisses, the alarm tone fades under it, no dialogue. One shot, one decision: he's still holding on, but he's turning.
The scene turns trust into a visible handoff. The viewer can understand the arc even without dialogue.
Example 3: Controlled Revision for a Weak Reveal
Wide shot in @Engine Room, camera pulled back further than the two shots before it, frame filled with warm dawn light. @Tavio Vale places the torque wrench fully into @Jun's open hand, then rests his own hand over Jun's instead of pulling away. Both turn their heads together toward the engine flare as it steadies. Shoulders relaxed, no clenched jaw, no triumphant pose — just the two of them watching the same thing happen. Engine hum settles into a steady, even rhythm, no dialogue. The shot should read as shared control, not rescue.
This revision repairs only the missing arc evidence.
The Most Common Ways an Arc Disappears
The first mistake is writing an arc that only the creator can see. If "she becomes braver" never changes body language, framing, prop use, or relationships, the audience has no evidence.
Another mistake is letting growth erase identity. A character can mature without getting a new face, costume, palette, and personality in the same shot. Mark fixed anchors separately from growth variables.
Creators also skip the resistance beat. A confident ending matters only if the opening shows what fear, pride, denial, or isolation looked like. Give the old behavior a strong visual shape.
A fourth mistake is making every shot equally emotional. Character arcs need contrast. If every shot uses tears, close-ups, glowing light, and dramatic poses, the reveal has nowhere to rise.
Finally, do not polish the wrong story. If the generated clip is active but emotionally flat, higher detail will not fix it. Repair the beat: want, resistance, choice, or visible change.
FAQ
How many beats does a short anime character arc need?
Three to five beats are enough for most shorts. Use an opening behavior, a pressure moment, and a reveal behavior as the minimum.
How do I visualize character growth without dialogue?
Pick one visible ladder: posture, prop use, camera distance, palette, costume state, or eyeline. Show the old version early and the changed version later.
Can the character change costume during the arc?
Yes, but treat costume as a story variable, not random polish. A repaired sleeve, removed mask, loosened collar, or shared team ribbon can show growth.
How do I keep a character arc visible across shots?
Reference the same character asset in the opening-resistance shot and the ending-reveal shot, then look at what's different in each shot description — posture, prop state, expression. Because identity never re-rolls, any visible change you compare is the arc, not noise from the model re-imagining the face.
What should I revise first when the arc feels flat?
Revise the visible behavior first. Change the hand action, stance, eyeline, prop state, or final frame. If identity is already stable, do not rewrite the whole character profile.