Why pretty maps fail at guiding stories
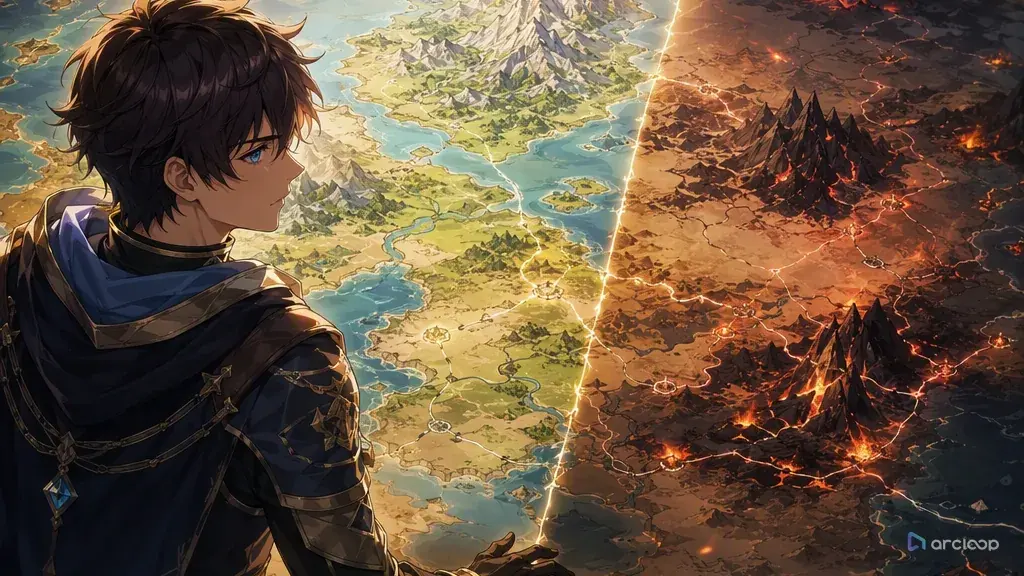
The map looks beautiful at first glance: dramatic mountains, glowing cities, curling coastlines, and a compass in the corner. Then you try to use it for episode planning. The hero can cross the continent in one scene, rival territory has no border, the capital has no reason to control trade, and the "forbidden forest" sits nowhere near the plot. It is a poster, not a world map. This guide walks you through how each part of the prompt fits together, step by step, from shaping regions to the final review pass.
An anime world map should answer production questions. Where can a character travel quickly? What route is dangerous? Which landmarks appear in establishing shots? Which faction controls the bridge, port, academy, shrine, or desert gate? What physical barrier makes the next episode harder? A useful map turns worldbuilding into visual constraints.
This guide explains how to prompt anime world maps for ArcLoop projects, short series bibles, travel arcs, and fantasy campaigns. Use regional art style guide for map visual treatment, and once a map is approved, bind it to a visual reference asset in ArcLoop Worlds so characters, routes, and later shot descriptions can pull in the same geography with an @ reference.
What makes a map work for production
Start with story function, not decoration. Decide whether the map is for a travel arc, school district, island chain, faction war, festival route, dungeon approach, or city chase. The function changes what must be readable.
Give regions shape logic. A mountain range should affect routes. A river should create bridges, ports, or borders. A desert should change travel time and supply points. If geography does not change decisions, it is wallpaper.
Use landmarks as production anchors. A lighthouse, broken rail line, glass observatory, old shrine road, crater lake, or clock tower can become repeated establishing shots. Name the landmarks that should show up later in scene prompts.
Define route friction. Smooth roads, storm seas, collapsed tunnels, guarded passes, haunted woods, toll gates, and seasonal ice all tell the story why a route costs time. This is more useful than drawing every small town.
Clarify faction zones without clutter. You can use color blocks, border lines, banners, or icons, but the map must stay readable. If the audience cannot tell who controls what, the faction layer is too busy.
Avoid fake text dependence. Generated text on maps can be unreliable. Use large readable shapes, icons, colors, and layout logic. Keep official names in the map asset's description in My Assets, or in captions, rather than forcing tiny labels into the image.
How to build a map prompt: from scope to final check
Begin with map scope. Name the scale: single town, academy campus, coastal province, island chain, desert route, floating city district, or whole continent. Scale decides how much detail belongs in the prompt.
Define the camera or map style. Use top-down illustrated map, tilted storybook map, clean anime shot cards, parchment-style layout, modern transit map, or tactical region map. Keep the style connected to its use.
List the must-have regions. Three to seven regions are usually enough for a readable story map. Give each a role: safe home base, blocked route, rival territory, resource site, hidden school, port city, storm zone, final destination.
Add route logic. State in the prompt which places connect, which path is fastest, which path is blocked, and which route characters are forced to take. Use visual route lines, bridge markers, or pass icons instead of tiny written labels.
Add landmarks and faction rules. Choose a few icons or silhouettes that can recur later. Keep them visually distinct: clock tower, sunken bridge, red kiln city, white pine pass, tide elevator, mirror lake, or black signal mast.
State readability constraints. Ask for clean silhouettes, large regions, no tiny unreadable labels, no fake text, no copied symbols, no photorealistic satellite view, no overfilled border decorations, and enough empty margin for production notes.
Saving your map as a reusable asset
The reason to build the map as an asset rather than a downloaded image: once it's bound as a visual reference in My Assets, the same map can be pulled into any shot description with an @ reference, right alongside the character and scene assets already in play. The map shouldn't be a one-off file you generate once and forget — it should control later shot descriptions.
After the first map draft, review it like a storyboard tool. Can you point to the home base, obstacle, rival zone, route, and next destination within ten seconds? Can a second creator generate an establishing shot from one landmark without asking you to explain the geography? If not, simplify the map before polishing.
Make derivative assets from the approved map: one clean route reference image, one faction reference image, one landmark reference set, and one episode travel plan. That is usually enough. Do not build a full encyclopedia unless the series already needs it. For a stylized starting point, Chinese Ink Wash Character Scene can guide painterly texture, but the map still needs production logic.
Once a map draft is approved, don't leave it as a downloaded file. Generate it with your image model of choice, then save the output straight to Library under Images. Open My Assets, create a new Visual reference asset — name it something you'll recognize later, like "Tide Keys of Orano Map" — and bind that Library image as its Main image. From here the map behaves like any other reusable asset: open an episode, and when you're writing an establishing shot in the Storyboard, type @ and pick the map asset instead of retyping island names and coastlines. Write only what that one shot adds — camera angle, weather, time of day — and let the reference carry the geography. Generate the still first to confirm the shot actually reads before you spend a video generation on it. If a later arc needs a tighter view of one location, bind a cropped or zoomed version of the same map as a second Reference image on the same asset instead of starting a new one — the map stays one asset with multiple looks, the same way a character can carry several reference images.
Example 1: Island Chain Story Map
Generate a clean top-down illustrated map, not a satellite image, for "Tide Keys of Orano" — the crescent-shaped island chain repair diver Seli Mar crosses to reach the glass lighthouse before the monsoon gate shuts. Show five islands: Home Dock in the southwest with boat sheds, Salt Orchard with white tree rows, the partly submerged Broken Causeway Reef at the center, Lantern Port under Harbor Guild control in the east, and Glass Lighthouse Island in the north, with open storm water beyond it. Mark the safe route through Lantern Port and the low-tide reef shortcut across the causeway with simple route lines, not text. Large island silhouettes, blue-green water, icon-style landmarks, wide caption margin. No tiny fake labels, no watermark.
This map prompt gives geography a story job. The reef shortcut, guild port, and monsoon gate create decisions for later episodes.
Example 2: Faction Route Board
Use @Tide Keys of Orano Map as the visual reference and generate a simplified faction and route overlay for episode planning: keep the crescent island layout, then add three layers — the Harbor Guild patrol zone around Lantern Port, the low-tide-only reef path across Broken Causeway Reef, and the storm boundary north of the lighthouse. Show the safe route as longer but stable, the reef shortcut as shorter but dotted, and the storm boundary clearly blocking the outer water, using color blocks and arrows instead of text labels. Add landmark icons only where needed: boat shed, orchard rows, reef posts, guild lantern, lighthouse. Flat anime production style, readable at mobile size, empty space on the right for later shot notes.
This second prompt turns the pretty map into a planning reference. It shows route cost without requiring a paragraph of explanation.
Example 3: Landmark-to-Shot Planning Pass
Using @Tide Keys of Orano Map for geography, generate three establishing thumbnails for later shot reference, each linked to its spot on the map with a clean line. Home Dock: low wooden sheds, rope baskets, teal shallow water, @Seli Mar kneeling by the boats checking a tide key at sunrise. Broken Causeway Reef: exposed stone posts, tide pools, broken rail segments, warning flags leaning in the sea wind, no figures. Glass Lighthouse: tall transparent tower, rotating blue lens, storm wall behind it, narrow landing pier, no figures. Keep the same clean 2D anime production style and readable silhouettes as the map. No new islands, no close-ups on faces, no fake UI text, no photorealism, no watermark.
This pass makes the map useful for actual shots. Each landmark becomes an establishing reference instead of just a dot on a decorative map.
Ways map prompts break
The biggest mistake is asking for "a beautiful fantasy anime map" without a production job. Beauty does not tell you where the next scene happens or why travel matters.
Another mistake is overloading the map with labels. If the image depends on tiny generated place names, it will be hard to reuse. Keep names in the map asset's description and make the visual map readable through shapes, icons, and routes.
Creators also forget travel friction. A map where every place connects equally has no drama. Add blocked bridges, tide windows, patrol zones, mountain passes, storm paths, or supply stops.
A fourth mistake is changing geography between assets. If the capital moves from east to west between the map and the Storyboard, continuity breaks. Lock the approved map before generating route reference images and location thumbnails.
Finally, do not build more map than the story can use. A school mystery may need a campus map, not a continent. A three-episode travel arc may need five locations, not fifty.
FAQ
How detailed should an anime world map be?
Detailed enough to guide the next production decisions. Include the regions, landmarks, routes, obstacles, and faction zones that affect the story. Leave minor lore for notes unless it changes a shot.
Should the map include written place names?
Use written names in the map asset's description in My Assets, or in captions. In the image itself, rely on large shapes, icons, route lines, and color zones because tiny generated labels can become unreliable.
How do I connect a world map to scene prompts?
Create landmark thumbnails from the approved map. Then reference those landmarks in shot prompts: lighthouse pier, broken reef posts, guild lantern port, or home dock sheds. This keeps geography visible in later clips.
How do I keep the world map consistent across a series?
Bind the approved map to a visual reference asset in My Assets, alongside the character and scene assets for the same world. Reference the map asset with @ in shot descriptions whenever a scene needs to match established geography, so routes and locations don't drift between episodes.
Where should I start?
Start with regional art style guide if the look is undecided. Once the geography matters to the story, bind the approved map as an asset in ArcLoop Worlds and only build separate scene assets for the specific locations the current arc actually uses.