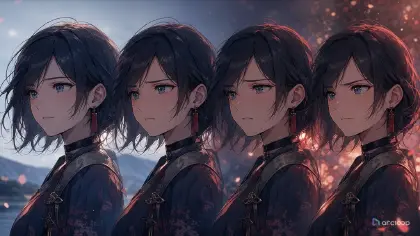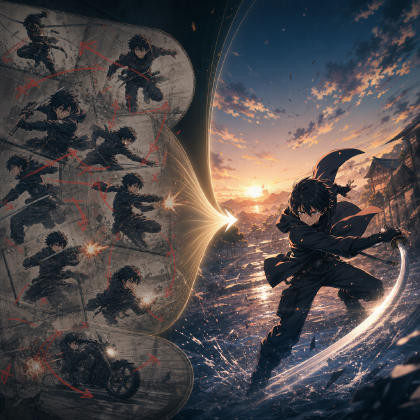
Why Group Prompts Blur Attention
You plan a five-character anime short about a midnight bakery crew solving a delivery curse. The first prompt includes everyone: the pastry lead, the courier, the quiet accountant, the rival baker, and the ghost customer. The result is busy. Faces blur. Two characters stare at nothing. The ghost steals the frame. The important choice, a courier deciding whether to confess she lost the order slip, disappears under a crowd of attractive poses. This guide walks you through how to hand each of them the right slice of attention, shot by shot.
That is the ensemble balance problem. Balanced attention does not mean equal screen time, equal dialogue, or every character in every shot. It means every visible character has a job, and every shot knows whose choice drives the beat and whose reaction matters. In AI anime, this matters even more because group prompts multiply identity drift, hand errors, eye-line confusion, and emotional noise.
Build each character once as a character asset in My Assets — face, costume, voice — and every later shot can pull that identity in with an @ reference instead of re-describing it. Keep the cast in Character Asset Fields, plan group beats inside ArcLoop Worlds, and lean on Continuity Checks so a background character does not quietly take over a shot.
This guide shows how to design ensemble balance for AI anime stories without flattening everyone into the same amount of attention. You will create an ensemble planning table, decide when to isolate or group characters, write prompts with clear foreground and reaction roles, and revise crowd scenes without rebuilding the whole cast.
Rules for Sharing the Frame
Every shot needs a driver. The driver is the character whose choice changes the beat. Other characters can react, block, assist, witness, or misread the moment, but they should not all compete for the same dramatic center.
Reactions are story actions. A silent glance, tightened grip, half-step backward, or refusal to look up can matter as much as speaking. Assign one reaction character when the scene needs emotional depth. Avoid giving every cast member a reaction in the same short shot.
Use framing as attention control. Foreground, center, sharp focus, light, and movement all tell the viewer where to look. If the driver is small in the back while a side character glows in the foreground, the prompt is lying about the beat.
Keep group shots simple. Three characters are already a lot for a short AI anime clip. Five characters usually need a wide establishing shot or separate close-ups. Do not force detailed acting from an entire cast in one 6-second prompt.
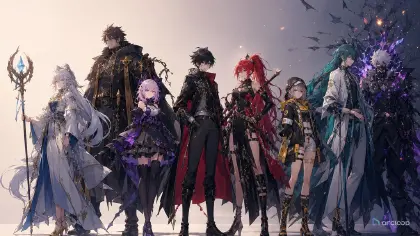
Give each character a distinct visual function. One carries vertical posture, one handles fast movement, one occupies stillness, one owns a prop, one controls comic interruption. Distinct functions are easier to read than five beautiful faces with similar poses.
Balance across the sequence, not inside every frame. A character can sit out a shot and still be important if the episode gives each core role a meaningful beat.
How to Build an Ensemble Planning Table
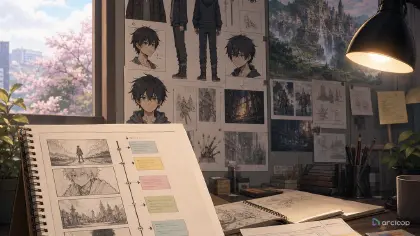
Start with a cast table. For each character, write identity anchors, story function, relationship to the driver, and one visual behavior. Keep it concrete: "Kessa hides fear by folding receipts into tiny squares" is more useful than "Kessa is anxious."
Choose the episode driver. Even in an ensemble story, one character usually owns the main change of a short. Mark the driver for each beat, not just for the whole episode. A scene can pass the driver role from one character to another if the handoff is visible.
Build an ensemble planning table. Use rows for beats and columns for driver, focus character, reaction character, background cast, camera size, and pass-fail rule. This prevents accidental crowding before the prompt is written.
Decide shot type by attention need. Use a close-up for private choice, a two-shot for conflict, a three-shot for triangle pressure, and a wide shot for status or location. If you cannot name why each person is in the frame, remove someone.
Write prompts with role labels. "Driver: Lune. Reaction: Kessa. Background: Orwin stays out of focus near the oven." Role labels make the prompt easier to inspect and revise. They also make it obvious when a character has no job.
Generate a few test shots for group beats. Review identity first, then focus hierarchy, then emotional readability. If the wrong character dominates, change framing, light, or movement. Do not add more dialogue or more facial description to everyone.
Keep your ensemble planning notes separate from the character assets in ArcLoop — build the cast once in My Assets, then reuse the same characters across future episodes, changing only who drives each scene.
Once the planning table is filled in, move its decisions into the product so they do not stay stuck in a side document. Build each cast member once in My Assets as a character asset, bind a Main image plus any Reference images you need, and repeat for every name in the cast — Lune, Maro, Kessa, Orwin, Vell, whoever your five leads are. Open the Story Outline and double-click the paragraph where the driver changes hands; write the handoff straight into that paragraph (it saves on its own) so anyone reading the outline later can see who leads each moment without opening your table. Open the Episode and click Generate Shots to split it into shot cards, then open one card at a time: reference only the characters who actually appear in that shot with @, skip the rest, and write just the action, camera, and light this shot adds. Generate the still first and check whether the driver reads clearly against the reaction and background cast before you generate video. Once the framing holds, batch the confirmed shots through the AI Chat Panel — "Generate videos for Shots 2, 3, and 4" — instead of opening each card by hand. In Edit, drop the finished takes into the timeline in beat order and swap out any shot where a background character still steals the frame.
Identity Goes in My Assets; Attention Goes in the Table
Ensemble balance is both a writing problem and a visual continuity problem. Build each character once as a character asset in ArcLoop, and its face, costume, and voice stay locked no matter which shot references it with @; who drives each moment is a call you make in your own planning notes and then write into the shot description. Keeping identity in the asset and attention in the shot description stops a background character from accidentally becoming the main character just because the generated image made them brighter.
Start in ArcLoop Worlds when the cast belongs to a recurring story: keep the roster in the world's story outline, build each member as a character asset, then lay out a per-episode planning table that says who drives each moment.
Use 2D Animation AI templates for shot structure, then overwrite the generic subject line with role-based staging. For example, a two-shot template becomes a driver-reaction shot when you define who moves, who watches, and where the audience should look first.
When reviewing, do not ask whether every character looks impressive. Ask whether the right character is readable. Then ask whether the reaction supports or distracts from the driver. If a side character looks great but steals the beat, save the design for another shot and revise the current frame.
Example 1: Midnight Bakery Crew Planning Table
Wide establishing shot of the midnight bakery interior. @Lune pushes through the back door, cold night air trailing in, and pauses to look at the cracked order tube in her hand. In the background, @Maro kneads dough near the warm oven light and @Kessa sits at the counter folding a receipt, both slightly out of focus. Camera: static wide shot, warm oven glow center-frame fading to cool blue near the door. Sound: the door hinge creaks once, then the low hum of the oven. Keep Lune the only character in sharp focus; everyone else stays background texture, no competing action.
This prompt creates the attention plan before generating scenes. It makes absence a valid choice.
Example 2: Driver-Reaction Group Shot
Medium two-shot at the bakery delivery counter: @Lune stands over the cracked order tube, breath held, then sets it down instead of hiding it again. Beside her, @Kessa stops folding a receipt and looks at the crack without a word, hands going still. Camera: static two-shot, Lune sharp in the left foreground, Kessa slightly behind the counter on the right, both hands visible. Light: warm oven glow with flour dust drifting through it. Keep Maro and the oven soft and blurred in the background; Orwin is not in this shot. No extra characters, no crowding, no text or logo.
The shot uses only the characters needed for the beat. The absent rival is not a problem; it keeps the confession readable.
Example 3: Controlled Ensemble Revision
Revise this bakery shot to fix one thing: @Maro in the background is too bright and pulls focus from @Lune setting the cracked order tube on the counter. Dim the oven glow around Maro and keep him softly blurred; raise the light on Lune's hands and the tube instead, so her action reads first. Leave @Kessa's stopped receipt-folding untouched, keep the same camera angle and duration, and do not bring Orwin or Vell into frame. Everything else — identity, layout, action — stays exactly as it was; change only where the light falls.
This revision fixes the real issue: attention hierarchy. It does not rewrite the story or rebuild the cast.
Ways Ensemble Shots Go Wrong
The biggest mistake is treating equal visibility as fairness. A story can respect every character while giving one of them the frame for a specific beat. Equal screen time inside every shot usually creates mush.
Another mistake is putting the full cast in the prompt because the cast exists. If a character has no action, reaction, or visual function in the beat, leave them out.
Creators also let background characters steal focus through light, motion, or scale. A side character can accidentally become the star if they are brighter, closer, or more active than the driver.
A fourth mistake is giving everyone the same emotional expression. Group scenes feel richer when one character avoids eye contact, one watches closely, and one misses the point. Distinct reactions create ensemble texture.
Finally, do not solve crowd confusion by adding more description to every person. Reduce the shot, split the beat, or assign clearer roles.
FAQ
How many characters should I put in one AI anime shot?
Use one or two for emotional beats, three for triangle pressure, and larger groups only for establishing shots or simple crowd energy. Detailed acting from five characters in a short clip is usually unstable.
How do I give every character a meaningful role?
Balance across the sequence. Give each core character at least one driver beat, one reaction beat, or one decisive visual function. They do not all need to appear at once.
What is the difference between a driver and a reaction character?
The driver makes the choice that changes the beat. The reaction character helps the audience understand the consequence. Both matter, but the camera should know which one leads.
How do I stop the ensemble cast from drifting?
Build each character once as a character asset, separate from the planning table that decides who drives, who reacts, and who stays out of frame each shot — so swapping who leads a scene never touches the identity anchors (face, costume, voice) referenced with @.
What should I revise when a group shot feels crowded?
Revise attention hierarchy first. Remove a character, soften the background, reduce motion, or move light toward the driver. Do not add more actions to a crowded frame.