Where It Usually Breaks Down
Most people making their first AI short drama drop the whole script straight into the generator and expect a finished episode to come out the other end. The lead looks fine in scene one, drifts into a different face by scene two, the blocking falls apart once more than one character is on screen, and the lines sound like they're being read off a page. The root cause is always the same: the characters were never built into assets first, the episode was never broken into individual shots, and the voice was never bound to the character. Prompts just get longer and messier, and the only fix left is rerolling generations over and over until something barely usable shows up.
The problem isn't that the script isn't dramatic enough — it's that the script never gets turned into characters, shots, voiceover, and a monetization check before generation starts. The easier path is to open your ArcLoop workspace first, use the AI short drama guide to find a shot structure, and lock the leads down with the My Assets guide — so the opening hook, episode-to-episode continuity, and character IP reuse are all planned for from the start.
How This Actually Works
A script is a piece of narrative text, not a video production spec. It tells you what happens, but it doesn't reliably specify the shot size, character turnaround, Main image, My Assets, blocking, voice, edit pacing, or cover hook for each shot. Feed a script straight into video generation and the system fills in those gaps itself — and the more it has to fill in, the more likely characters are to drift from shot to shot.
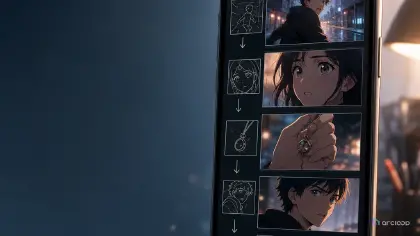
It helps to separate the terms for character consistency. A character asset is the minimum identity spec — role, appearance anchors, and a do-not-change list. A character turnaround covers front, side, and back proportions and costume. An extended turnaround adds a three-quarter or key rear angle, useful for turns, glances back, and multi-character shots. A character reference sheet usually lays the Main image, turnaround, expressions, costume, and props out on one page for review. A My Assets is the next level up — a project-wide record that keeps visuals, voice, blocking, and reference rules in one place long-term. The progression is: start with a character asset, add a turnaround or extended turnaround, assemble a reference sheet, then fold it into the My Assets.
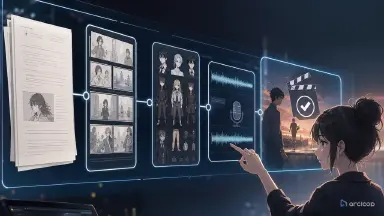
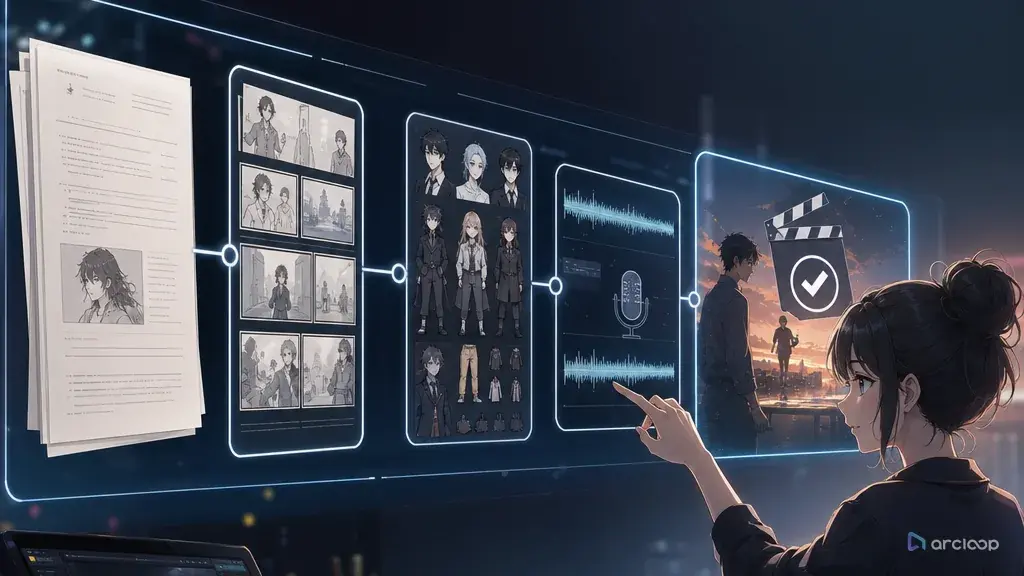
A stable script-to-video pipeline splits the script into three layers first. The narrative layer covers character goals, conflict, twists, and each episode's ending. The production layer covers the storyboard, shot list, My Assets, scenes, lighting, and voiceover. The monetization layer covers audience, headline angle, posting frequency, cost ceiling, reusable assets, and the conversion action. Any real AI short drama workflow needs to cover all three layers, because what creators actually care about is whether they can keep producing episodes — not whether they can generate one sample clip.
ArcLoop fits in the middle of the production layer: use the AI short drama guide to find a comparable template, use the storyboard template to break the script into scene-by-scene shots, then build the characters into assets and bind reference images and voice through the My Assets guide. In your ArcLoop workspace, reference that asset in every shot with @CharacterName, so the voice and the face don't change from one episode to the next.
Here's the click-by-click version. Open your ArcLoop workspace, go to My Assets, and add a new character for your lead. Bind her key art as the Main image, then bind two or three more shots of her, different angle, different outfit, as Reference images. Do the same for any character or prop that shows up more than once across episodes. Once that's done, you stop re-describing her face in every prompt: each shot just references her with @CharacterName, and the model pulls her look from the bound images instead of guessing at it.
Step-by-Step
Step 1: Pin down the concept. Don't start with something broad like "a wealthy family revenge story." Write an executable concept instead: target audience, main conflict, opening hook, episode length, and monetization goal. For example: "Vertical AI short drama — the lead discovers a rigged contract, the first three seconds show the evidence twist, goal is testing whether the series holds viewers episode to episode."
Step 2: Break the script into scenes. Each scene should carry exactly one action goal: discovery, misunderstanding, confrontation, retaliation, or reveal. The clearer the action goal, the easier the scene is to storyboard. Skip long interior monologues at this stage — video generation can't process them.
Step 3: Build the My Assets. Think of it as a callable identity record for the system: lock down appearance, color palette, signature props, voice, and a do-not-change list up front, so every later shot pulls from that record instead of reinventing the character. At minimum, include the lead's Main image, character turnaround, expression set, costume rules, and do-not-change list. Make the do-not-change list strict — hairstyle, face shape, eyes, jacket silhouette, and key props shouldn't move. That's what saves you from endless rerolling and from the character looking like a different actor in every frame.
Step 4: Break each scene into a shot list. For every shot, write down the shot size, action, line, emotion, duration, blocking, and lighting. Short-form video has a real 15-second rule: if the conflict isn't clear within 15 seconds, viewers drop off; without a second pressure point by the 30-second mark, completion rates fall. Don't force anything past 30 seconds into one long take — break it into 3-to-7-second shots and stitch them together in roughly 15-second beats: opening hook, relationship development, evidence twist, and the moment that pulls viewers into the next episode. Keep the character asset reference and the cut points in every beat.
Step 5: Generate video shot by shot. Don't generate a whole episode in one pass — generate by shot. Each clip should carry exactly one job: a reaction, a turn, handing over evidence, a confrontation. Use the AI short drama guide to save shot structures you can reuse.
Step 6: Handle voiceover and editing. Multi-character voiceover needs a voice profile for each character — noting perceived age, pace, emotional range, and rules for staying consistent across episodes. When editing, prioritize information density over visual polish. Finish with a monetization check: does the title deliver on the concept, does the cover image show the conflict, does the series make it easy to keep watching, and does the budget support the next batch?
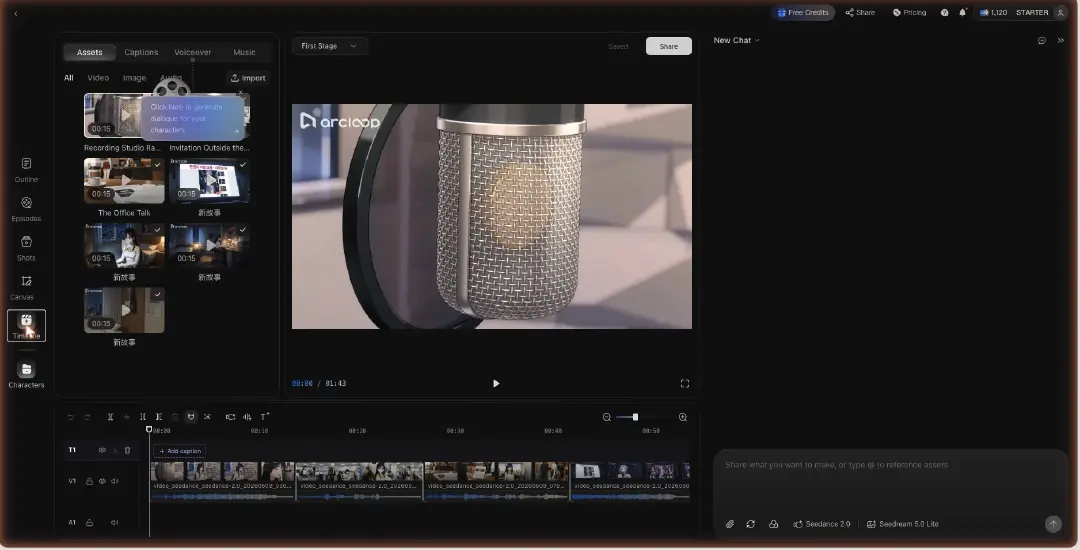
When you're ready to shoot, open the episode and click Generate Shots, it splits your scene into shot cards automatically. Open a card and edit the description to add only what that shot needs on top of the asset: the action, the camera move, the light. Reference the characters and props you already built with @, and generate an image first to confirm framing and face before you spend a video generation on it. Once several cards are ready, stop clicking through them one at a time, open the AI Chat Panel and type something like "Generate videos for Shots 1, 2, and 3." Pull the finished clips into Edit to arrange them against your 15-second beats and swap out any shot that still needs a redo.
How to Take a Script Through ArcLoop, Screen by Screen
You have a script. Here is exactly where it goes and what you touch on each screen.
1. Paste the script as the project input. Open ArcLoop, start a new project, and paste the script — or the scene you want to shoot first — into the input box. The Agent reads it as the source for the outline, the cast, and the first episode; you will edit all three, so the paste does not have to be clean.
2. Set Story Settings to match the script's delivery. Open Story Settings from the model chips under the chat box: ratio (9:16 for a short drama feed), the video and image models, and their resolutions. The visual direction stays in the outline, where you can edit it. Set it once; the Agent builds against these settings.
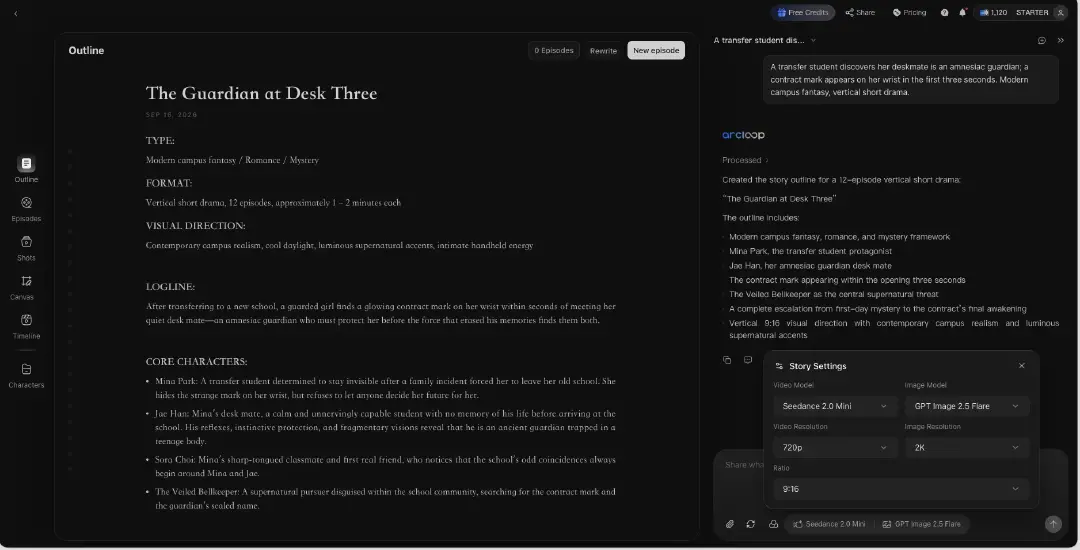
3. Check the Story Outline against the script. The outline should mirror your scene order and stakes. Where the Agent smoothed a beat you need sharp, double-click and put the line back, or ask in the chat panel: "Keep the contract reveal in scene 2, before the argument."
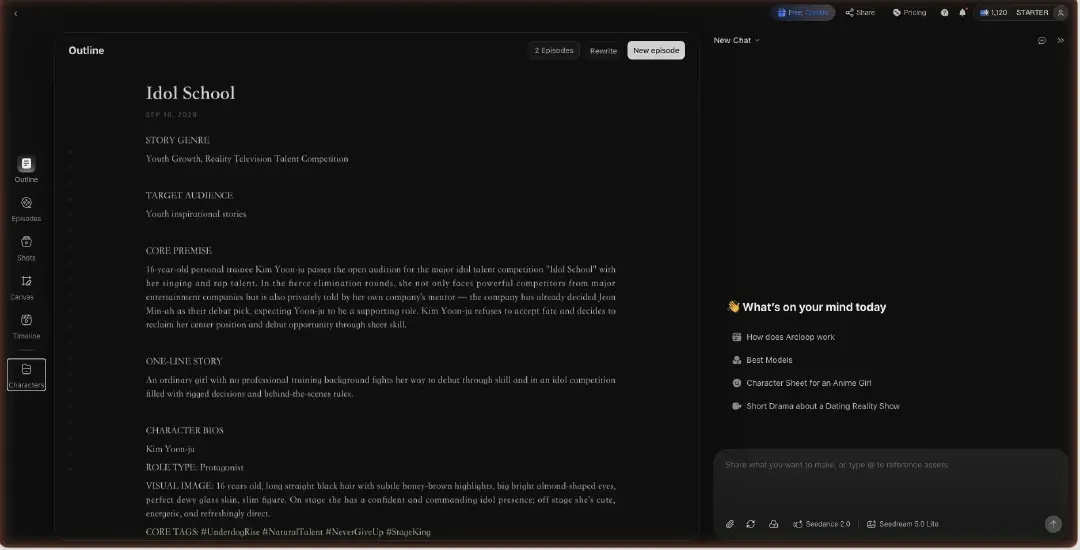
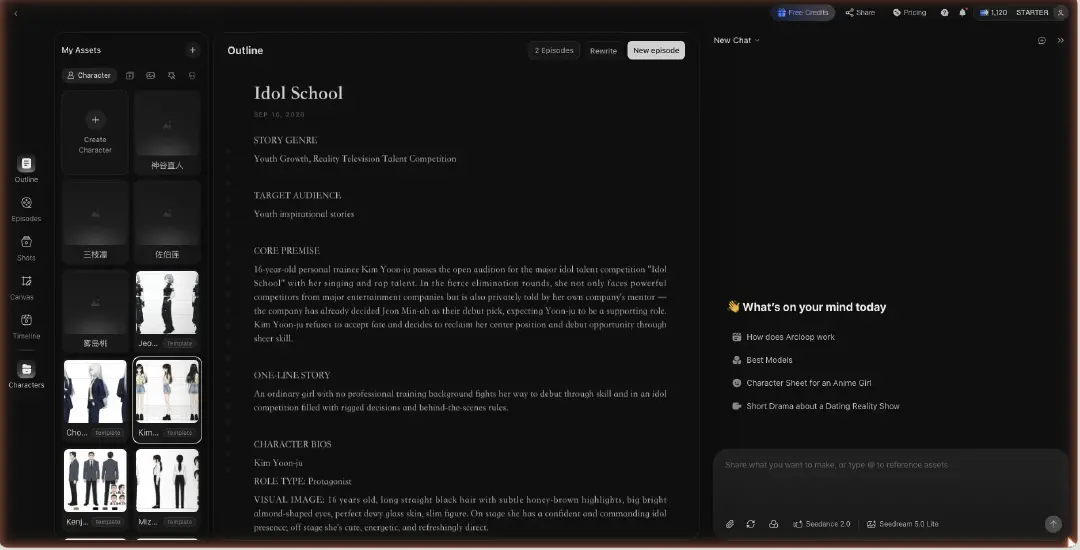
4. Turn the cast list into character assets. Every named character in the script becomes an asset in My Assets with a Main image and, where the script changes their look, extra Reference images bound to the same asset. This is what lets you write @Lin Zhixia in a shot instead of her face.
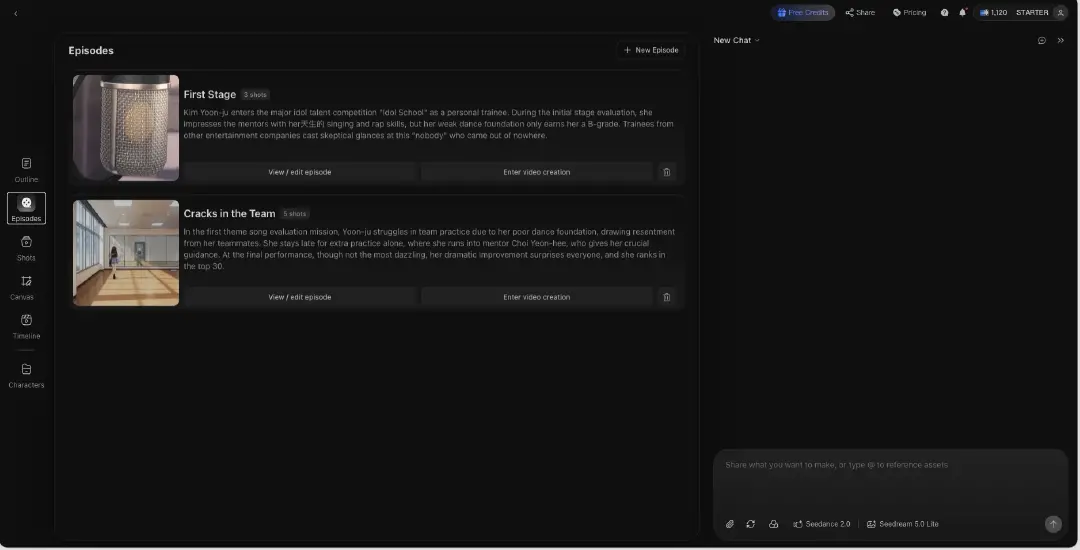
5. Generate Shots per scene and edit the cards. Each script scene is an Episode or part of one. Click Generate Shots, then walk the cards: one action per shot, the script line attached, blocking written, @ references for who is in frame. This is the per-scene shot list from Example 1, living in the product.
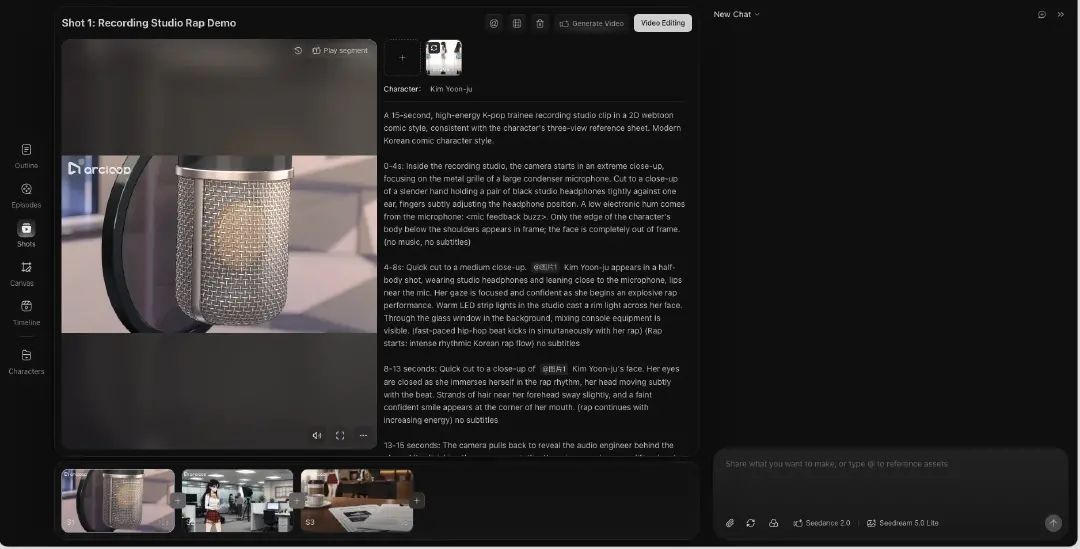
6. Review the batch, then cut in Edit. Generate stills, run the Example 3 batch review, regenerate only the cards that failed, then generate video. In Edit, arrange the clips in script order, trim to the lines, run Generate Voiceover, add BGM, and export.
Copy-Paste Prompts and Specs
Example 1: Script to Scene-by-Scene Shot List
Break the following short drama script into a scene-by-scene shot list for ArcLoop. For every shot, list: scene, shot number, duration, shot size, blocking, action, line, emotion, lighting, and which character or prop assets it needs. Follow concept -> script -> storyboard -> shots -> voiceover -> edit. Each shot carries exactly one action goal, and the first 3 seconds land a hook. Before generating, confirm the lead and any recurring characters already exist as character assets in My Assets with a bound Main image, then write every shot's action line using @CharacterName instead of re-describing their face or costume. Flag this episode's selling point, a candidate cover frame, and the beat that pulls viewers into episode two.

Example 2: Single-Shot Video Generation Spec
@Lin Zhixia stops just outside the meeting room, turns back toward camera, and holds the contract up so the text is readable. She's in the right foreground; the supporting male lead stays soft-focus in the left background, both framed from the waist up. Line delivery: low voice, but firm, she's not asking, she's confirming. Camera: medium shot on the turn, then a slow push-in that lands on the contract. Lighting: cool white office light, no flicker. Vertical, 7 seconds. Keep it to this one beat, the stop-turn-reveal, don't add a second action or a new character into the frame.

Example 3: Batch Production Review Checklist
Review these 12 generated shots as a batch before moving to Edit. For each shot, check: does the character stay visually consistent with the @CharacterName reference used in its description (face, costume, no drift), is blocking coherent whenever more than one character is in frame, do the lines sound like real speech rather than a script read-aloud, is lighting consistent shot to shot, does each cut point advance the conflict, is there a hook in the first 3 seconds, and does the ending earn a reason to watch the next episode. Sort each shot into pass, full regeneration, or fixable in Edit, naming the one change needed. Flag whether this episode is better suited to driving traffic, carrying viewers into episode two, or building character IP.

Common Mistakes and Fixes
The first mistake is treating the script as the prompt. The fix is to break it into a shot list first, then generate shot by shot. The script owns the story; the shot list owns production.
The second mistake is a thin My Assets. One pretty image isn't enough — you need a Main image, character turnaround, expression set, and do-not-change list. Otherwise the system reads "the same character" as just "the same style," and every character starts to look interchangeable.
The third mistake is leaving voiceover for last. Short drama conflict runs on dialogue, so emotion and pacing for the voice should be marked at the storyboard stage. This matters even more for multi-character dialogue — voice profiles should be kept alongside the My Assets for the long term.
The fourth mistake is chasing visual polish for its own sake. The goal of an AI short drama isn't a pretty animated clip — it's making the conflict clear enough that viewers want the next episode. When editing, cut the slow shots before you cut the information that sells the twist.
The fifth mistake is skipping a cost line. Rebuilding characters, scenes, and voice from scratch every episode blows the budget. Before monetizing, work out the shot count per episode, expected regeneration count, voiceover passes, and editing hours.
FAQ
Can you skip storyboarding entirely and turn a script straight into an AI short drama?
Not recommended. The real time savings don't come from skipping the storyboard — they come from making the storyboard reusable. Without one, video generation decides blocking and pacing on its own, and it's much harder to fix afterward.
Can AI short drama and AI anime drama use the same workflow?
The underlying workflow is the same: concept → script → storyboard → video → voiceover → editing. The difference is that AI anime drama leans more on character turnarounds, a consistent art style, and the My Assets, while live-action-style AI short drama leans more on performance pacing, vertical composition, and dialogue that sounds real.
When should you start thinking about monetization?
From the concept stage. Monetization isn't something you bolt on with ads at the end — it's a production constraint that shapes the genre, episode length, ending hook, asset reuse rate, and the cost of producing episodes at scale.