Why good clips refuse to connect
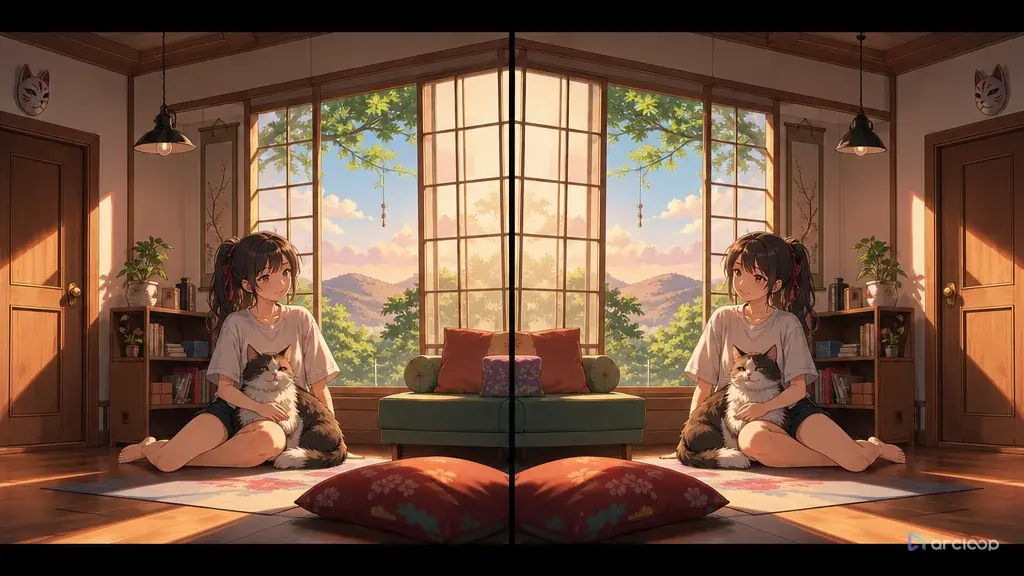
Camera continuity errors show up when two individually good AI video clips refuse to connect. In shot one, the character runs screen right. In shot two, they enter from the wrong side. A cup sits on the left side of the table, then jumps behind the character. A close-up implies the hero is facing a door, but the next wide shot puts the door across the room. Nothing is visibly "broken" in a single clip, yet the sequence feels disorienting.
The fix is to stop treating each prompt as an isolated image. Camera continuity is a relationship between shots: screen direction, axis, lens distance, anchor objects, entrances, exits, and final frame. For AI anime shorts, those relationships need to be written into the storyboard and reused in the shot card. If the camera invents a new geography every generation, the editor has no stable cut.
This guide explains how to fix camera continuity errors inside ArcLoop. Use Three-Shot Continuity Board when you need connected panels before generating video, and use ArcLoop Worlds when a recurring location needs stable layout across multiple scenes.
Rules that hold shots together
Set the screen direction early. If a character travels left to right in the first shot, decide whether that direction represents forward progress. Repeat it unless the story deliberately turns the character around.
Keep the action axis visible. In a dialogue, chase, duel, or handoff, imagine a line connecting the important subjects. Crossing that line without a transition can flip left and right, making the viewer feel that positions changed.
Use anchor objects. A red vending machine, cracked pillar, blue sofa, door arch, table lamp, or window grid can tell the viewer where the camera moved. Repeat the anchor in adjacent shots when geography matters.
Match lens distance with intent. A wide shot establishes space, a medium shot carries action, and a close-up carries emotion or detail. Jumping from wide to extreme close-up is fine if the insert object is clear; random shot size changes feel like missing footage.
Protect entrances and exits. If the character exits frame right, the next shot should usually let them enter from frame left or continue screen right, depending on the layout. Name that in the prompt.
Review the last frame. AI clips can begin well and end in a different camera relationship. The final frame often decides whether the next cut works, so specify the final pose, object position, and screen direction.
How to repair continuity errors step by step
Start by making a tiny continuity map. Write the location, action axis, screen direction, key anchor, and where the character starts and ends. This can be one paragraph, not a full production bible.
Break the sequence into shots. Give each shot a purpose: establish, follow, insert, reaction, reveal, or exit. If two shots have the same purpose, consider deleting one. Shorter sequences are easier to keep coherent.
Write camera notes in relative terms. "Door stays on frame right," "Rami moves left to right," "anchor statue remains behind the counter," or "camera stays on the hallway side of the table" is more useful than a vague "cinematic angle."
Use a storyboard board before video. Generate or sketch a three-shot continuity board in ArcLoop, then approve the layout before final motion. Fixing screen direction at the panel stage is cheaper than repairing three finished clips.
Run a draft and compare edges. Look at the first and last frame of each clip: character position, gaze direction, anchor object, camera side, and motion direction. If those match, polish can wait. If not, repair the camera relationship only.
For broader prompt basics, see How to Write 2D Anime Animation Prompts. For storyboards, start from 2D Animation AI Templates and pick a continuity-first template instead of a single-shot template.
How ArcLoop locks continuity into the workflow
ArcLoop helps because continuity is easiest to control before generation, not after. Build the recurring location once as a Scene asset in My Assets so its layout and anchor points are locked, then reference it with @ in every shot instead of re-describing it. Screen direction and camera distance go directly into the shot description, and Canvas lets you compare the new draft against the approved shot before final render.
When a continuity error appears, keep the approved assets still. If the face and background style work but shot two crosses the axis, the repair is not a new character prompt. It is a camera-side correction: keep the hallway side, keep the anchor on frame right, keep the character moving left to right, and end on the same doorway.
Use ArcLoop Worlds to build recurring spaces like bedrooms, cafes, classrooms, studios, and fantasy guild halls as Scene assets in My Assets. A stable scene asset gives every future shot the same layout vocabulary, which keeps edits from feeling accidental.
Example 1: Bookshop Handoff Continuity Board
Create a three-panel 2D anime continuity storyboard for a quiet bookshop handoff. Character A: Rami, an original delivery student with short maroon hair, tan satchel, cream hoodie, and green sneakers. Character B: Iven, an original bookshop clerk with silver glasses, black apron, and rolled white sleeves. Location anchor: a tall red rolling ladder beside the rare-books shelf. Continuity rule: keep the service counter on frame right and the red ladder in the background of all panels; keep Rami moving left to right. Panel 1 wide shot: Rami enters from frame left toward the counter. Panel 2 medium shot: Rami places a sealed blue book on the counter, Iven faces him from frame right. Panel 3 insert: Iven's hand turns the blue book so the seal faces camera, red ladder still visible behind. Clean 2D anime storyboard style, readable layout, no text labels, no random extra customers, no flipped counter.
This prompt builds the relationship before generating motion. The red ladder and counter keep the geography stable.
Example 2: Alley Chase Screen Direction Repair
Camera continuity repair for shot 2 of a 3-shot alley chase featuring @Tola. Previous approved shot: Tola ran left to right past a teal noodle stand. Repair target: shot 2 must continue the same screen direction and stay on the same side of the alley. Medium tracking shot, 6 seconds. Tola enters from frame left, vaults over a low pipe, and exits frame right. The teal noodle stand stays behind her on the far side of the alley for the first two seconds, then falls behind. Camera stays parallel to the alley, no axis crossing, no sudden front view. Keep scarf trailing backward, message case on her left hip, forward motion clear. No camera spin, no reversed running direction, no extra pursuer reveal, no blurred exit frame.
This repair focuses only on continuity. It does not redesign the chase.
Example 3: Tea Table Dialogue Axis
Create a 7-second 2D anime dialogue shot that preserves the established table axis. Scene: a moon-viewing tea room with a round black table, a low gold lamp, and paper doors opening to a garden. Character on left: Suki, an original shrine accountant with straight gray hair, violet cardigan, and abacus bracelet. Character on right: Harun, an original festival planner with sandy blond hair, red vest, and folded fan. Continuity rule: Suki remains frame left facing right; Harun remains frame right facing left; camera stays on the garden side of the table. Shot purpose: reaction close-medium on Suki while Harun's shoulder stays as a soft foreground shape on frame right. Suki glances from the gold lamp to Harun, then closes the abacus bracelet with one hand. Preserve table position, lamp center, eyelines, and left-right roles. No flipped seating, no overhead angle, no random cup movement, no new background wall.
Dialogue continuity depends on eyelines as much as camera beauty. This prompt states the axis and the roles directly.
The most common continuity mistakes
The most common mistake is writing each shot from scratch. If every prompt reintroduces the room with new angles and new props, the sequence will drift even when each clip looks polished.
Another mistake is ignoring exits. A character who leaves frame right and appears from frame right in the next shot may seem to have reversed direction unless the layout explains it.
Creators also use "dynamic camera" too broadly. Dynamic movement can hide bad geography for one clip and make the next cut worse. Use a stable camera when the viewer needs to understand space.
Do not rely on style words to fix continuity. "Cinematic anime" does not tell the camera which side of the table it occupies or where the door sits.
Finally, avoid repairing continuity by changing the approved performance. If the acting works, keep it. Fix the camera side, anchor object, screen direction, or final frame.
FAQ
What is the fastest way to diagnose a camera continuity error?
Compare the last frame of shot one with the first frame of shot two. Check screen direction, eyeline, anchor object, character side, and camera distance. The mismatch is usually visible there.
Should every shot keep the same camera angle?
No. Variation is useful. Continuity means the angle changes with clear geography, not that the camera never moves. Establish the space, keep anchor objects, and preserve left-right relationships when they matter.
How do I stop AI video from crossing the line?
Write the action axis into the shot card: which side the camera stays on, which direction the character moves, and where the key anchor remains in frame. Use a continuity storyboard before final video.
How do I build connected shots instead of isolated clips?
Build the recurring characters and locations as assets in My Assets, then reference them with @ in every shot description. Because identity and layout live in the asset instead of being retyped, camera continuity gets planned into the storyboard before you ever render a final clip, instead of being patched shot by shot afterward.