Introduction
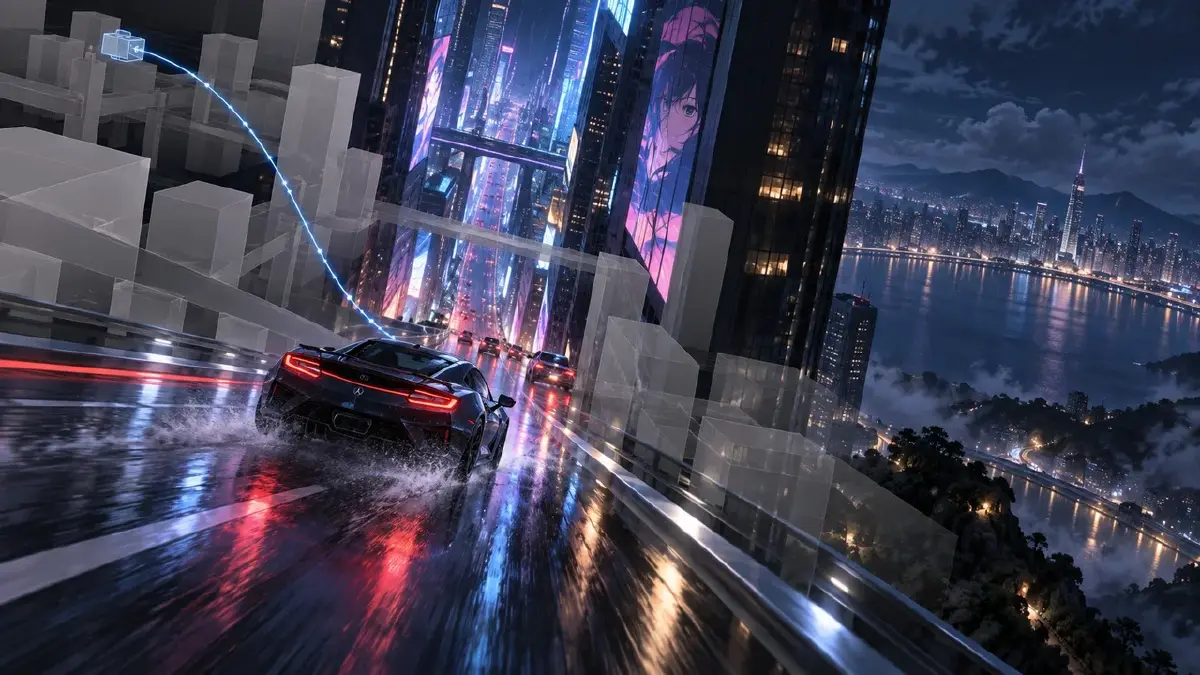
You know the shot. Open high above the road so the layout reads, dive between the towers, pick up the car as it drops in, hold a clean side view for a beat, then pull back until the whole city is in frame. You write all of that into a prompt, and the model gives you a car driving the other way, or a camera that never leaves the ground, or four beautiful clips that do not belong to the same move.
The problem is not the model. Camera moves and character routes are spatial information, and prose is a bad container for spatial information. A grey-box 3D previz — blank models, a rough set, one camera — is a much better container. This guide shows how to build a previz that only answers three questions, how to export one still per camera position, and how to turn each still into an ArcLoop shot so the sequence connects. If you have been asking how to keep the camera under control across a fast multi-shot move, this is the workflow.
What a previz is for, and what it is not for
A previz answers three questions and nothing else:
- Where is the camera, and where does it go next?
- Where does each character start, and which way do they move?
- What is in front of what? Foreground pillar, character, background building — in that order.
It does not answer what anything looks like. The set can be a photo-based blockout. The characters can be capsules. Nobody will see the previz; its whole job is to lock the skeleton so the generation only has to fill in skin.
This changes how you review. When the AI clip comes back, you compare it against the previz, not against a style reference. Same camera direction, same left-to-right route, same foreground-background order — pass. The lighting and the texture can be anything the model wants.
If you are coming from a 3D background, the 3D-to-anime pipeline guide covers what else transfers. This article stays on one thing: the camera path.
Rules for a previz that the model can follow
- One shot, one camera move. A previz with a tracking move that turns into a crane that turns into a pull-back is three shots. Cut it there.
- Put the camera where a real camera could be. Models have learned real cinematography. A camera that clips through a wall or floats through a character produces clips that do the same.
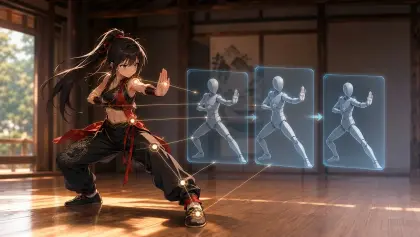
- Mark the route, not the performance. A capsule sliding along a path is enough. Acting comes from the shot description, not from the previz.
- Keep scale honest. If the character is two heads tall next to a door, the generated character will be too.
- Export at the aspect ratio of the project. A 16:9 previz still will not frame a 9:16 shot. Set your Story Brief to the delivery ratio and match the previz camera to it.
How to build the previz and hand it to ArcLoop, step by step
- Block the set from a reference photo. Rough shapes are enough: road, two building masses, a pillar in the foreground. If a location asset already exists in My Assets, use its Main image as the reference so the previz and the final share a layout.
- Place the characters and draw their routes. One path per character. Note where they stop.
- Set the camera positions. For a moving shot, record the start and end frame. For a multi-camera scene, place each camera and number it in the order it appears.
- Play it once and fix the obvious. If the camera loses the character behind a wall, move the wall. Do not polish anything else.
- Export one still per camera position. Start frame and end frame for each shot. Upload the stills to Library; upload the previz clip too so the team can play the intended move.
- Bind the stills as a Visual reference asset named after the scene, so composition is something the Agent can reuse and not a note in a chat.
- Generate Shots on the episode, then edit each shot card. Attach the matching previz still, reference the characters and the location with
@, and write only the camera and the action for that shot. Do not describe faces or outfits; the assets carry that. - Generate the image first, check it against the previz still, then generate the video. If the framing is right in the still, the video usually keeps it. If it is wrong, fix the shot card before spending credits on motion.
Where the camera path lives in the shot card
Camera information belongs in the shot description itself, in plain camera language, in the order the move happens: where the camera starts, what it does, where it ends, and what stays in frame. Put the previz still in the reference slot, not in the text. The text should read like a shot list line, not like a screenplay paragraph.
For the vocabulary — push, pull, pan, track, tilt, crane — see the camera language guide. For scenes with two or three characters, the multi-character blocking guide covers sightlines and who owns which line.
Example 1: Single runner, tracking camera
The simplest case: one character runs up a mountain path, passes a stone pillar, and stops at a statue on the ridge. In the previz that is one route and one camera tracking behind. Split it into a tracking shot and an arrival shot so each has one clear action.
Shot 1 — Tracking shot, camera behind and slightly left of @Kaito, following at running pace along the mountain path. @Kaito runs uphill without slowing, passes the stone pillar on the right so it crosses the foreground for a few frames, and keeps going. Background: the ridge and the statue growing larger with every stride. Camera stays at shoulder height, no tilt, no push-in. Late afternoon light from the left. Composition: match previz still 01A.
Shot 2 — Camera continues the same track from Shot 1, then slows and tilts up as @Kaito reaches the ridge and stops in front of @Guardian Statue. He drops from a run to a standing breath, hands on his knees, chest rising. The statue fills the upper right of frame; the valley opens wide behind him as the camera settles. Same light direction as Shot 1. Composition: match previz still 01B.
Example 2: Two characters, three cameras
A street conversation in an open-world style: the camera lives behind the protagonist, so a single fixed position clips through walls. The previz uses three cameras: behind A as he walks up, a reverse from B's side, and a third as B walks away. Three cameras, three shots.
Shot 3 — Over-the-shoulder, camera behind @Ren at head height, tracking at walking pace as he walks up to @Vendor Marcus at the food cart. @Ren slows and stops two steps away. Marcus looks up from the grill and turns to face him. Foreground: Ren's shoulder on the left edge; midground: Marcus and the cart; background: the street and passing traffic. Camera stops when Ren stops. Match previz camera 1.
Shot 4 — Reverse angle from behind @Vendor Marcus, camera at chest height, static, same distance as Shot 3 so the cut feels like a real conversation. @Ren is now facing camera, talking, one hand gesturing toward the cart, the other in his jacket pocket. Marcus's shoulder frames the left edge and stays out of focus. The street behind Ren matches the background of Shot 3. Match previz camera 2.
Example 3: A fast car, four camera positions
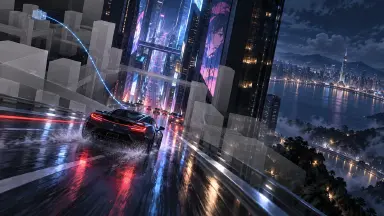
Speed is where prompts fail most. The previz sets four positions: high angle over the road, a dive between the towers, a side view of the car, a pull-back to a wide. Each is its own shot; the model only has to execute one move at a time.
Shot 5 — High-angle establishing shot over @Neon Expressway at night, camera slowly descending toward the road, no pan. @Vela's car enters from the bottom of frame, small, headlights on, and drives away from camera up the center lane. The road layout must read clearly: two lanes, towers on both sides, a gap between the two tallest towers ahead. Rain-wet asphalt reflecting signs. Match previz camera 1.
Shot 6 — Camera flies forward between the two towers at car height, tracking alongside @Vela's car in a clean side profile, left to right. Neon reflections streak across the door and the windows. The car stays centered in frame and does not change direction or lane. The towers pass as vertical streaks in the background. End on the car pulling slightly ahead of camera. Match previz camera 3.
The most common ways this breaks
- The camera reverses. The previz tracks left to right; the clip tracks right to left. Reject it. Check that the shot card states the direction in words, not only in the reference still.
- The character crosses to the wrong side. Usually the route was not in the text. Add "passes the pillar on the right."
- Two moves in one shot. If the model has to dive and then pull back, one of the two will go missing. Split the shot.
- The previz still gets copied, texture and all. A grey-box still can pull the generation toward grey. Keep the style locked by a style reference and the location's Main image; the previz still is a composition reference, not a look reference.
- Scale drifts. A capsule that was too tall in the previz becomes a giant in the clip. Fix scale in the previz, not in the prompt.
FAQ
Do I need a full 3D scene? No. A photo-based blockout with a few boxes is enough. The previz only has to show where the camera and the characters are.
Can I skip the stills and just describe the previz in words? You can, and it works for simple shots. For anything with a fast camera or two characters crossing, the still is what keeps the framing honest.
Does the previz clip itself go into the shot?
Upload it to Library so the team can watch the intended move. The shot card uses the stills for composition, the @ assets for identity, and the text for the camera path.
What if the model ignores the previz still? Check the text first. If the camera move is only in the image, spell it out: start position, move, end position. Then regenerate the image before the video.
Next step
Take one shot you have been re-rolling — the one where the camera never does what you asked — and previz just that shot. Export the start and end frame, bind them as a Visual reference, and rebuild the shot card with @ assets and the camera move written in order. Open the project in ArcLoop, generate the still, and compare it to the previz frame before you touch video.