Three characters in frame — and the scene falls apart
Single-character close-ups usually hold up fine. Group dialogue is where things fall apart. In one shot, Lin Zhixia is standing at the right front of the table; in the next, she's suddenly on the left. Zhou Heng is supposed to be silent, but his mouth keeps moving. Chen is looming over both of them from the doorway — then the reverse angle cuts and he's a stranger sitting at the table instead. On top of that, the contract, the voice recorder, and the phone on the table keep drifting to different spots, so the edit never quite connects.
No amount of "stay consistent" in your prompt fixes this. Multi-character scenes in AI short drama need the space locked first, then the characters, then who's speaking. Blocking, sightlines, lines, lip sync, the subtitle-safe zone, and a fallback edit plan all have to sit in the same production path before you generate anything. Otherwise you're stuck re-rolling generations, cutting whatever half-works, and watching the continuity errors pile up the more you edit.
In ArcLoop, the approach is more direct: use the AI short drama guide to break down multi-character shot structure, and the character asset guide to build a character asset for each person — face, outfit, and character voice locked separately, then referenced one by one with @CharacterName in the shot description. From there, open your project in the creative workspace and work these shots into Storyboard shot cards one at a time. Only the things that change from shot to shot — blocking, sightlines — go in the shot description; you never have to re-describe what anyone looks like. Multi-character dialogue doesn't need everyone in frame every second, either. As long as the space and the sightlines stay continuous, a solo reaction shot, an evidence close-up, or a two-shot can still convince the audience everyone's in the same scene.
This piece covers the practical version: draw a scene staging diagram first, break it into 15- and 30-second shot lists, review lip sync and editing, and fix broken shots with the smallest possible rework.
Space, identity, and voice: the threads holding a multi-character scene together
The first thread is space. In a multi-character scene, character positions, furniture placement, prop placement, camera angle, and sightlines are what let the audience read the relationships. The lead standing front-right reads as pressing someone for answers; the other lead seated back-left reads as pinned down; the antagonist blocking the doorway reads as cutting off the exit. The moment a position jumps, the tension in the scene evaporates.
The second thread is identity. Group shots are exactly where faces get swapped, borrowed, or subtly recast. Writing "lead, love interest, antagonist" isn't enough — tie each one to a character code in your My Assets. For example: ZH-001, Lin Zhixia — short black hair, cream-colored suit, silver stud earrings. ZH-002, Zhou Heng — dark gray shirt, thin-framed glasses, a ring mark on his left hand. ZH-003, Chen — black overcoat, square jaw, gold cufflinks. Everyone in frame needs an anchor distinct enough to tell them apart at a glance.
The third thread is voice. Lip sync isn't something you patch on with audio at the end — it gets decided at the storyboard stage: who says which line, who's listening, who interrupts, who stays silent. A multi-character shot works best with one primary speaker and everyone else reacting. Two characters delivering long lines at the same time is just asking for lip-sync trouble.
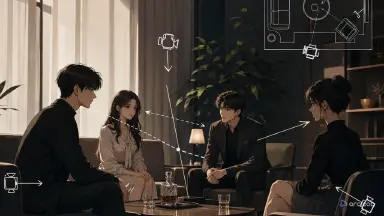
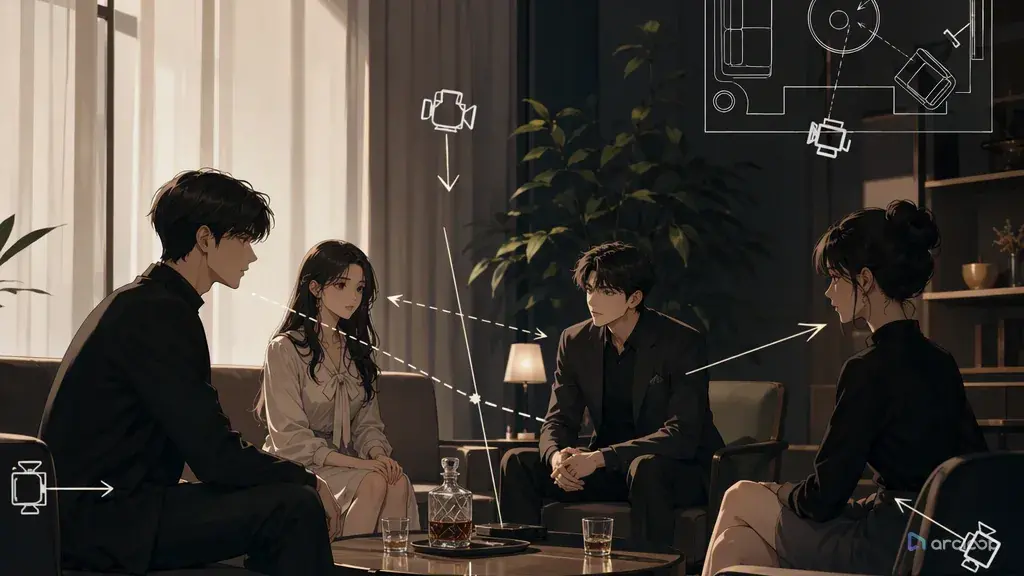
A scene staging diagram doesn't need to look good. Think of it as a top-down floor plan of the set: where the door is, where the window is, which way the table faces, who's in the foreground, who's in the background, where the key props sit, which character each camera position (A/B/C/D) covers, and which line you can't cross. As long as the diagram is clear, every shot after it can reference it instead of re-describing the office in every prompt.
The most immediate payoff of drawing the diagram first is keeping left-right relationships from scrambling. In a two-person scene, if A looks left and B also looks left, the audience reads it as two people not actually talking to each other. It's even more obvious with three: who's pressuring whom, who's avoiding whom, who's holding the evidence — all of it depends on the spatial relationships staying intact. A staging diagram fixes which side of the table each camera sits on ahead of time, so the reverse angle doesn't cross the line either.
It also keeps furniture and props from drifting. Short dramas lean hard on evidence props — a contract, a room key, a voice recorder, a phone, a pill bottle, a paternity test. The moment a prop slides from the center of the table to a corner, or disappears in the next shot, the story breaks. A staging diagram keeps props anchored as part of the scene, and the shot list references the same position every time.
The third payoff is fewer wasted generations. Without a spatial spec, you're gambling on how characters, furniture, props, and camera angles happen to line up. It feels like you're tuning the prompt, but you're really just betting this particular take won't fall apart. Drawing the staging diagram first looks like an extra step, but it turns failure from random into reviewable.
The fourth payoff is that it supports longer sequences. A conflict under 15 seconds can hold up on three or four shots. Past 30 seconds, you need to keep returning to a spatial anchor so the audience still reads everyone as being in the same room. Without a staging diagram, longer cuts start to feel like a pile of disconnected clips.
How to build a scene staging diagram
Step one: define the space in one sentence. For example: a law firm conference room at night, a long table across the middle of the frame, the door back-left, floor-to-ceiling windows back-right, cool white overhead light, a contract and a voice recorder on the table. Keep the space simple — don't open with a mansion, a staircase, a balcony, and full blocking for six people all at once.
Step two: lock the furniture. Table, chairs, door, window, sofa, screen, cabinet — nail down the big objects first. Furniture is the skeleton of the space and the reference point for every camera change. Don't regenerate the room from scratch for each shot.
Step three: lock the key props. The contract sits on the table on the lead's side, the voice recorder is center-table, the phone is by the other lead's right hand, the water glass sits outside the antagonist's path through the door. Prop placement should serve the story, not just fill up the table.
Step four: place the characters. Reference each one by code and character asset, not just by role. ZH-001, Lin Zhixia, stands front-right. ZH-002, Zhou Heng, sits back-left. ZH-003, Chen, stands mid-ground at the door. Mark foreground/mid-ground/background, left/center/right, facing direction, and sightline for each.
Step five: set the camera positions. Camera A covers the lead's close-up, camera B covers the other lead's reaction, camera C covers the three-way relationship shot, camera D covers the evidence on the table. Write down each camera's shooting direction and the line it can't cross. Crossing the axis flips the left-right relationship, and it's one of the most common continuity errors in multi-character scenes.
Step six: assign who's talking. Every shot gets exactly one primary speaker; everyone else listens, looks down, clenches a fist, avoids eye contact, handles a prop, or stays silent. Spelling out lip-sync ownership up front is far more reliable than trying to force-match audio afterward.
Step seven: feed it into the shot list. Later prompts don't need to re-describe the whole conference room — just write "follow staging diagram S-01, camera A, ZH-001 speaking, ZH-002 reacting as listener, contract position unchanged." Shorter prompts, more stable results.
Splitting 15- and 30-second scenes into shots, and fixing them with minimal rework
In ArcLoop, your character assets, your Storyboard shot cards, and your Edit timeline all live under the same project. Character assets hold the fixed identity — face, outfit, voice — while blocking and camera position, which change shot to shot, go in the shot description. That way, when one shot breaks, you fix the camera, the lip sync, or the prop position on that one shot instead of rebuilding the whole scene.
For anything under 15 seconds, aim for three to four shots: a wide relationship shot to establish blocking, a close-up on the speaker to push the conflict, a listener reaction to carry the pressure, and an evidence close-up or a pointed question as a small hook. Don't have three people take turns delivering long lines inside a 15-second shot — the lip sync will almost certainly break.
Around 30 seconds, split it into two 15-second blocks: the first drops the evidence, the second pushes the confrontation or the twist. Each block should return to a spatial anchor at least once — the three-way relationship shot, the evidence on the table, the doorway position — so the cut doesn't feel like it changed rooms.
Use group shots sparingly. Two characters in frame together is relatively stable; three needs clear foreground/mid-ground/background and left/center/right; past four, stick to wide establishing shots or break it into reaction shots. For a commercial short drama, group shots are best spent on conflict highlights, cover-image candidates, and twist clips — routine exposition is cheaper as single-character close-ups.
If lip sync isn't holding up, don't force a straight-on long line. Cut to a listener's reaction, an evidence close-up, a hand gesture, a back shot, footsteps at the door — or let the key line only show lip movement on the last few words. Have a fallback cut ready ahead of time: if a two-shot fails, cut to the speaker's solo close-up; if a three-character blocking shot falls apart, split it into a foreground-pressure shot, an evidence close-up, and a listener reaction.
Leave room for subtitles from the start. Vertical short dramas usually put subtitles in the bottom third of the frame — don't let a mouth, a phone screen, a signature on a contract, or a recorder's red light land in that zone. Mark the subtitle-safe area on both the staging diagram and the shot list.
Here is how to run this in ArcLoop, step by step.
Open your IP Project and go to My Assets. Create a Character for each person in the scene — Lin Zhixia, Zhou Heng, Chen. Upload your reference images to Library, then Bind the clearest one as Main image for each character. If a character wears different outfits across episodes, Bind those as Reference images under the same character asset; they stay one person.
Once assets are ready, go to your Episode and click Generate Shots. ArcLoop breaks the episode into shot cards. Open each card and type @ to pull in the character by name — write only what changes in this shot: camera position, what the character does, where the props are, who is speaking. Skip re-describing the face or outfit; that is already in the asset.
For lip sync, assign one primary speaker per shot card. If a shot needs a listener reaction instead of a line, write that explicitly in the description so the generated motion does not add unwanted mouth movement.
To generate several shots at once, open the AI Chat Panel and type: Generate videos for Shots 1, 2, and 3. Review the results against your staging spec before moving to the next block. When a shot breaks, fix only that card — adjust the camera note or prop position — and regenerate it alone.
Finally, bring the approved shots into Edit, arrange them on the timeline, and check that the spatial anchor shot appears at least once per 15-second block before you export.
Example 1: multi-character staging diagram
Wide shot of the law firm conference room at night. @Lin Zhixia stands front-right, leaning forward with both hands on the table. @Zhou Heng sits back-left, eyes down, gripping the edge of his chair. @Chen stands mid-ground in the doorway, arms crossed. The contract lies on the table closer to Lin Zhixia; the voice recorder sits center-table. Cool white overhead light. Camera holds at a three-quarter angle from the right side — do not cross the axis. No character changes position. Subtitle-safe zone: bottom quarter of frame is clear.
The point of this spec isn't polished prose — it's giving every character, every prop, and every camera position a fixed place.
Example 2: staging diagram to a 30-second shot list
Break this scene into a 30-second shot list using the established staging: @Lin Zhixia front-right, @Zhou Heng back-left, @Chen mid-ground at the doorway. Contract and voice recorder positions unchanged. Camera stays on the right side of the axis throughout. Two 15-second blocks: Block 1 — Lin Zhixia slides the contract across the table, Zhou Heng looks down without touching it; Block 2 — Chen steps one pace into the room, Lin Zhixia straightens up. For each shot: duration, camera position (A/B/C/D), shot size, speaker, listener reaction, prop positions, lip-sync note, edit point, fallback cut if the shot fails.
The shot list should be specific enough to directly drive generation and editing. Each shot carries one primary job, and each one can be redone on its own if it fails.
Example 3: reviewing blocking and lip sync in a finished cut
Review this finished scene against the staging spec. Characters: @Lin Zhixia, @Zhou Heng, @Chen. Check: (1) Does each character hold their established left-right position across cuts? (2) Does the camera stay on the correct side of the axis? (3) Do the contract and voice recorder stay in place — or drift? (4) Does the speaker's mouth move on their lines and stay closed when listening? (5) Do subtitles clear the mouth area and the contract signature? (6) Does the scene return to a spatial anchor between the two 15-second blocks? Flag each issue as: pass, fixable in editing, or needs a redo, with the smallest fix described.
Review isn't nitpicking — it's cost control. Don't redo what editing can fix, and don't force-save a shot where the blocking or identity has already fallen apart.
Things that break and how to fix them
Failure one: the prompt just says "office, multiple characters talking." Fix: draw the top-down staging diagram first, then write the shot list. The space has to be stable before the characters can be.
Failure two: two characters look too similar. Fix: go back to the My Assets and check face shape, hair silhouette, outfit cut, color palette, and prop anchors. Add a character reference sheet if needed, so the two of them are still distinguishable side by side.
Failure three: the furniture changes every shot. Fix: treat furniture as a scene asset instead of regenerating it in every prompt.
Failure four: key props drift. Fix: give props a code and a fixed position, and reference that same position in the shot list every time. Evidence props — contracts, voice recorders, phones — need this the most.
Failure five: the camera crosses the axis. Fix: define camera zones, and keep reverse angles from crossing into territory that flips the left-right relationship. For a shot that's already crossed the line, a minor case can be buffered with a reaction shot; a bad one needs a redo.
Failure six: multiple characters talk at once. Fix: one primary speaker per shot, everyone else reacts. Break long lines into shorter ones — don't put key information on two mouths at the same time.
Failure seven: lip sync is off. Fix: shorten the line, or cut to an evidence close-up, a hand gesture, or a silent listener. Give key lines to a speaker close-up when you can, and let non-critical lines play as voiceover.
Failure eight: assuming the same scene means everyone has to be on-screen together. A scene doesn't need all three characters in frame every second. As long as blocking, sightlines, props, and voice stay continuous, solo reactions and prop close-ups can still hold the sense of a shared scene — and they're easier to produce at scale.
Diagnose the speaker error before replacing the shot
Use this table after a failed take. A wrong voice, an unwanted moving mouth, and incorrect edit timing need different repairs.
| What you see or hear | Check first | Smallest useful repair |
|---|---|---|
| Correct character, wrong voice | The line's speaker assignment and selected voice | Correct the audio assignment; retain the picture only if its performance still fits |
| The listener's mouth moves during someone else's line | The generated visual performance | Replace that visual take or use an intentional reaction or prop cutaway |
| Correct speaker, rushed or missing words | Line length and available duration | Shorten the line or allow more time |
| The reply plays before the question | Shot order and audio placement in the edit | Correct the sequence before generating anything again |
| The face changes between shots | Character references and selected assets | Repair identity separately from dialogue timing |
Watch the exchange muted to check mouth movement, then listen without picture to check line order and pauses. Muting a clip does not remove unwanted mouth movement. Replacing audio does not automatically synchronize lips, and naming one speaker in a prompt is not a guarantee that the output will obey. Keep a usable reaction shot; regenerate only the speaking performance that actually fails.
FAQ
Does the staging diagram have to be an actual image?
No. A written top-down description, a table, or even simple ASCII positioning all work. What matters is that characters, furniture, props, camera positions, sightlines, and the subtitle-safe zone are all clearly spelled out.
Do two-character scenes need a staging diagram too?
Yes, especially with furniture, props, reverse angles, or lip-sync requirements involved. Two-character dialogue is exactly where blocking jumps, mismatched sightlines, and listeners moving their mouths incorrectly show up most.
How many characters can share a frame before it gets unstable?
Two is the most stable by default. Three works if you clearly define foreground/mid-ground/background, left/center/right, and who's speaking. Past four, split it into separate shots unless it's just a wide establishing shot or a brief cover-image moment.
Does lip sync have to be perfectly accurate?
Key lines should be as accurate as possible, especially straight-on close-ups and twist lines. For everything else, reaction shots, hand gestures, back shots, evidence close-ups, and voiceover all take the pressure off lip sync.
Can a multi-character shot be salvaged after it's already generated?
Review it against the staging diagram first. Minor lip-sync errors, a prop that's slightly off, or subtitles clipping an edge can usually be fixed with editing, a reaction shot, or a close-up. A flipped left-right relationship, completely rearranged furniture, or swapped characters usually means a redo.
Does a staging diagram limit performance?
No. It locks relationships, positions, and lip-sync ownership — not expression. Facial expressions, pauses, small hand gestures, listener reactions, and pacing can all still vary.