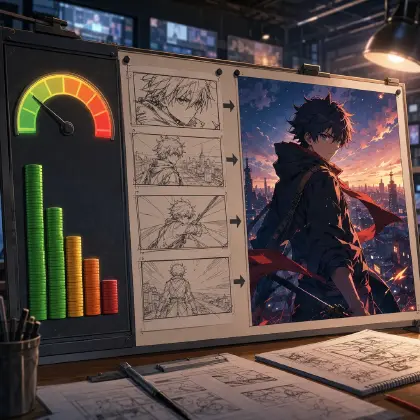

When you create a character with an invented job, one question runs through a viewer's mind before they can care about anything else: what does this person actually produce? Not the job title, not the lore behind the profession — the thing their hands make, decide, or deliver on an ordinary afternoon. Without a visible answer, even a beautifully designed character reads as decoration.
The common failure is filling that gap with exposition: a colleague asks what the character does, and the character explains. The viewer learns the label but never sees the labor. The profession stays abstract, and the character stays thin. A better path is a single work task, sized so the audience can see three things across two or three shots: what the worker starts with, the judgment call only they can make, and the result that lands in someone else's hands. This is how to build that sequence in ArcLoop.
Identify the Job's Inputs, Decision, and Output
Before writing a single shot, write three lines on paper or in your Story Outline:
- Input: What material, data, or situation does this worker receive?
- Decision: What does their expertise let them read or judge that an untrained person could not?
- Output: What leaves their hands, and who picks it up next?
These lines are not dialogue. They are a pre-production spec. The shots do not have to state them — they just have to show them. A viewer who can answer all three after watching the sequence understands the job, even if they have never heard the title before.
For this guide, the fictional worker is Sable, a Drift Surveyor in a near-future city where geological strata shift unpredictably between tidal windows. Her input is sensor readings from ground pressure instruments. Her judgment is whether the current window is stable enough for courier routes through the affected zone. Her output is a route decision that a dispatcher uses to open or hold a crossing. In this fictional workplace, a plain red stop token means hold the crossing; establish that convention through an earlier stopped courier, not through a written label. The job has a tool, a decision with consequences, and a result someone else depends on.
Build character assets for Sable and the Dispatcher, scene assets for the Survey Platform and Dispatch Gate, and prop assets for the Calibration Rod, Check Gauge and Stop Token. The instruments are fictional story props. Design their reference images so a discrepancy is visible through pointer positions, without requiring exact numbers or rendered interface text. Upload a reference image for each in Library, then bind each image to its asset — set the clearest image as the Main image and add others as Reference images for additional angles or states. Once those assets exist, every shot description can reference them with @ instead of rebuilding the visual from scratch each time.
Design the Ordinary Task Before Anything Goes Wrong
The ordinary task shows the job running normally. It does not need drama — it needs specificity. Viewers need to see what routine looks like so that any deviation registers as meaningful.
For Sable, the ordinary task is a morning reading: she lowers the Calibration Rod to a familiar sampling point on the Survey Platform. Its pointer provides an initial reading; the reference establishes what the instrument looks like, while the scene establishes why that reading matters. The audience sees the tool, the environment, and the gesture of someone who has done this a thousand times. They do not yet know what the numbers mean, but they know the action is deliberate.
All @ references below are fictional assets that must be created and have suitable images bound in My Assets before use. These examples and their illustrations are proposed staging, not recorded generation tests. Review any small instrument detail in the actual result rather than assuming the reference guarantees it.
Medium shot of @Sable at the familiar sampling point on @Survey Platform. She lowers @Calibration Rod until its tip rests on the ground marker, keeping the pointer face angled toward her. Frame the contact and instrument together; the far landscape stays secondary. Early amber light falls across the railing. Camera remains still throughout the one lowering action. Do not add writing, numerals or a second operation. End when the instrument reaches the established sampling position.

This shot establishes the baseline. The viewer has the tool, the location, and the routine before anything goes wrong — which makes the next shot land harder.
Design the Interruption That Exposes Professional Competence
One interruption does more work than three exposition scenes. The key is that the interruption should require the judgment built into this specific job — not a generic obstacle, but something an untrained person would not know how to read.
For Sable, the interruption is a pressure spike that should not exist at this hour. A courier would not know what to do with it. An administrator would flag it and wait. Sable knows the protocol: she does not authorize the crossing yet. She checks the same sampling point with the independent Check Gauge. For this case, the story establishes that conflicting readings require a hold until the disagreement is resolved; she cannot safely average them or guess.
That choice — pause, verify, do not guess — is the job. The audience needs to see both the discrepancy and her decision to withhold permission. A neutral shot of two devices does not show expertise unless the resulting choice is also clear. The decision is visible as behavior, not stated as dialogue.
Close shot of the work surface on @Survey Platform. @Calibration Rod and @Check Gauge already rest side by side, with their pointers visibly disagreeing. @Sable places @Stop Token beside them instead of reaching toward the crossing controls. Keep the instruments and token in one readable frame while her face remains outside the crop. Flat morning light, steady camera. The token placement is the only action; neither pointer changes position during this shot.
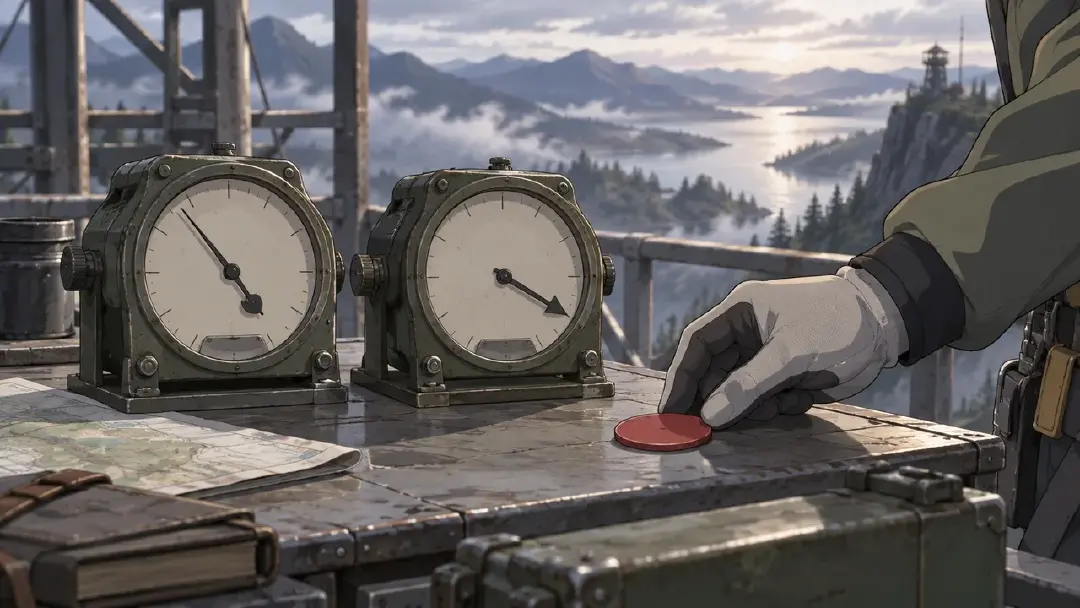
The chosen token makes her judgment observable. Without the previously established meaning of the token and the instrument disagreement, it would be an arbitrary object placement. Check those prerequisites before relying on the shot.
Place Only the Necessary Operation in Each Shot
Once the asset references are set, each shot description carries only the new information for that moment: the action, the framing, the emotional register, the light, relevant sound. The character's face, build, and costume are already in the character asset. Repeating them in the shot description adds noise and can pull the generation away from the bound reference images.
Before the third shot, establish that Sable has delivered the Stop Token to the Dispatcher; use a separate simple transfer shot if the exchange is not clear from the cut. The third example shows the output being used: the Dispatcher closes the crossing. A pause or raised eyebrow alone would not prove that the work changed anything. The route is held because Sable applied the disagreement rule, not because a form happened to exist.
Medium shot at @Dispatch Gate. @Dispatcher lowers the crossing barrier across the courier path. @Stop Token is already attached beside the barrier control, plainly visible without any writing. @Sable stands still beyond the counter while the waiting courier remains behind the line. Keep the path and descending barrier together in frame so the result of the hold decision is visible. Cool outdoor light meets warm booth light. No simultaneous phone call, handoff or extra reaction.

How to Check Whether the Sequence Reads to a First-Time Viewer
Before generating video, run a legibility check against four questions:
- What does this worker produce?
- Who uses it?
- What judgment did they apply?
- What would have gone wrong if they had guessed instead of verified?
A missing answer can arise at any stage. If the discrepancy is unreadable, fix the instrument framing. If Sable's judgment is unclear, show the chosen token. If the result seems pointless, show what the Dispatcher does with it. The closing barrier makes the output useful to someone else without relying on an eyebrow or unreadable form.
Generate the images for the planned shots before video. Review tool contact in the first frame, pointer disagreement and token choice in the second, and the crossing boundary in the third. If needed, add the simple token transfer between the latter two. Once the stills work, use the AI Chat Panel to request video for the actual shot numbers, then arrange the clips in Edit and inspect the causal sequence.
If the Calibration Rod disappears into a wide frame, tighten to medium or close. The prop is load-bearing for legibility — if it vanishes, the job vanishes with it.
For staging the character's entrance before the work sequence begins, see Staging a Character's First Appearance. For building a location that carries context without any character present, see How to Show Something Just Happened Even With Nobody in the Frame.
FAQ
Do I need to show the full job in one episode? No. One well-staged work task establishes more than a full backstory. If the viewer can answer the four legibility questions, the profession is introduced. Depth comes from repetition across episodes, not from a longer first scene.
What if the job has no physical tool? Look for a decision artifact instead — a form, a threshold, a screen, a list. The prop does not need to be mechanical; it needs to be the thing the worker handles when applying their judgment. Bind it as a prop asset and reference it the same way.
Can I reuse these assets across multiple episodes? Yes, and that is the point. When @Sable, @Survey Platform, and @Calibration Rod return in a later episode, the audience already knows what each one means. The asset reference provides a shared visual source while the shot description carries the new operation. Review the generated details each time; a prop reference does not automatically enforce its pointer state.
What if the interruption feels too dramatic for a background character? Scale the stakes down. The interruption does not have to be dangerous — it has to be the kind of thing this worker would notice and a non-expert would miss. A small anomaly handled quietly is more convincing than a crisis handled loudly.
Open your IP Project at /creative/worlds, create the character, scene, and prop assets for your invented professional, and write the work, decision and use-of-output shots, adding only the connecting action needed for clarity. Check what another person can now do because of the worker's judgment.