What cutting actually means for Live2D
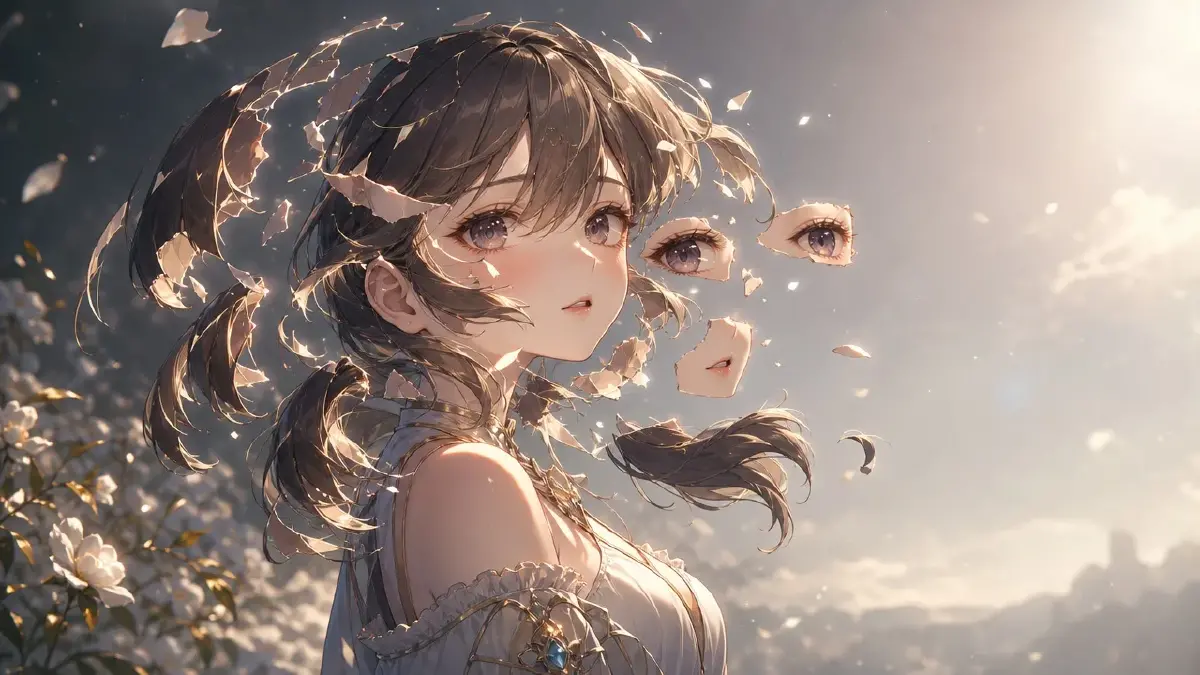
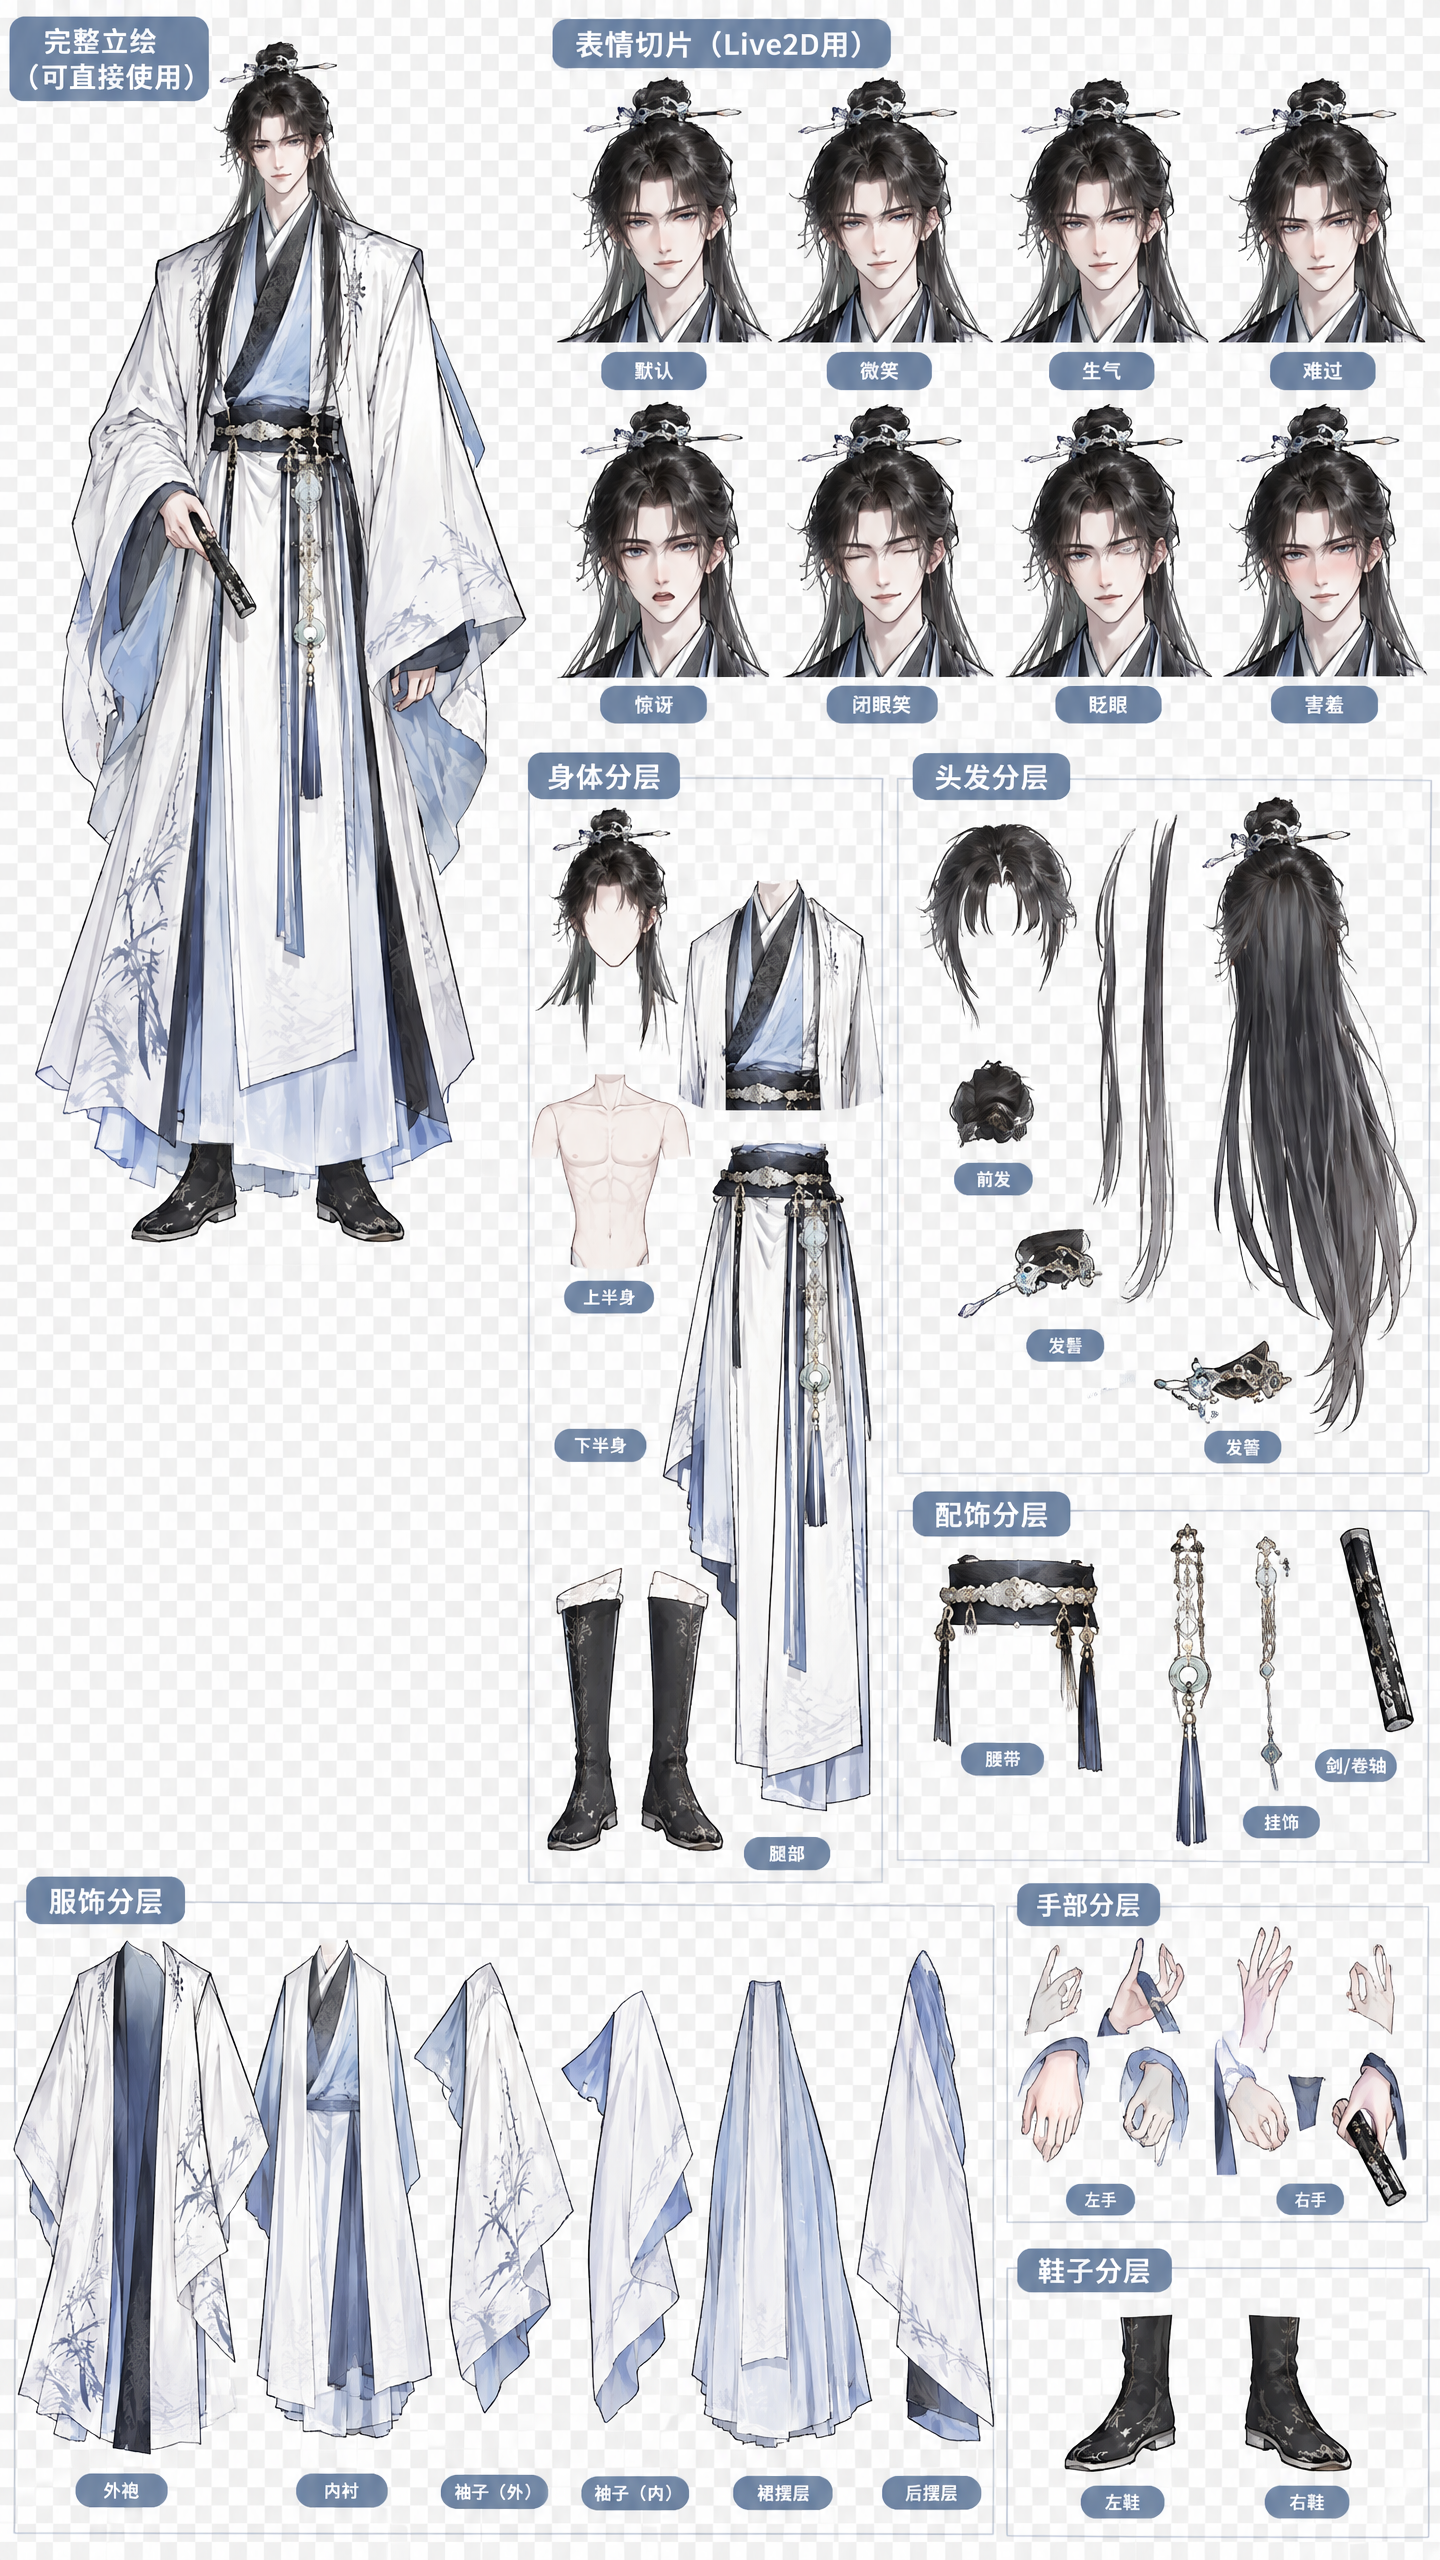
Live2D calls it material separation: dividing one finished illustration into parts — eyelashes, eyeballs, brows, mouth, hair blocks, body — so each part can move on its own. Riggers in the community just call it cutting. Whatever you call it, it is the step where most AI-art VTuber projects stall.
The problem is not that AI-generated art looks wrong. It is that a finished illustration, AI-generated or hand-drawn, only shows the surface. The moment you cut the front hair away from the face, you expose forehead that was never drawn. Cut the jacket off the torso and there is nothing underneath. A rigger needs those hidden areas filled in, and this is exactly where a generated single image gives you less to work with than a layered artist file.
This guide covers two things: what a Live2D cut actually needs, and how to produce clean references for every hidden area you have to redraw — instead of guessing at what your character's forehead or jaw looks like.
What goes into a standard cut
There is no single mandatory list, but the Live2D editor's own tutorials and most rigging commissions converge on the same groups. Use this as your checklist:
| Group | Typical parts |
|---|---|
| Brows | left brow, right brow |
| Eyes | eyelash top, eyelash bottom, eyeball, highlight, white — per eye |
| Mouth | upper lip, lower lip, mouth interior, teeth, tongue |
| Face | face base, nose, cheek blush, ears |
| Hair | front hair, side hair (left/right), back hair, stray strands |
| Body | neck, torso, arms (upper/lower), hands, legs if visible |
| Extras | accessories, toggles like a hood or glasses, each on its own part |
Two rules matter more than the count:
- Anything that moves separately gets its own part. If the hood needs to toggle on and off, the hood is a part, and the hair underneath it must be fully drawn.
- The more detailed the division, the better the model moves. That is straight from the official manual. A minimal cut can blink and talk; a detailed cut can turn its head without the hair tearing.
If you have not finished the character design yet, start from a sheet that is planned for rigging — see what a riggable sheet needs — and this whole step gets easier, because fewer parts overlap in the first place.
Why AI-generated art hides the parts you need — and how to get them
A hand-drawn commission arrives as a layered file. A generated illustration arrives flat, and it hides three specific traps:
1. Nothing exists behind occluders. Behind the front hair there is no forehead. Behind the collar there is no neck. Every cut edge exposes an area you must redraw, and redrawing from imagination is how a character stops looking like herself.
2. Baked lighting crosses part boundaries. A shadow the front hair casts on the face belongs to the hair's position, not the face. If you cut with the shadow still painted on the face layer, the shadow stays frozen when the hair moves.
3. Tangled boundaries. Generated hair strands weave into eyelashes and collars in ways no artist would layer. The twintail that crosses behind the shoulder and in front of the arm is a genuinely hard cut even for professionals.
The fix for all three is the same: stop treating the illustration as your only source of truth. Keep the character as a design you can re-query, not just a picture.
In ArcLoop, that means building the character as an asset before you finalize the art. Create your character inside an IP project, bind your best generated look to it as the main image, and add reference images for other angles. Because the agent remembers assets, you can then ask for exactly the missing information:
- the same face, eyes closed — a clean reference for the eyelid area under the lashes
- the same face, mouth wide open — the mouth interior you need for lip sync
- the same character with hair tucked back — the actual shape of the forehead and jawline
- the outfit without the jacket — what the torso layer should contain
Reference each request with @ so identity stays locked:
Close-up of @Yuki, same lighting as the main portrait, eyes fully closed,
mouth relaxed. Front hair pinned back to show the full forehead and brows.
You are not asking the model to invent a new character. You are asking a character it already knows for a missing view. That is the difference between redrawing a hidden area with evidence and redrawing it from hope.
How to go from a flat image to import-ready layers
The separation itself happens in a painting tool — Photoshop and CLIP STUDIO PAINT are the two the Live2D editor officially guarantees. The workflow:
- Lock the master art. Pick the final illustration and stop regenerating it. Every later part must match this exact image. Store it in your project Library so the version you cut is the version everyone references.
- Generate the hidden-area reference pack first. Closed eyes, open mouth, hair moved, bare torso — everything from the section above, before you start cutting. Ten minutes here saves hours of guessing later.
- Cut by group, not by pixel. Duplicate the source, mask out one part per group following the checklist, and name every layer uniquely as you go. Duplicate layer names are a known source of import confusion, and "how do I name my layers" is one of the most-asked rigging questions for a reason. A boring scheme works:
hair_front_L,eye_ball_R,mouth_inner. - Fill the exposed areas using your references. Extend the forehead under the front hair, complete the eye socket under the lashes, paint the full mouth interior. Match your generated reference views, not your memory.
- Repaint boundary lighting. Remove cast shadows from the layer they fall on; if you want them back, they get their own layer so the rigger can move them with the caster.
- Flatten for import. The import copy of the file needs one merged layer per part: line art, fills, and clipping masks combined, layer masks applied, no path data. Keep your working file with masks intact as a separate file — the official docs recommend maintaining both.
- Check the format boxes. PSD format, RGB color, 8-bit channels, sRGB profile. Miss one and the editor refuses the import — "psd not importing" is almost always one of these four.
Mistakes that break the cut
- Cutting before checking motion range. Decide first whether the model will turn its head. A face angle of ±30° needs more hair and ear coverage drawn than a face that only blinks.
- Redrawing hidden areas without references. The forehead you invent will not match the next expression diff you generate. Query the character asset instead.
- Leaving shadows baked across boundaries. The most common tell of a rushed AI-art cut — the hair moves and its shadow stays.
- One giant hair layer. Front, sides, and back move at different depths. A single hair blob rigs like a helmet.
- Cutting a character that was never design-locked. If each generation drifted, your part references will contradict each other. Lock identity in the character asset before you cut; the same discipline that keeps faces stable across shots keeps part views consistent here.
FAQ
Can AI do the material separation itself?
Not usefully today. Auto-separation tools produce rough masks that still need manual cleanup on every boundary that matters — eyes, mouth, hair edges. Where generation genuinely helps is upstream: producing the character views that tell you what to draw in the areas the illustration hides.
How many layers do I actually need?
A talking, blinking bust model commonly lands between 30 and 60 parts; detailed commissions go well past that. Count the checklist groups against the motion you want. More separation is more expressive and more expensive to rig — decide with your rigger, not after.
Do I have to draw the mouth interior?
For lip sync, yes. The interior, teeth, and tongue each move during speech. Generate an open-mouth view of your character so the interior you paint matches the face around it.
What resolution should the source art be?
Work large — 4000px canvases are a common commission standard, because parts get scaled and warped during rigging. Generate or upscale your master art before cutting, not after.
Cut once, with evidence
Material separation rewards preparation more than skill. The checklist tells you where to cut; the reference pack tells you what belongs underneath. Build the character as an asset, generate the missing views while the design is locked, and the cut becomes tracing instead of guessing. Open your project, pull up the character, and generate the hidden-view pack before you open the painting tool.