
How to Create Your First Episode on Arcloop
Tired of writing complex prompts? Creating AI video should not feel like fighting with instructions. With Arcloop, just describe the idea, feeling, or moment in simple words, and turn it into cinematic video clips. This guide shows you the fastest way to make your first episode in Arcloop — from a simple story idea to a finished clip with consistent characters, scenes, and style.

1. Start With an IP Project
An IP Project is the home base for your story world — keeping your stories, characters, and videos organized so every episode shares the same creative context.
Steps
-
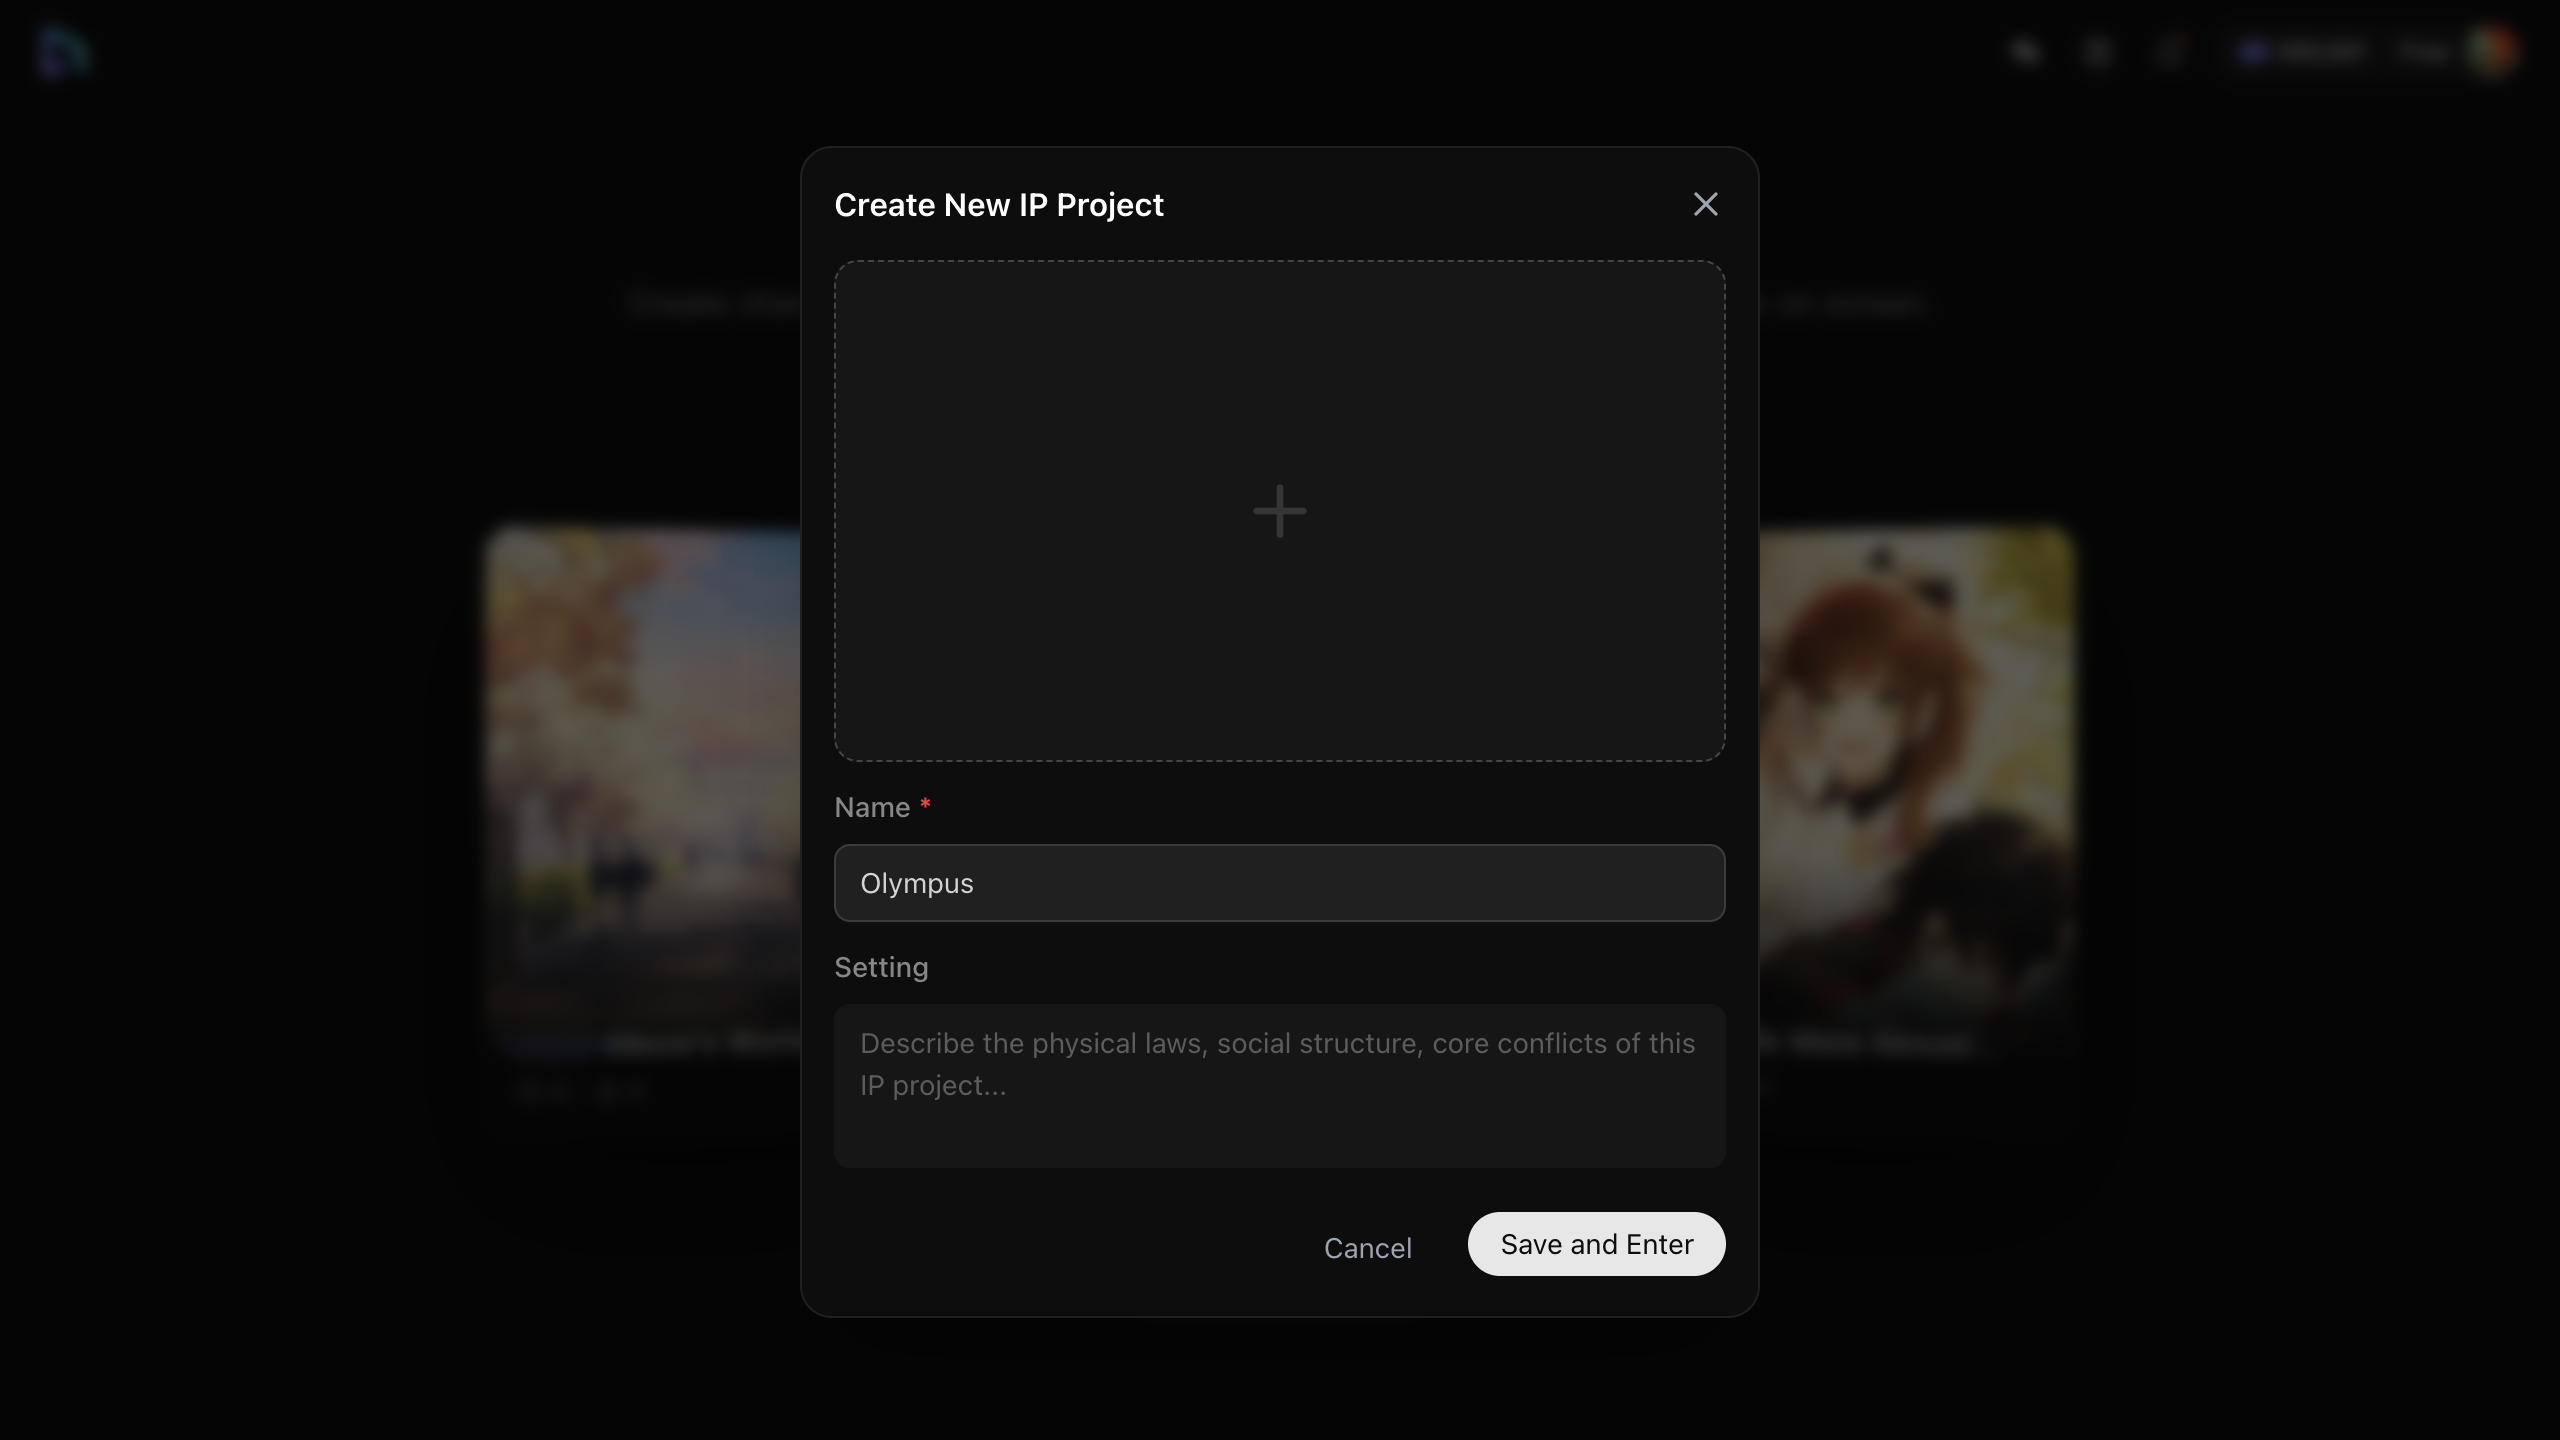
Open or Create a Project
From your homepage, open an existing IP Project, such as the default world, or click New Project.
-
Fill in Details
-
Project name, (e.g., Olympus)
-
Add world settings now or skip them and fill later
-
-
Save and Enter
Click Save and Enter to open the project workspace.
From there, you can start building the story for your first episode.
2. Create a Story
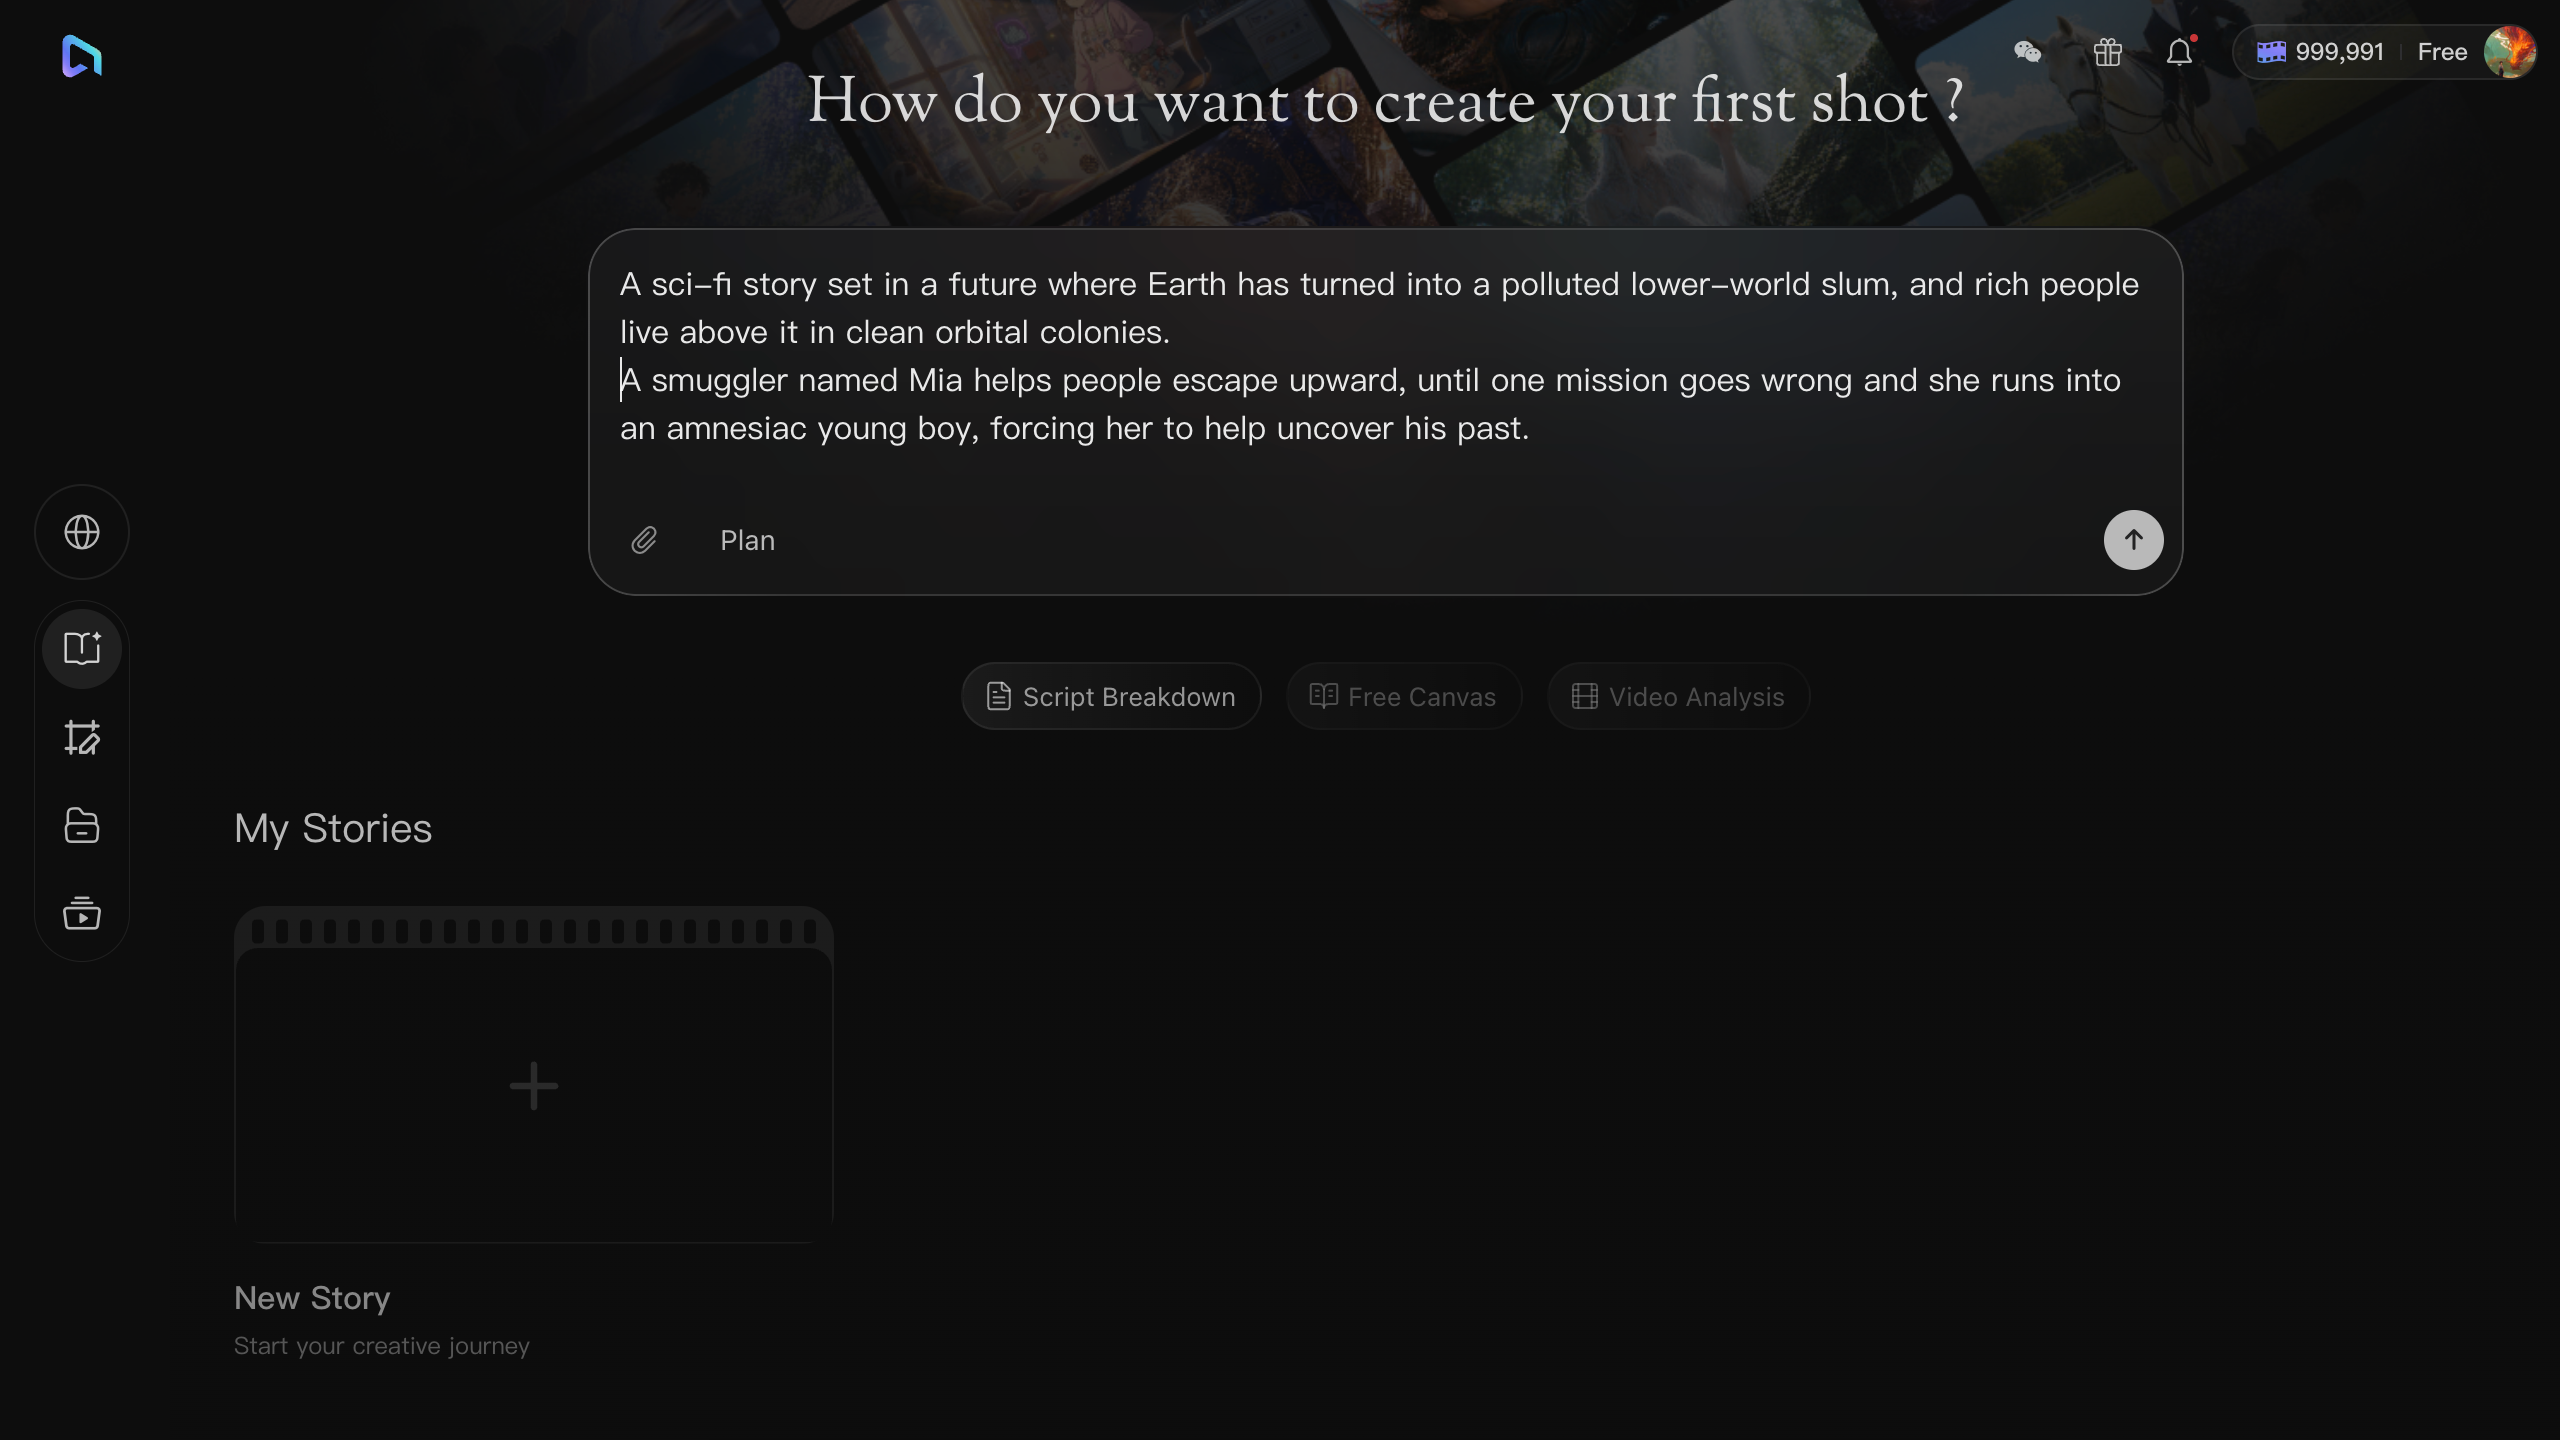
Enter a simple prompt in the homepage input box, then click Send to start a new story.
Example
A sci-fi story set in a future where Earth has turned into a polluted lower-world slum, and rich people live above it in clean orbital colonies. A smuggler named Mia helps people escape upward, until one mission goes wrong and she runs into an amnesiac young boy, forcing her to help uncover his past.
Next, review the Story Brief before the AI assistant generates your outline.
This is where you set the basics for your episode:
- Film language, (e.g., Chinese, English, Japanese, or Korean)
- Aspect ratio, (e.g., 16:9 or 9:16)
- Image model
- Video model
- Visual style, (e.g., Realistic Style or Anime Style)
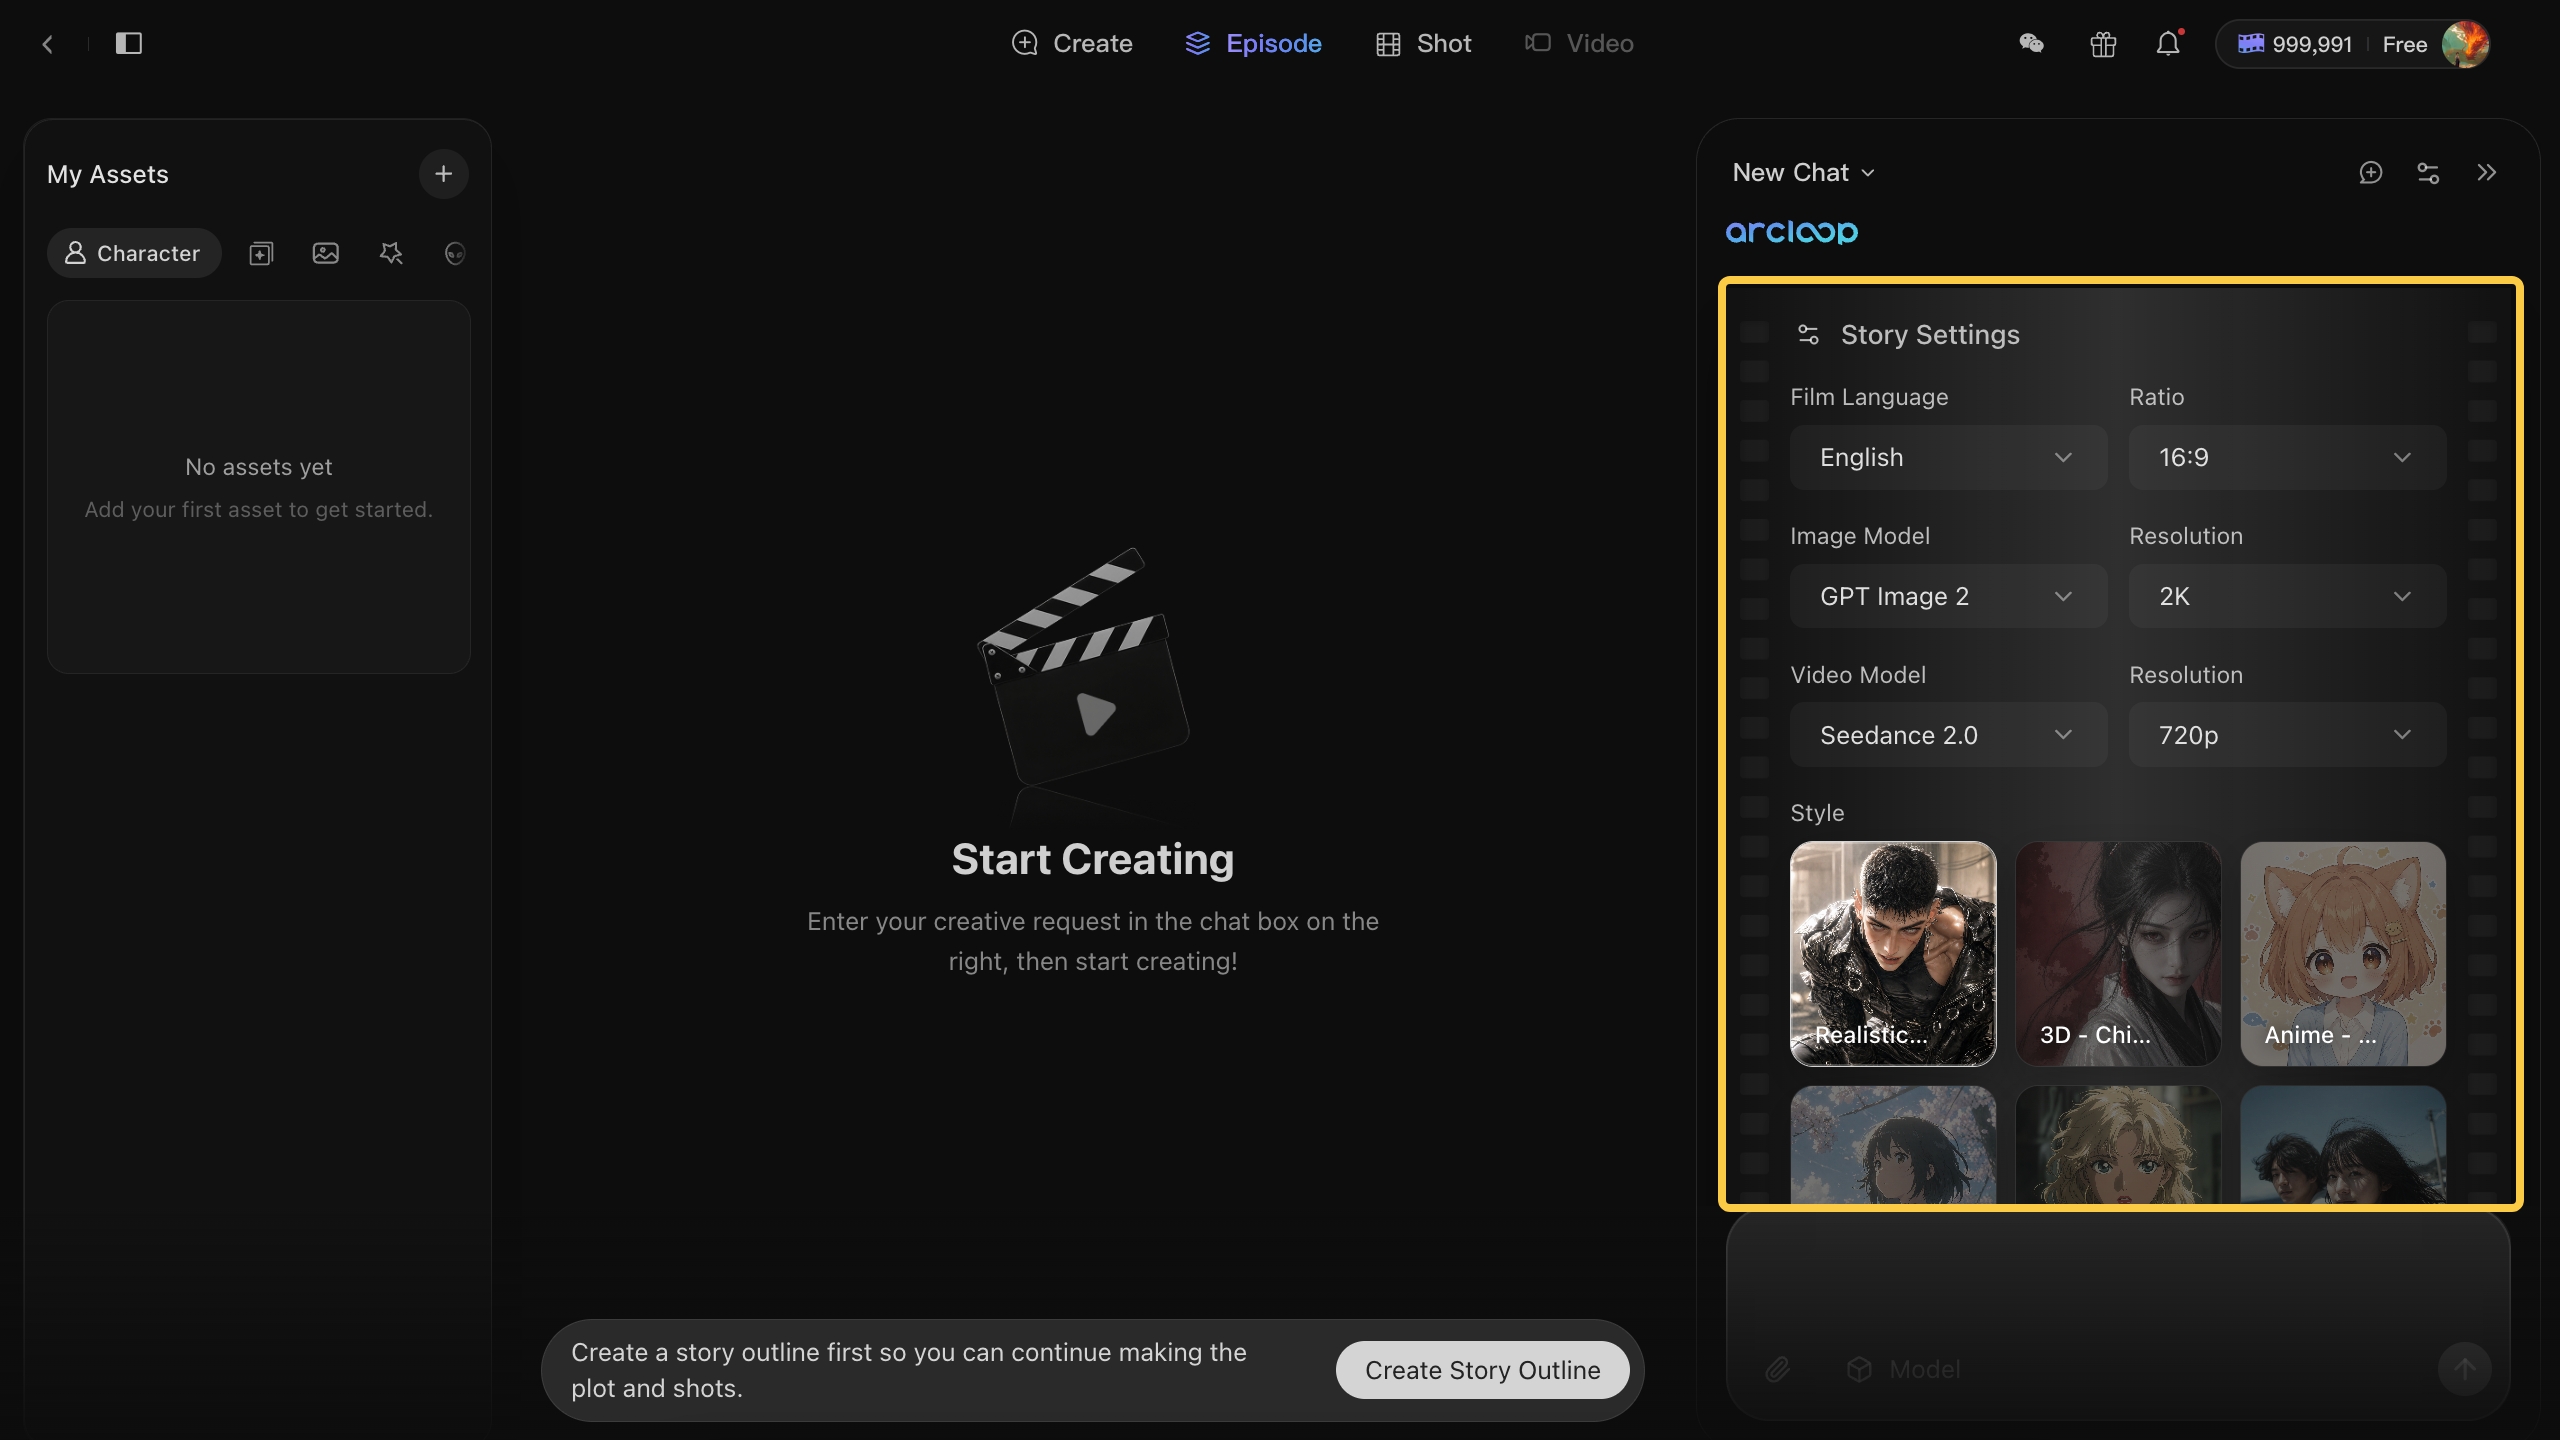
Once you confirm the brief, the AI assistant starts generating your story outline.
On the Episode Page, you can manage your story outline, characters, and episodes in one place.
The center panel is the Text Editor. Your AI-generated outline appears here. To make changes, click into the text and edit it directly.
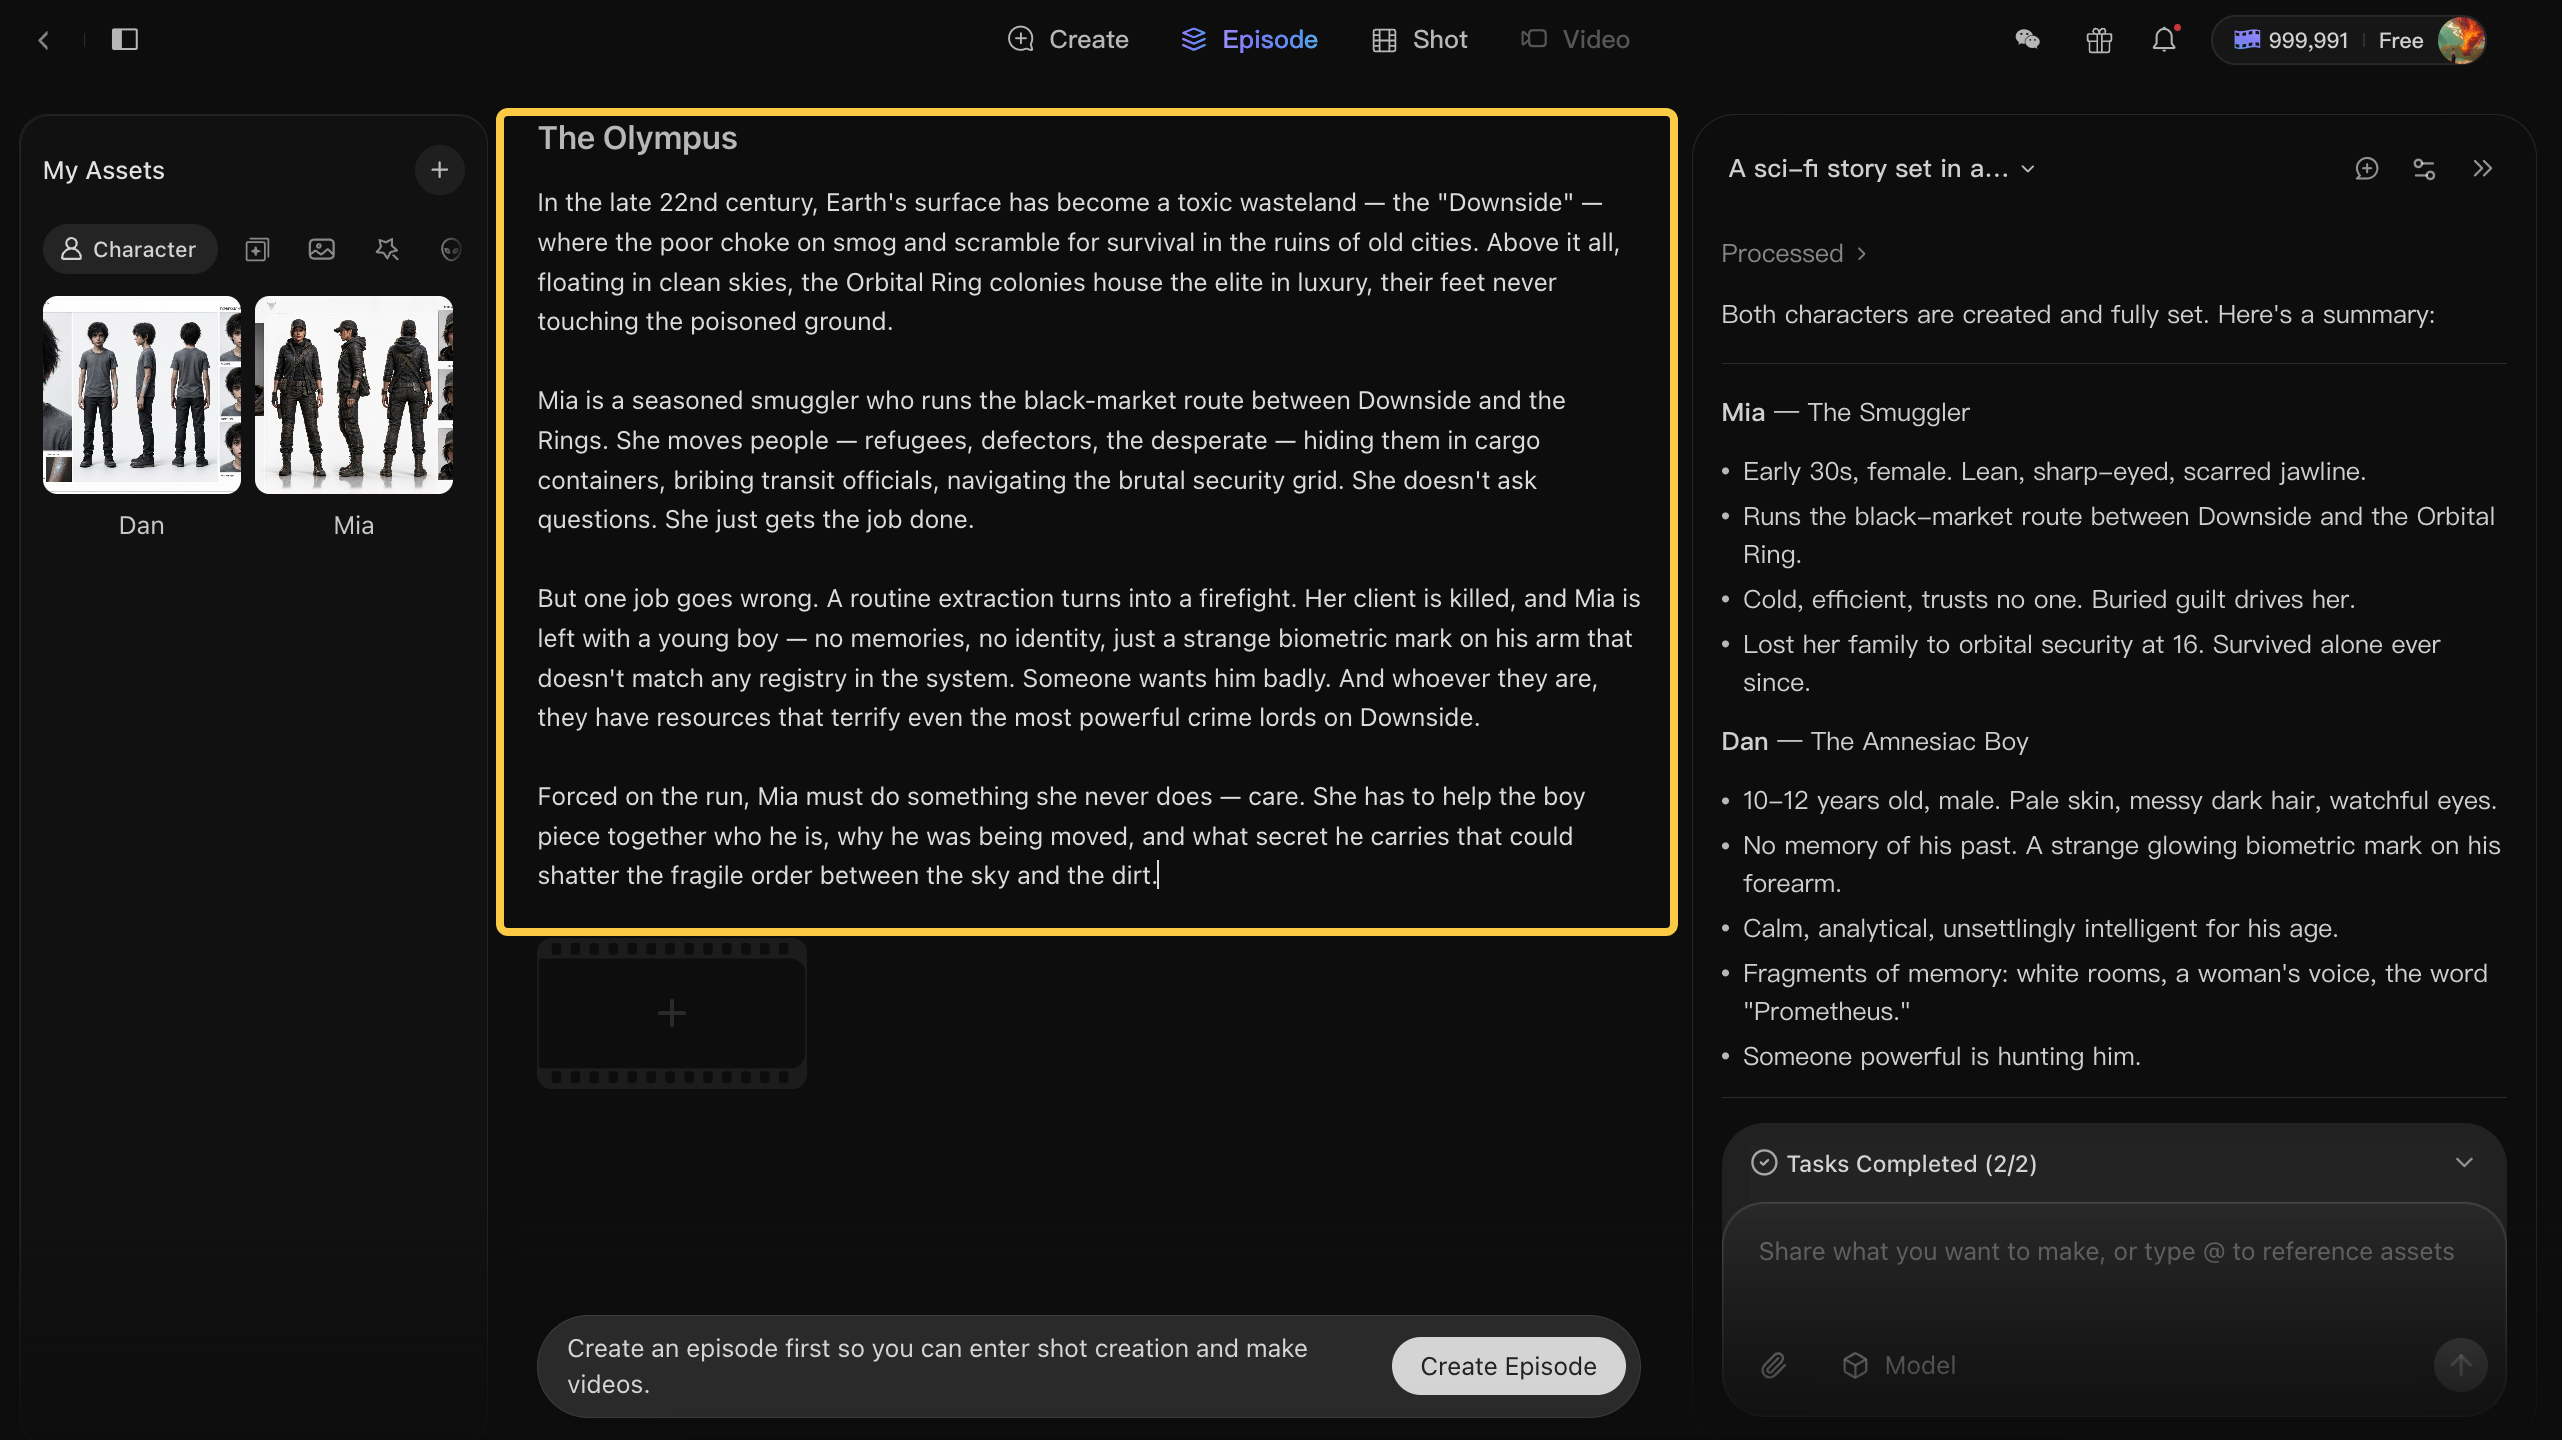
The left panel is My Assets. It shows the characters, scenes, and props in this IP universe. Click a character card to edit details like name, appearance, and personality.

The right panel is the AI Chat Panel. Use it to keep shaping your story with simple instructions. You can ask the assistant to rewrite your outline, add new characters, or update character details directly. For example:
Make the story outline feel more tense and suspenseful.
Create a new character named Felix. He is Mia’s brother.
Update this character’s appearance to short black hair and blue eyes, with a slightly hesitant expression.
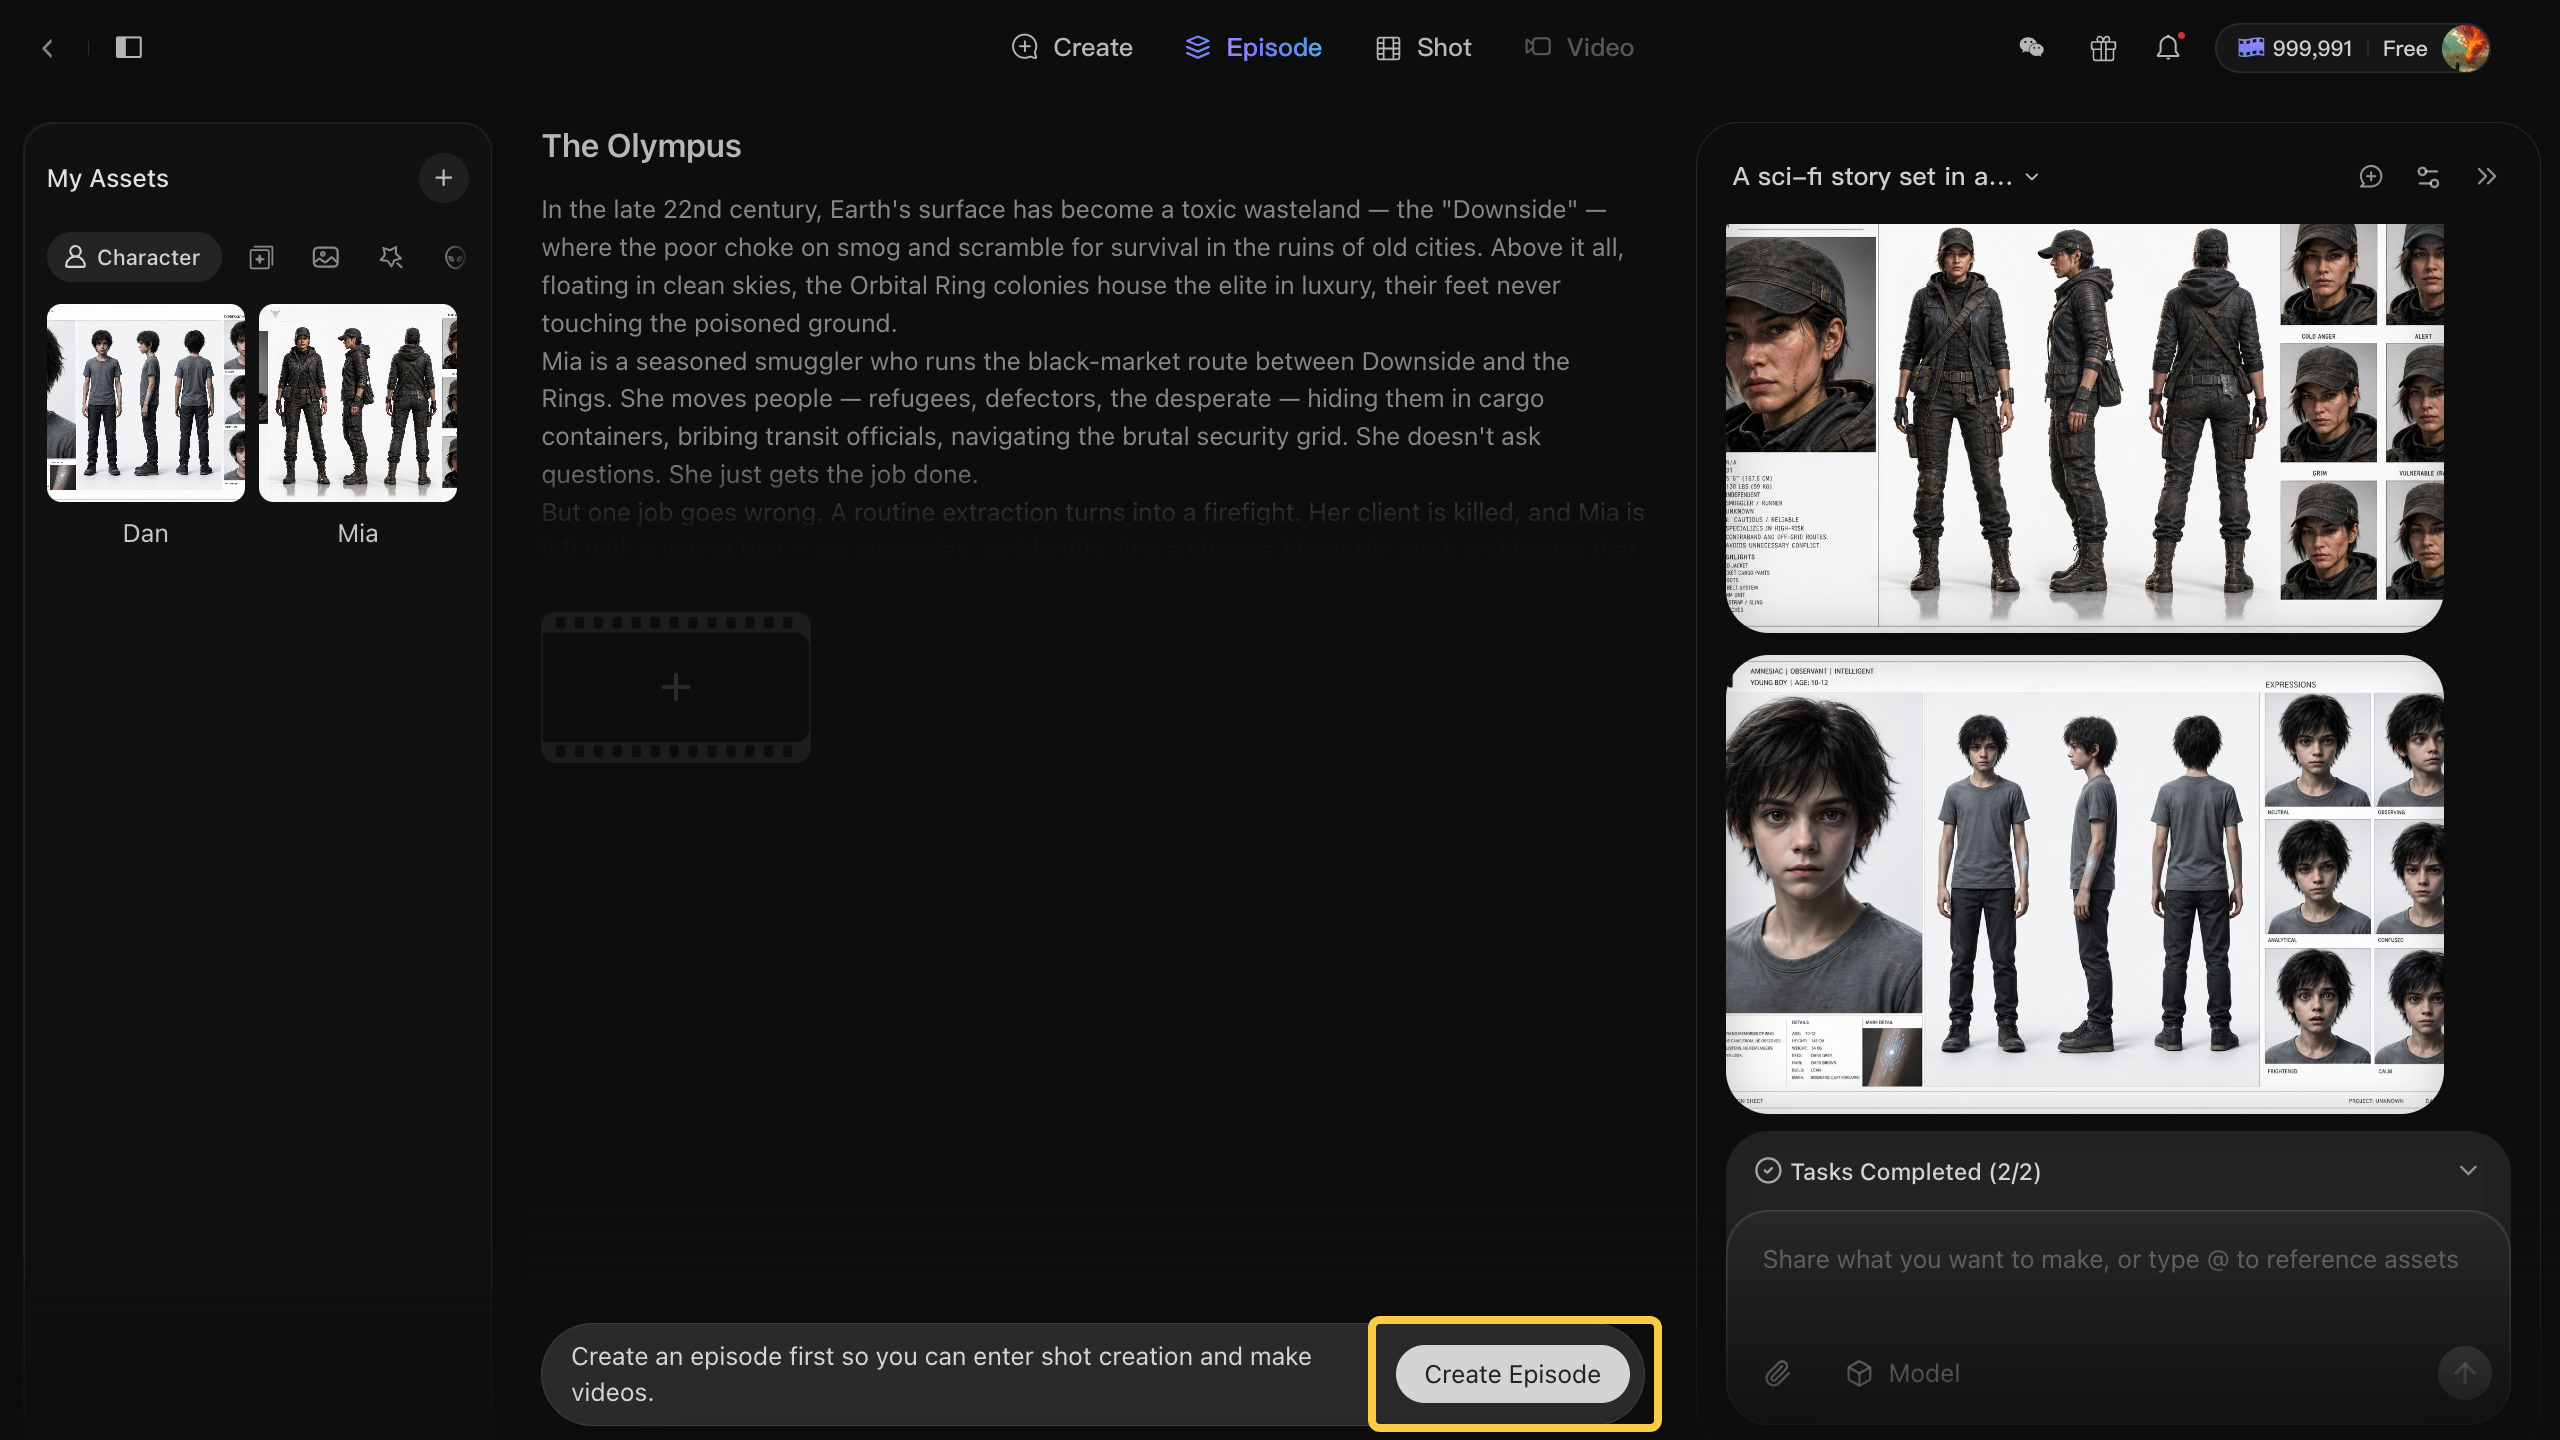
3. Add Your First Episode
Your outline is now ready. It’s time to turn part of the story into Episode 1.
Click Create Episode from the quick action bar below the outline, or type a simple request in the AI Chat Panel:
Create Episode 1.
You can also give it a clearer story beat:
Create Episode 1 where Mia enters the lower-world transit hub and meets the amnesiac boy for the first time.
When the episode appears, click the episode card to open it.
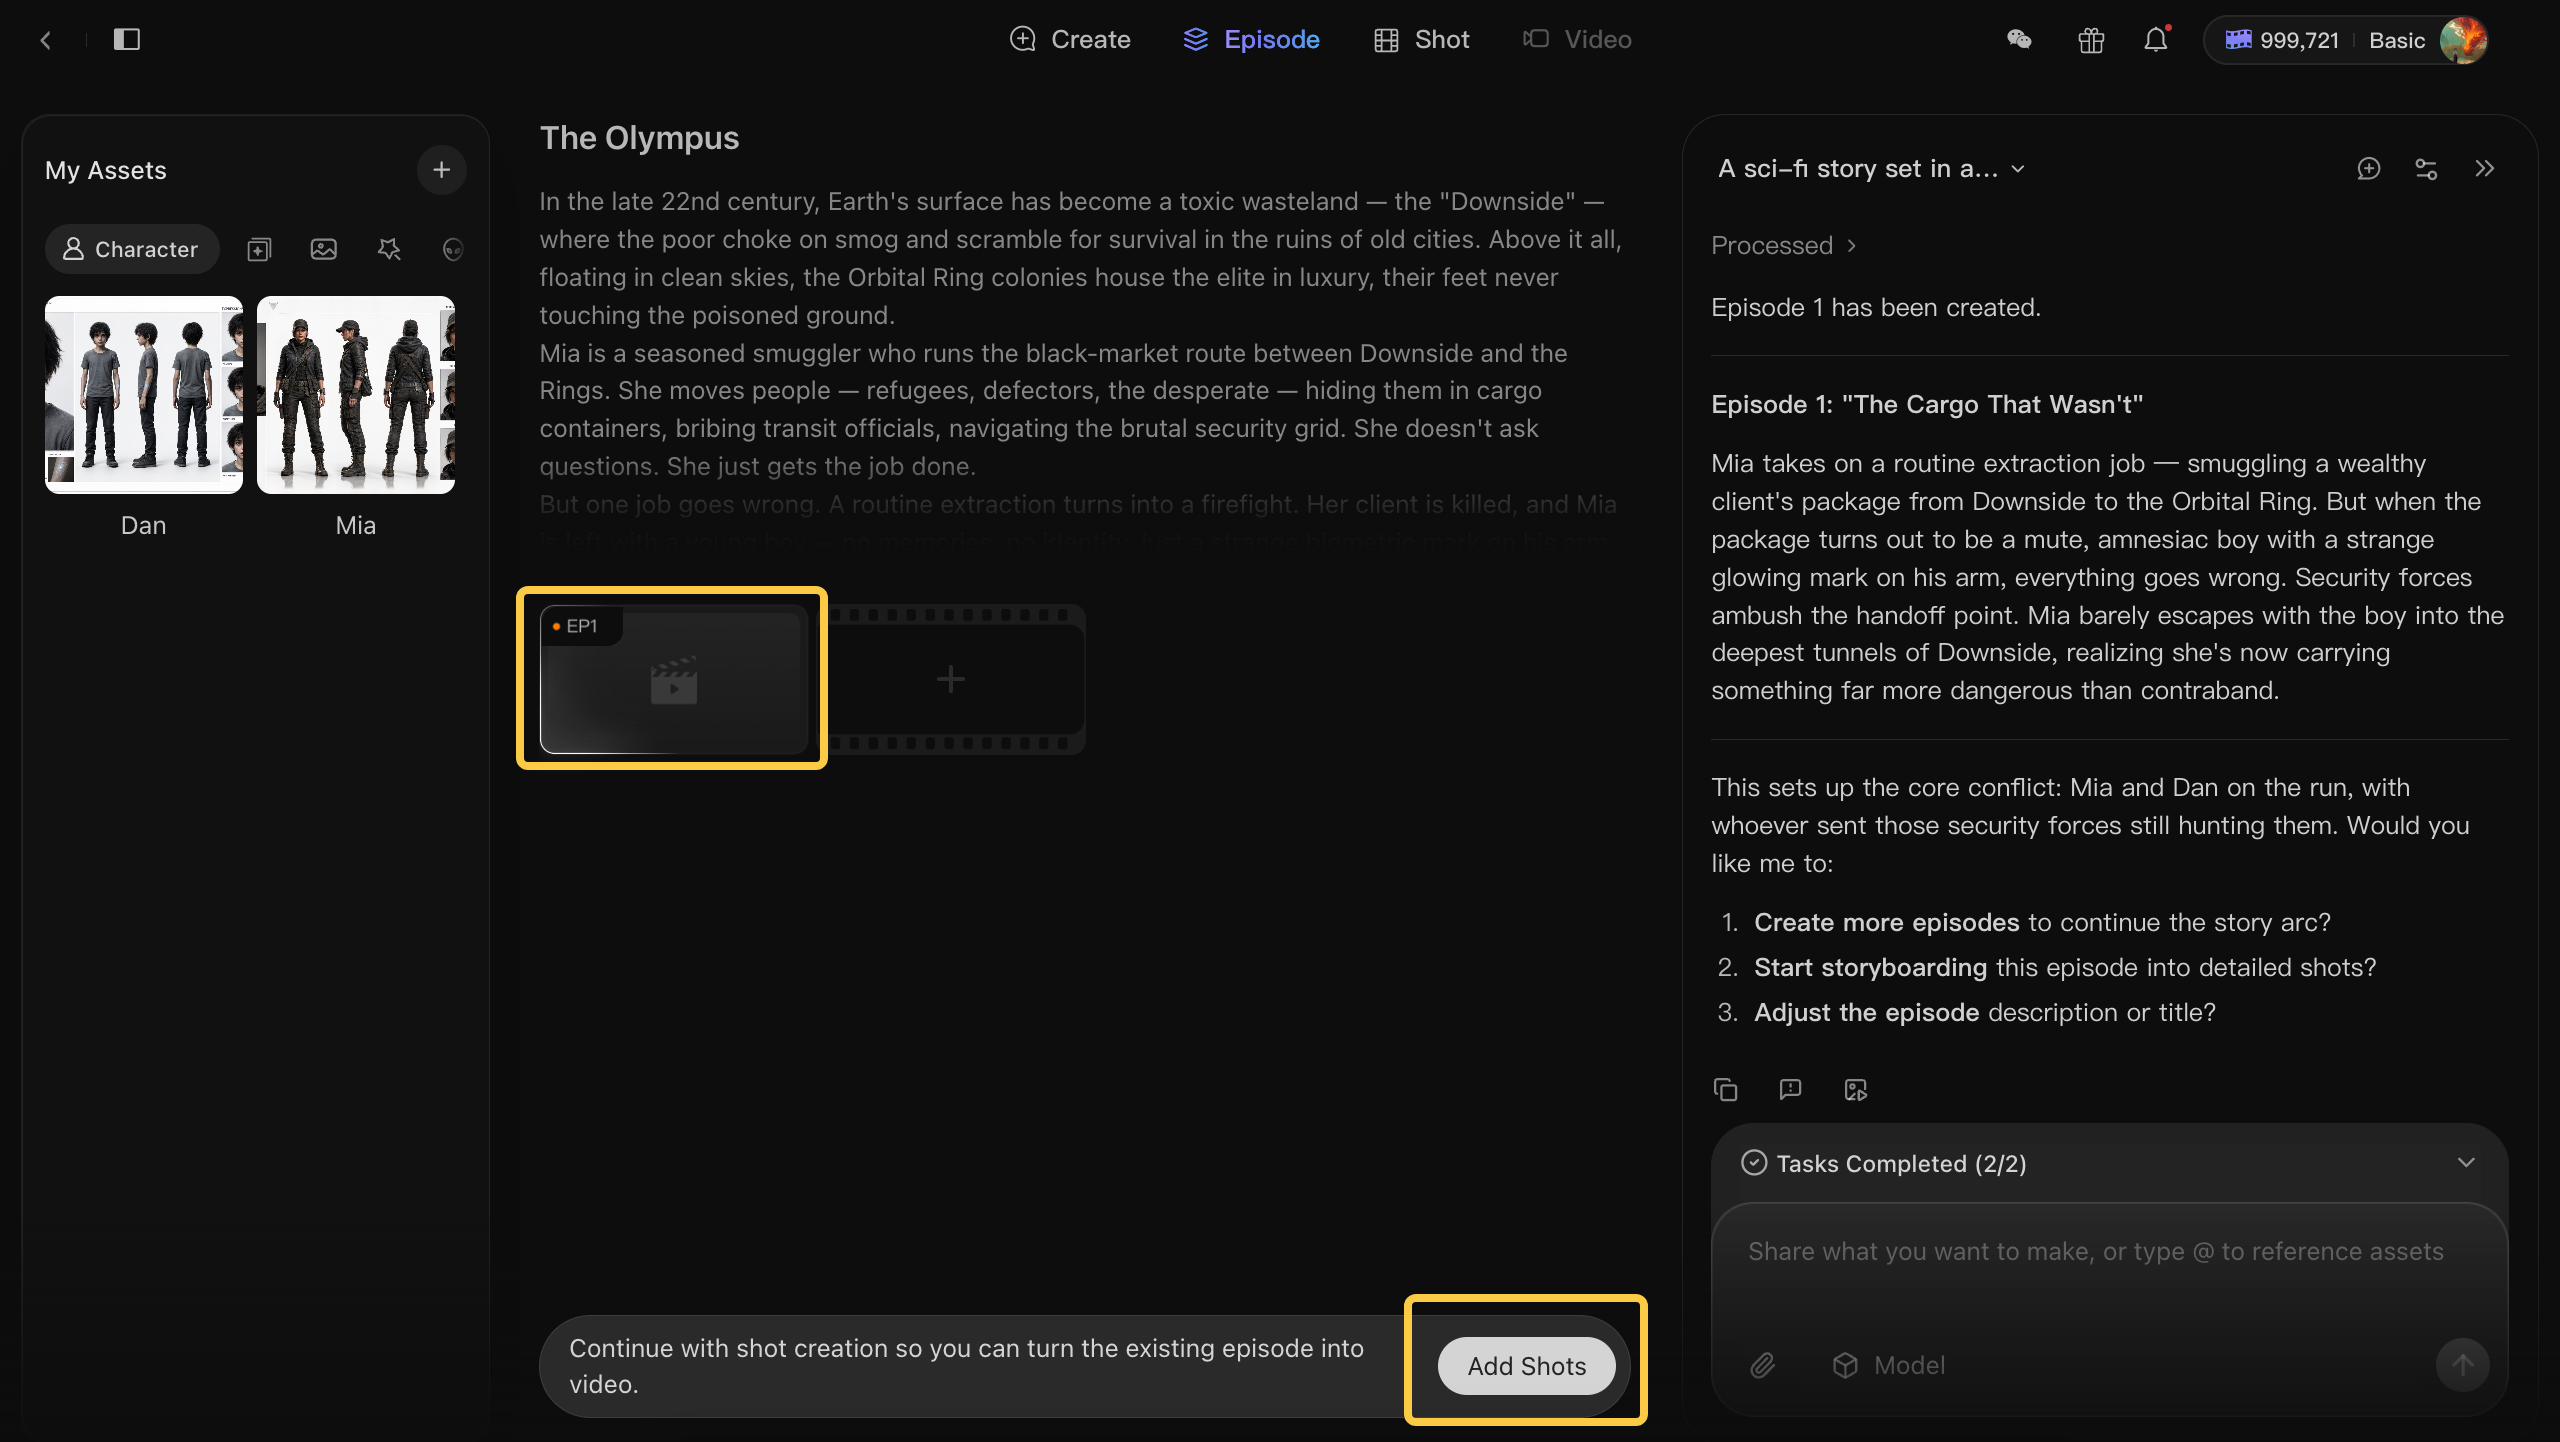
This is where your story moves into storyboard mode — plan the scenes, generate images, and turn the strongest shots into videos.
4. Add Visual Assets
Before generating shots, please set up the assets for your episode.
In My Assets, switch between asset types from the tabs at the top:
- Characters
- Scenes
- Props
- Visual References
Click any asset card to view or edit its details.
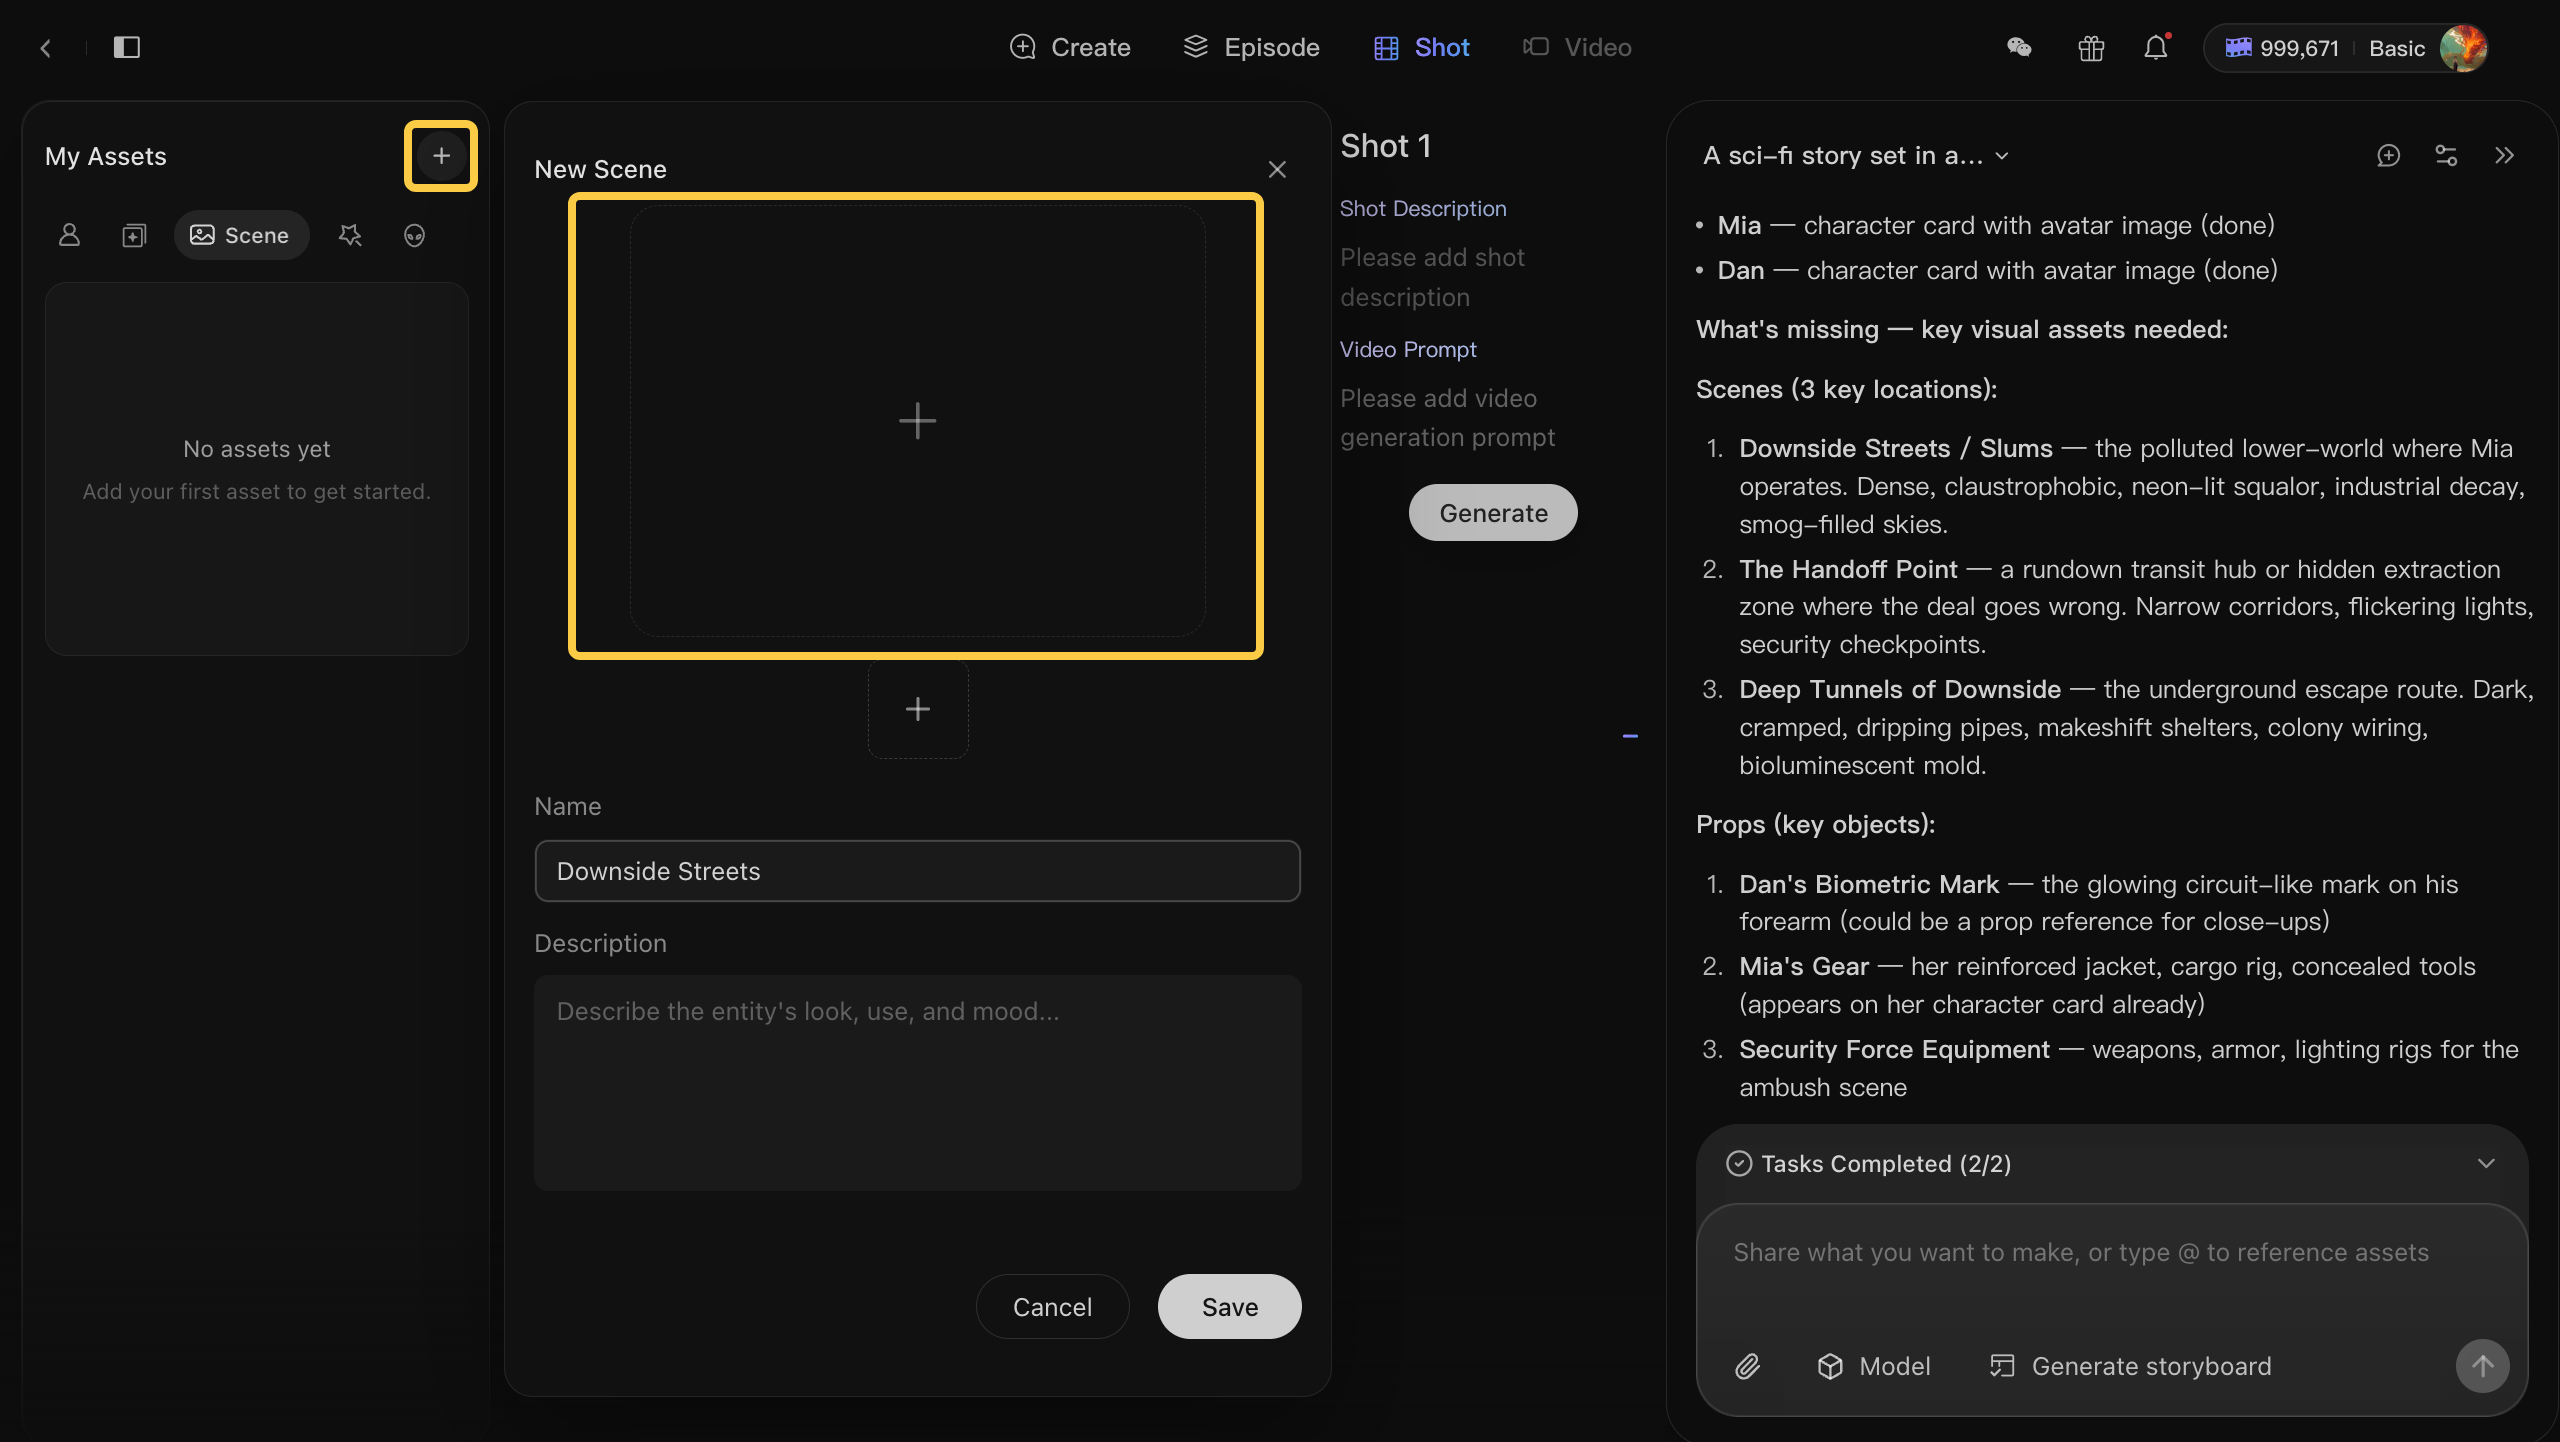
To add something new, click the + button in the top right, or ask the AI Chat Panel directly:
Create the Downside Streets.
To create an image reference, you can ask AI Assistant to generate one:
Create an image for the Downside Streets.
Or open an asset card, click + in the detail view, and upload an image from your computer.
These assets become the visual foundation for your storyboard, helping characters, locations, props, and style stay consistent across the episode.
5. Smart Shot Planning for Episodes
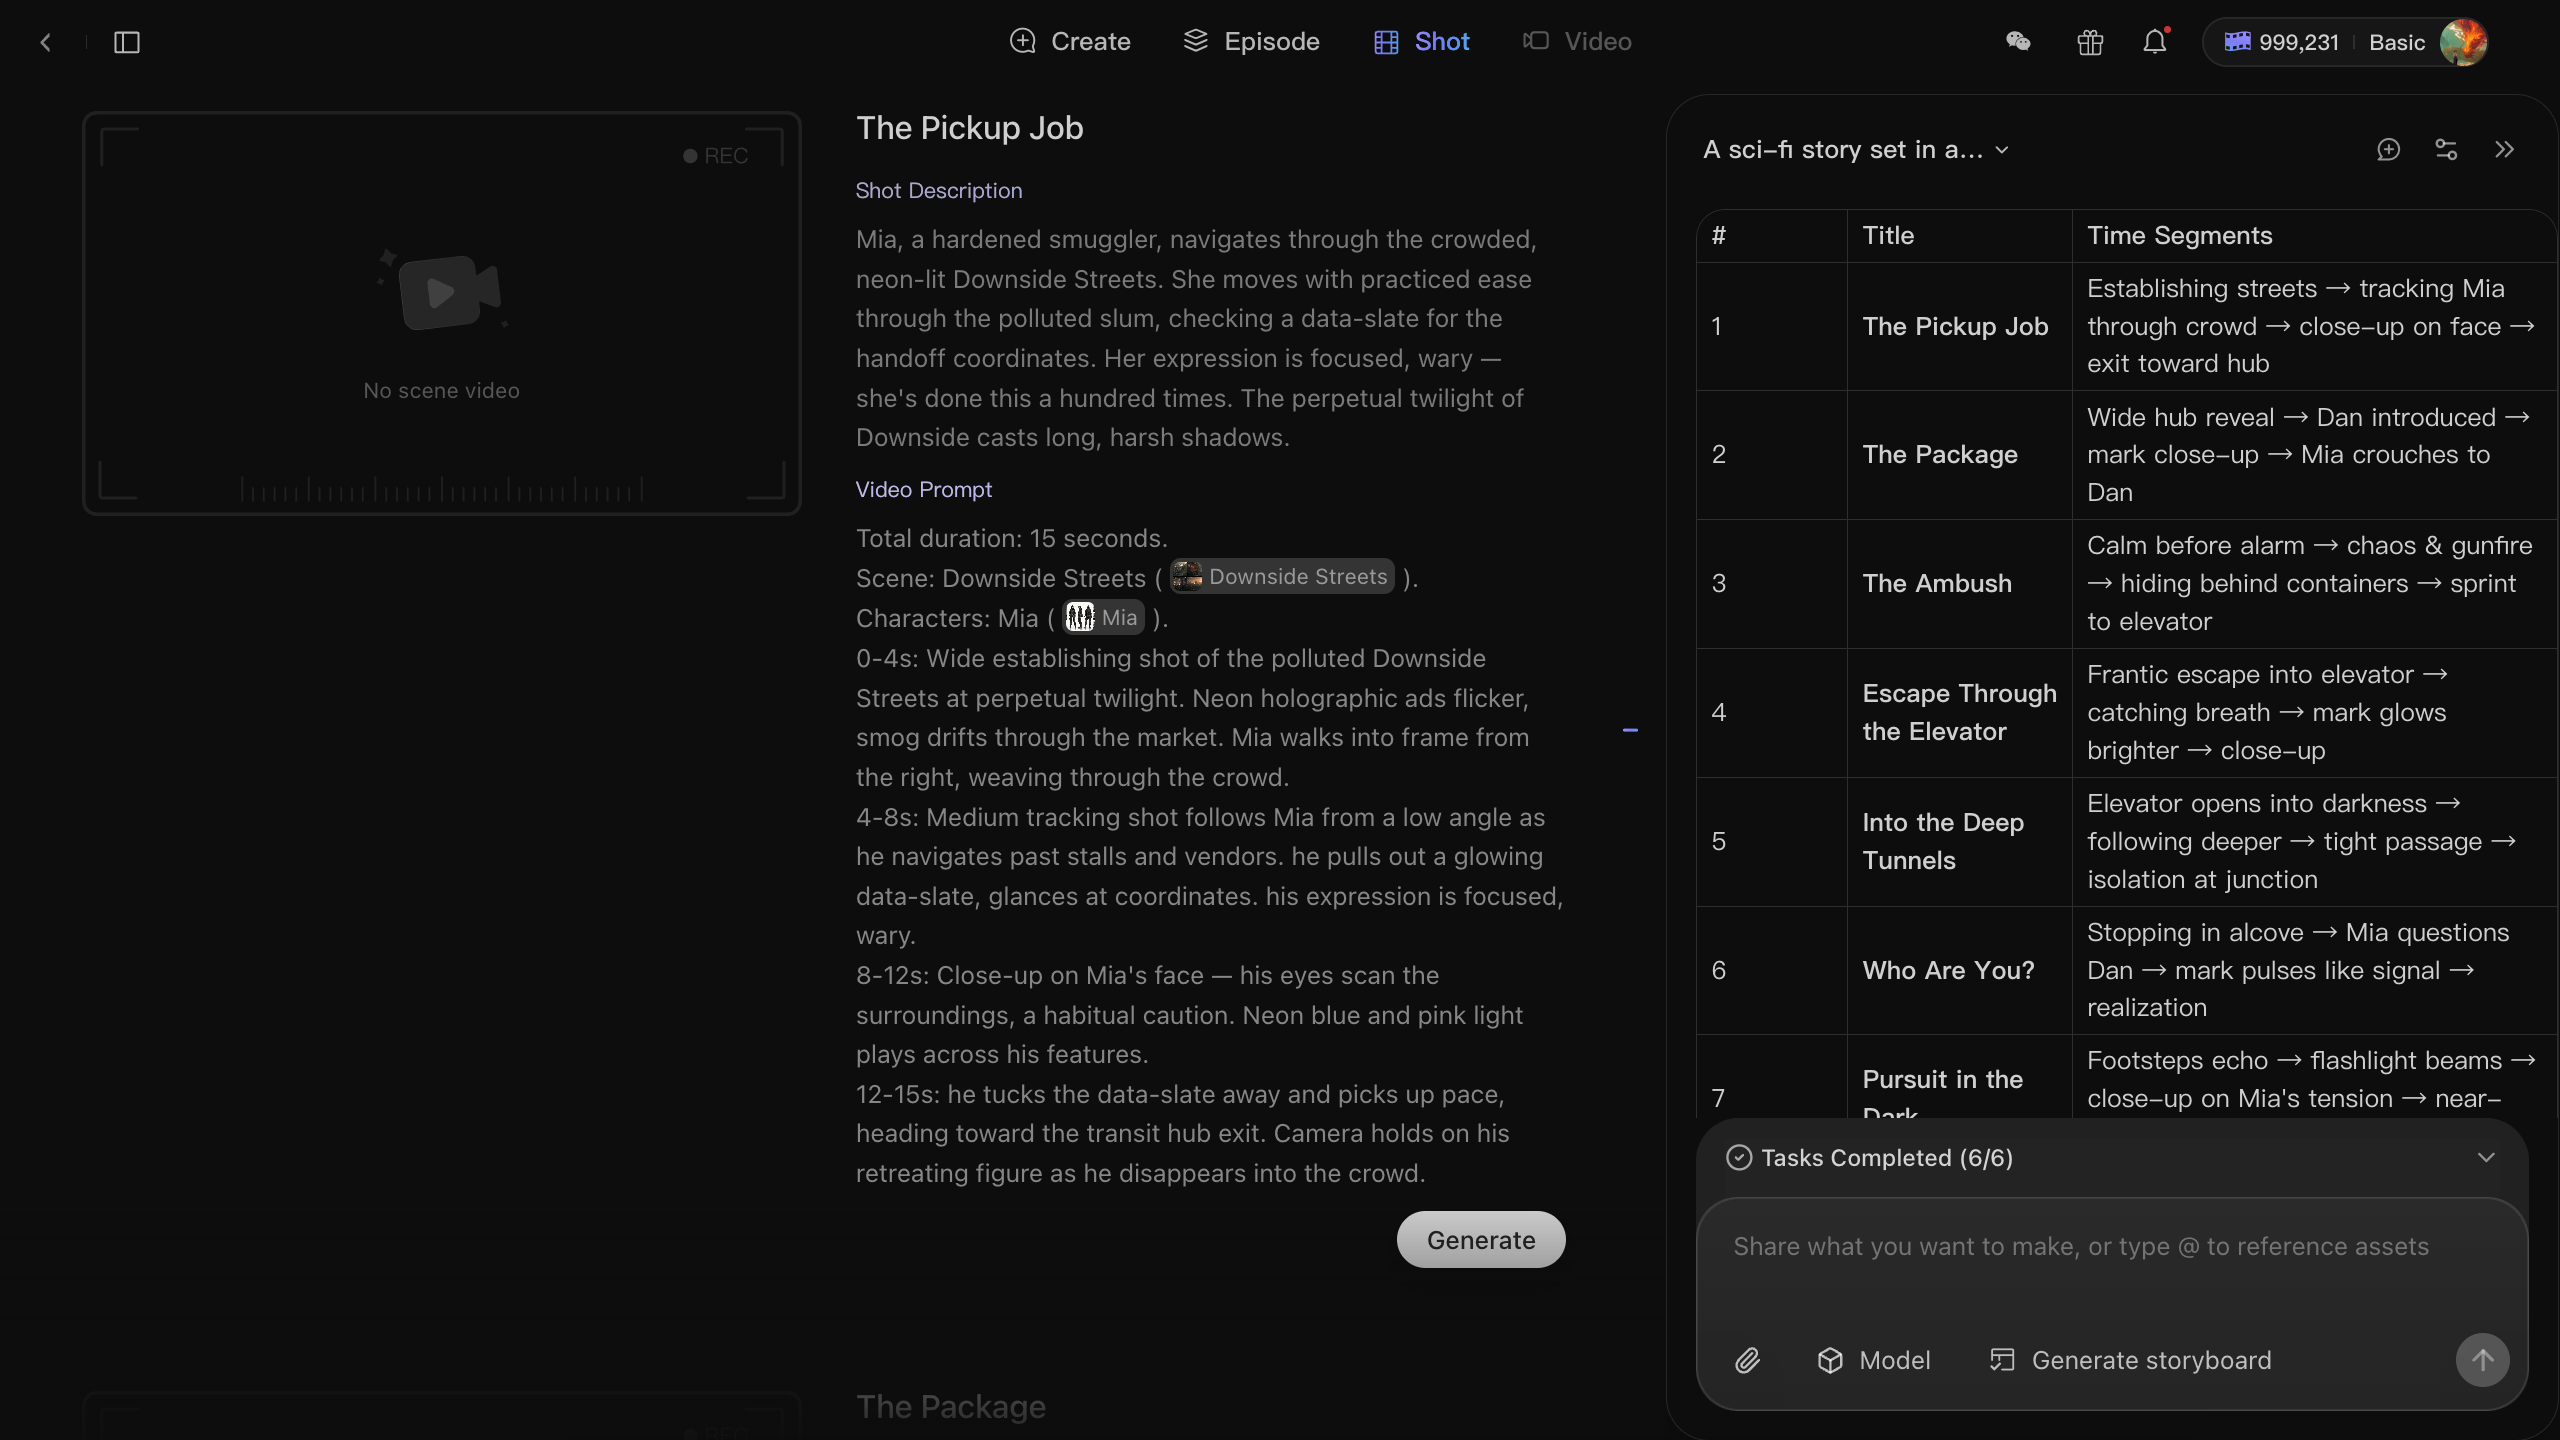
You’re now on the Shot page. Each shot card is editable and includes two key fields:
- Shot Description — the story beat for this shot
- Video Prompt — the prompt used for video generation
Two ways to build your shots
1. Edit manually Click any shot card to edit the description or video prompt. Hover over the bottom-right expand icon to view more details.

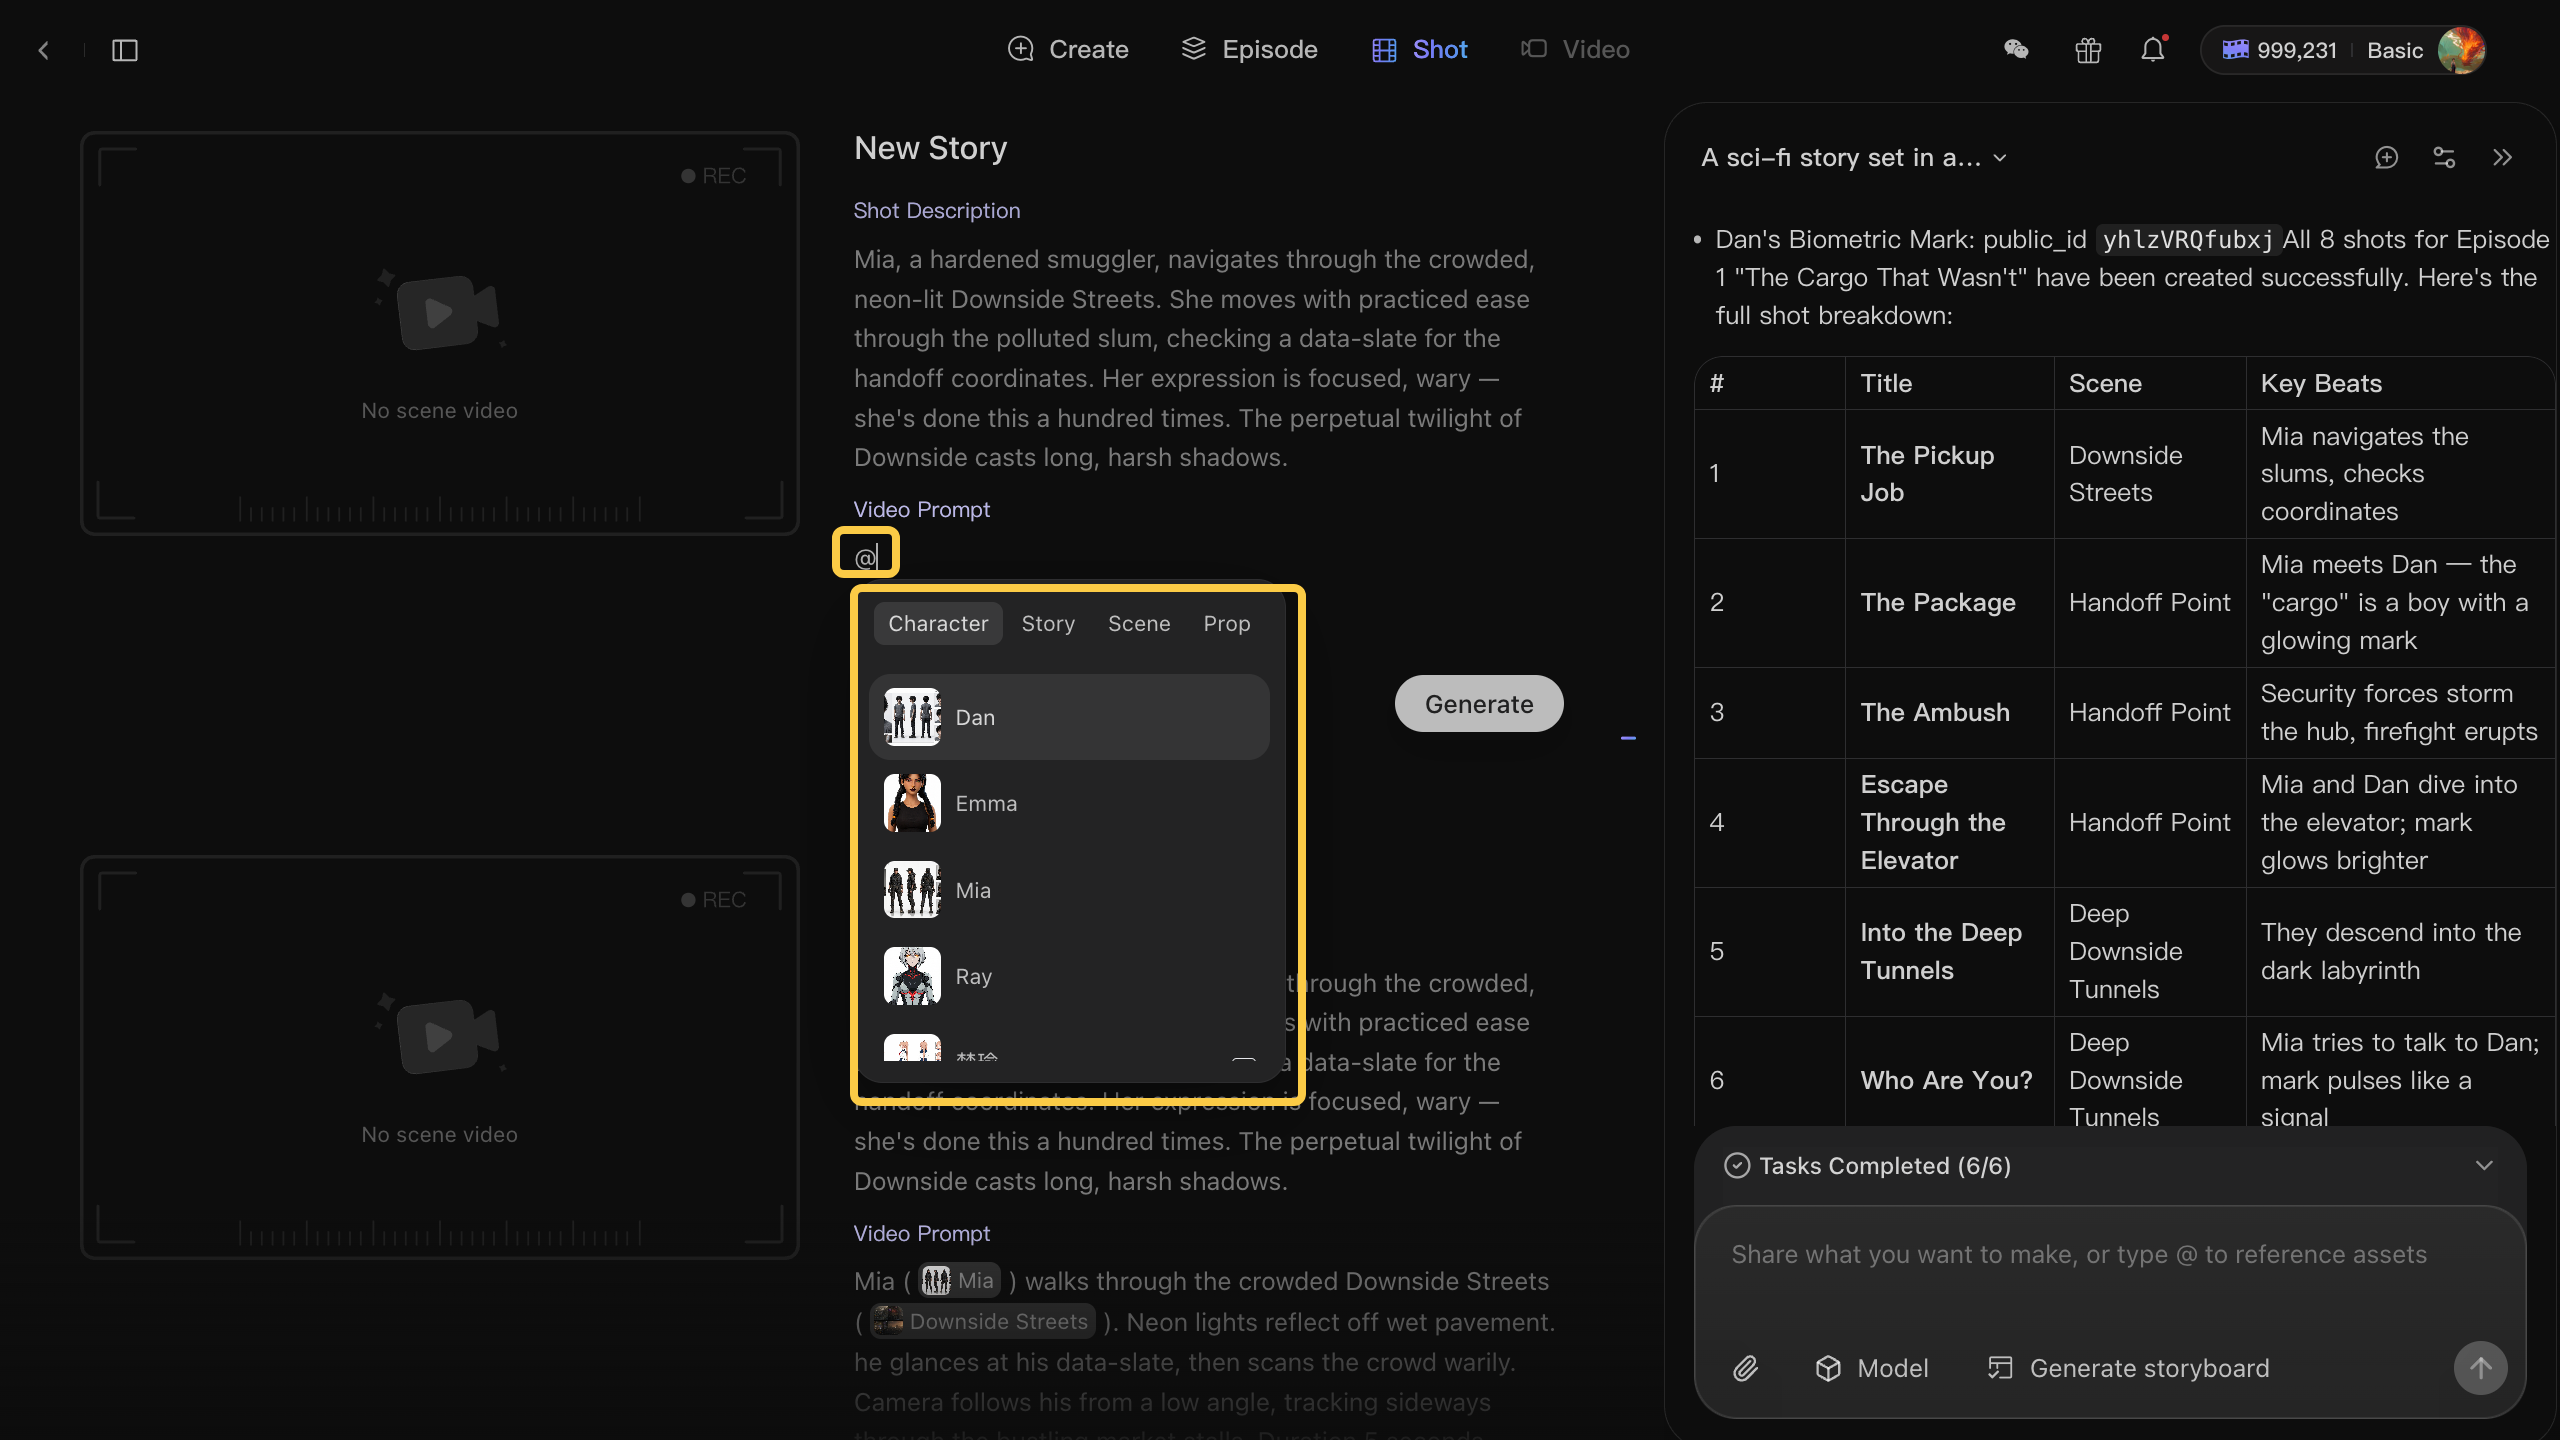
Use @ mentions to reference assets you’ve already created, such as characters, scenes, or props.
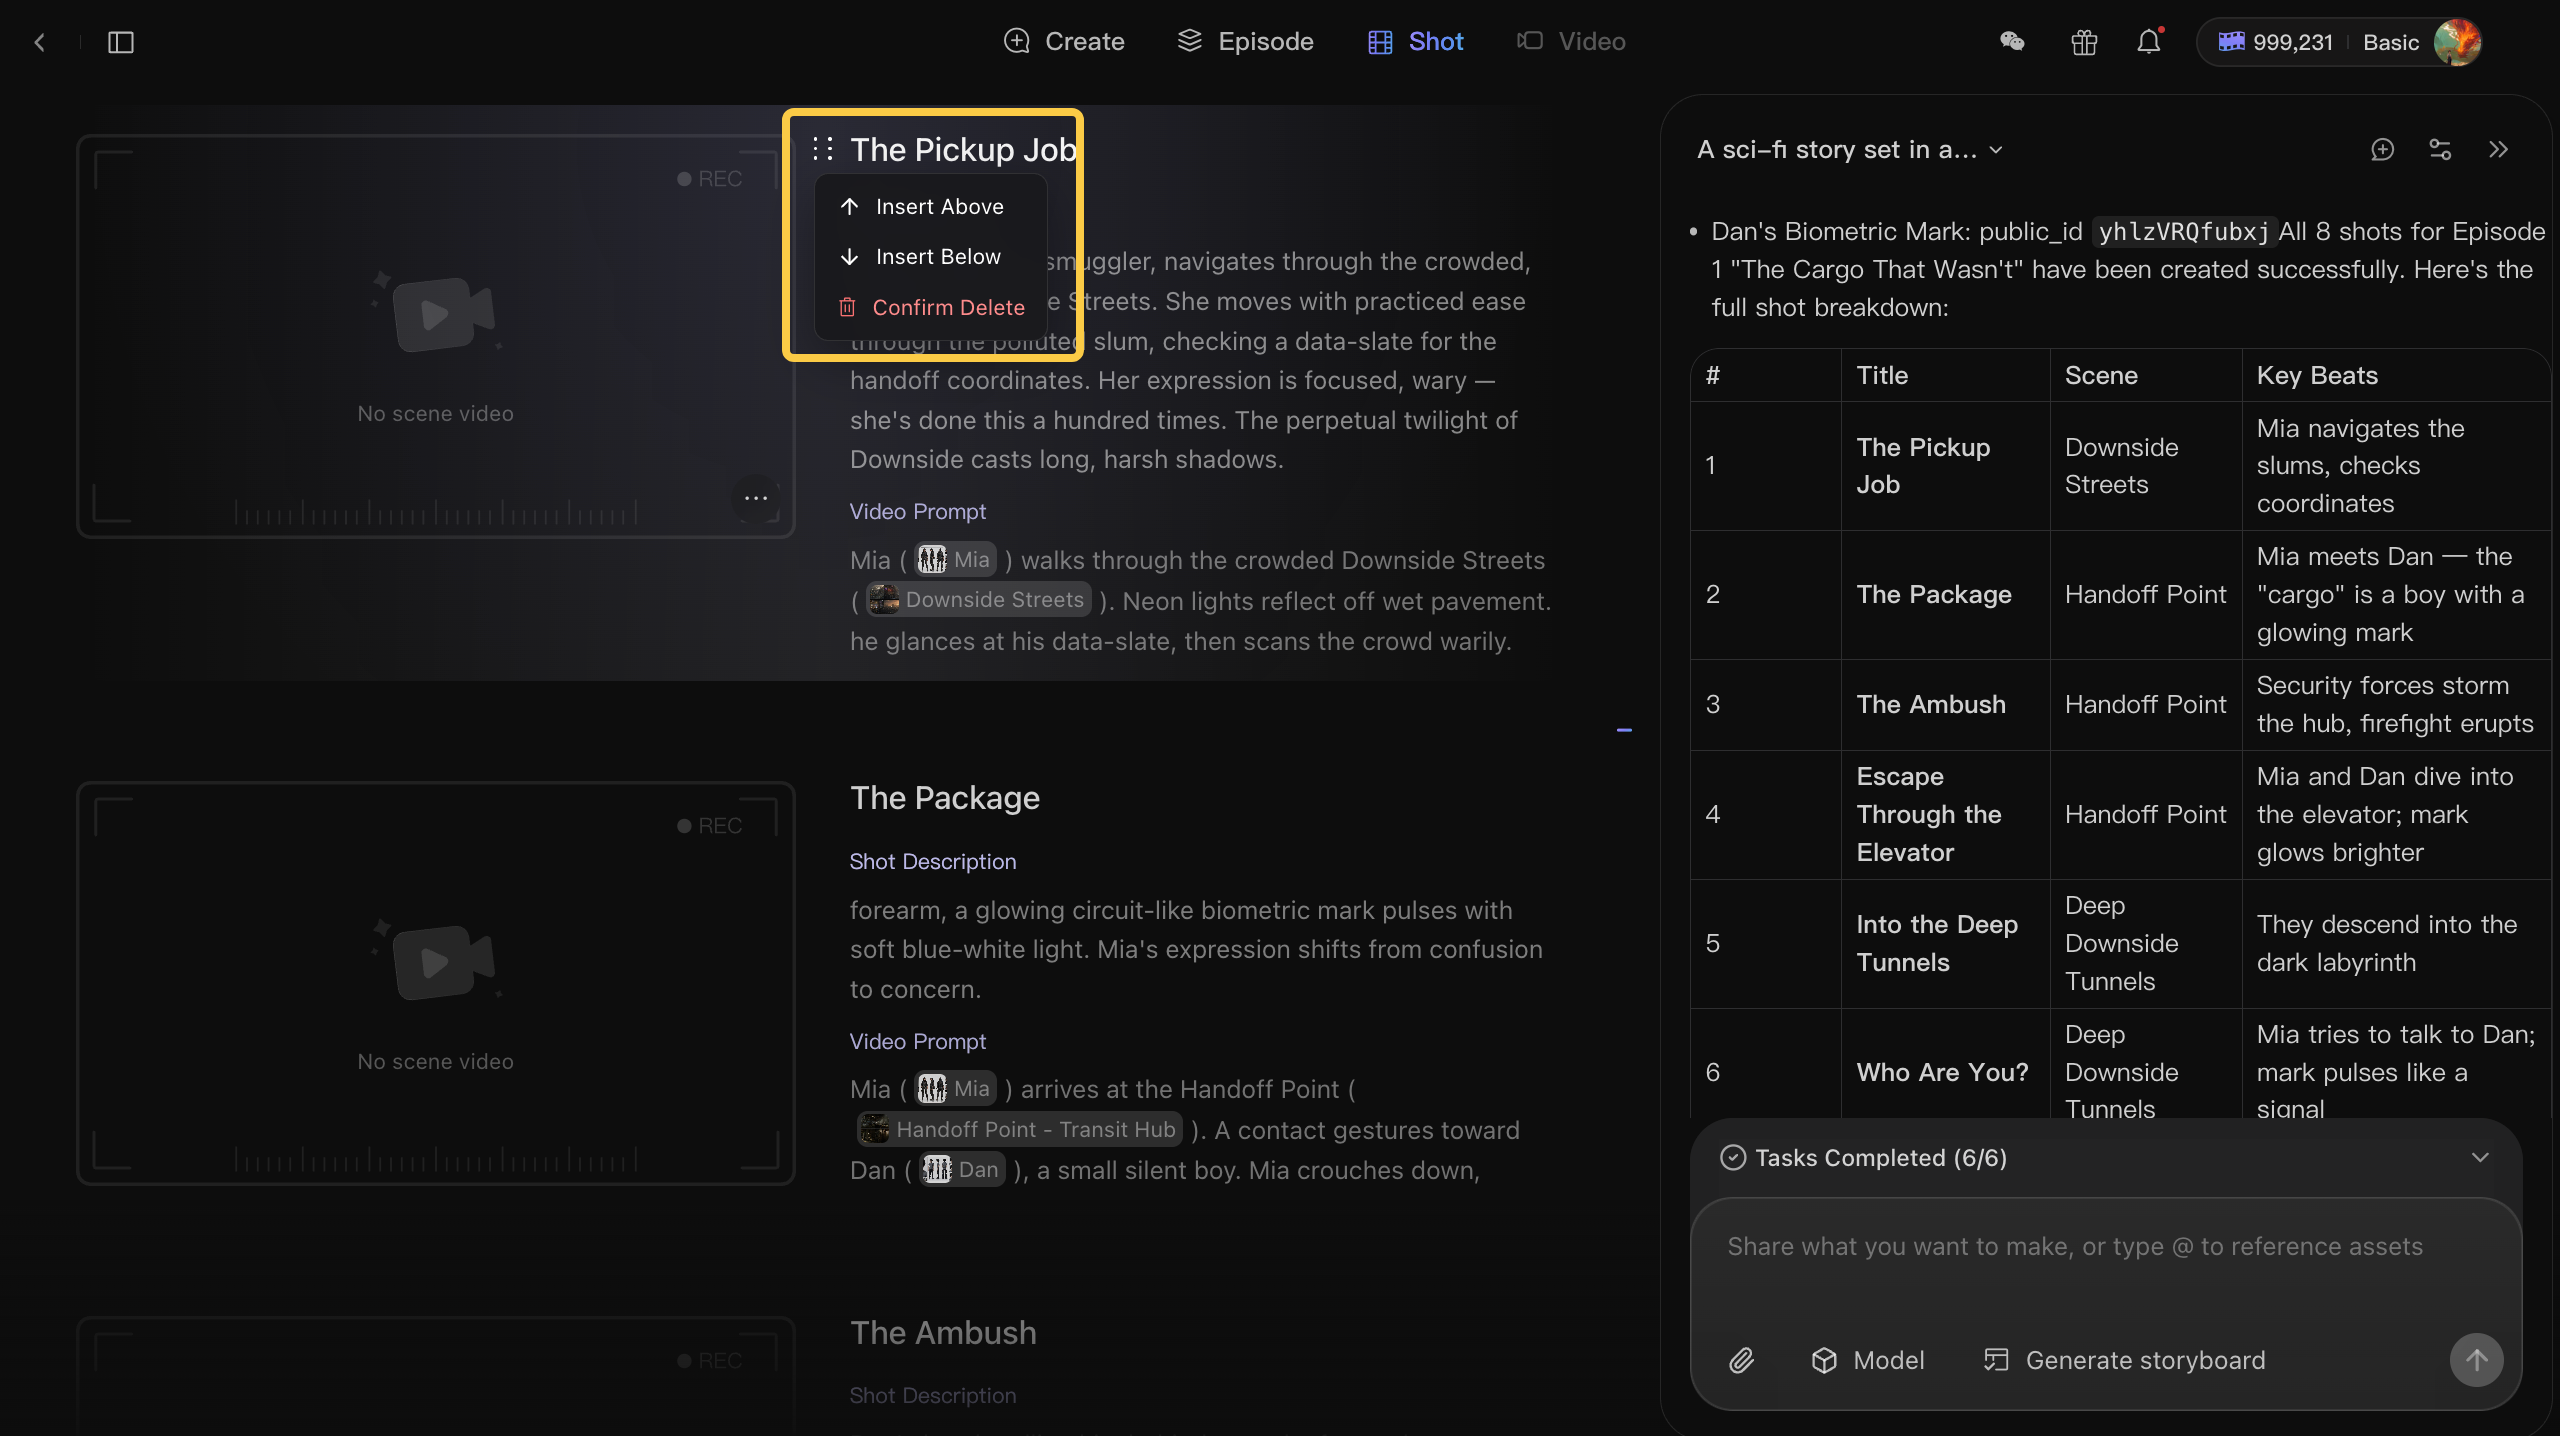
Use the six-dot handle at the top left to drag the card, or add a blank shot above or below.
2. Smart Shot Planning with AI Ask the AI Assistant in the AI Chat Panel to create the full shot list for you:
Create all shots for Episode 1.
AI Assistant will fill the storyboard with shot descriptions and video prompts.
You can edit the card directly or ask the assistant to revise it:
Update Shot 1 video prompt, change the camera to a slow push-in and make the mood more tense.
Update Shot 3 video prompt, set the duration to 5 seconds.
6. Generate Videos From Your Shots
Your shots are ready. Now make them move.
Generate your way
Click Generate Use the Generate button on any shot card to create a video for that shot directly. By default, each generated video is 15 seconds long.
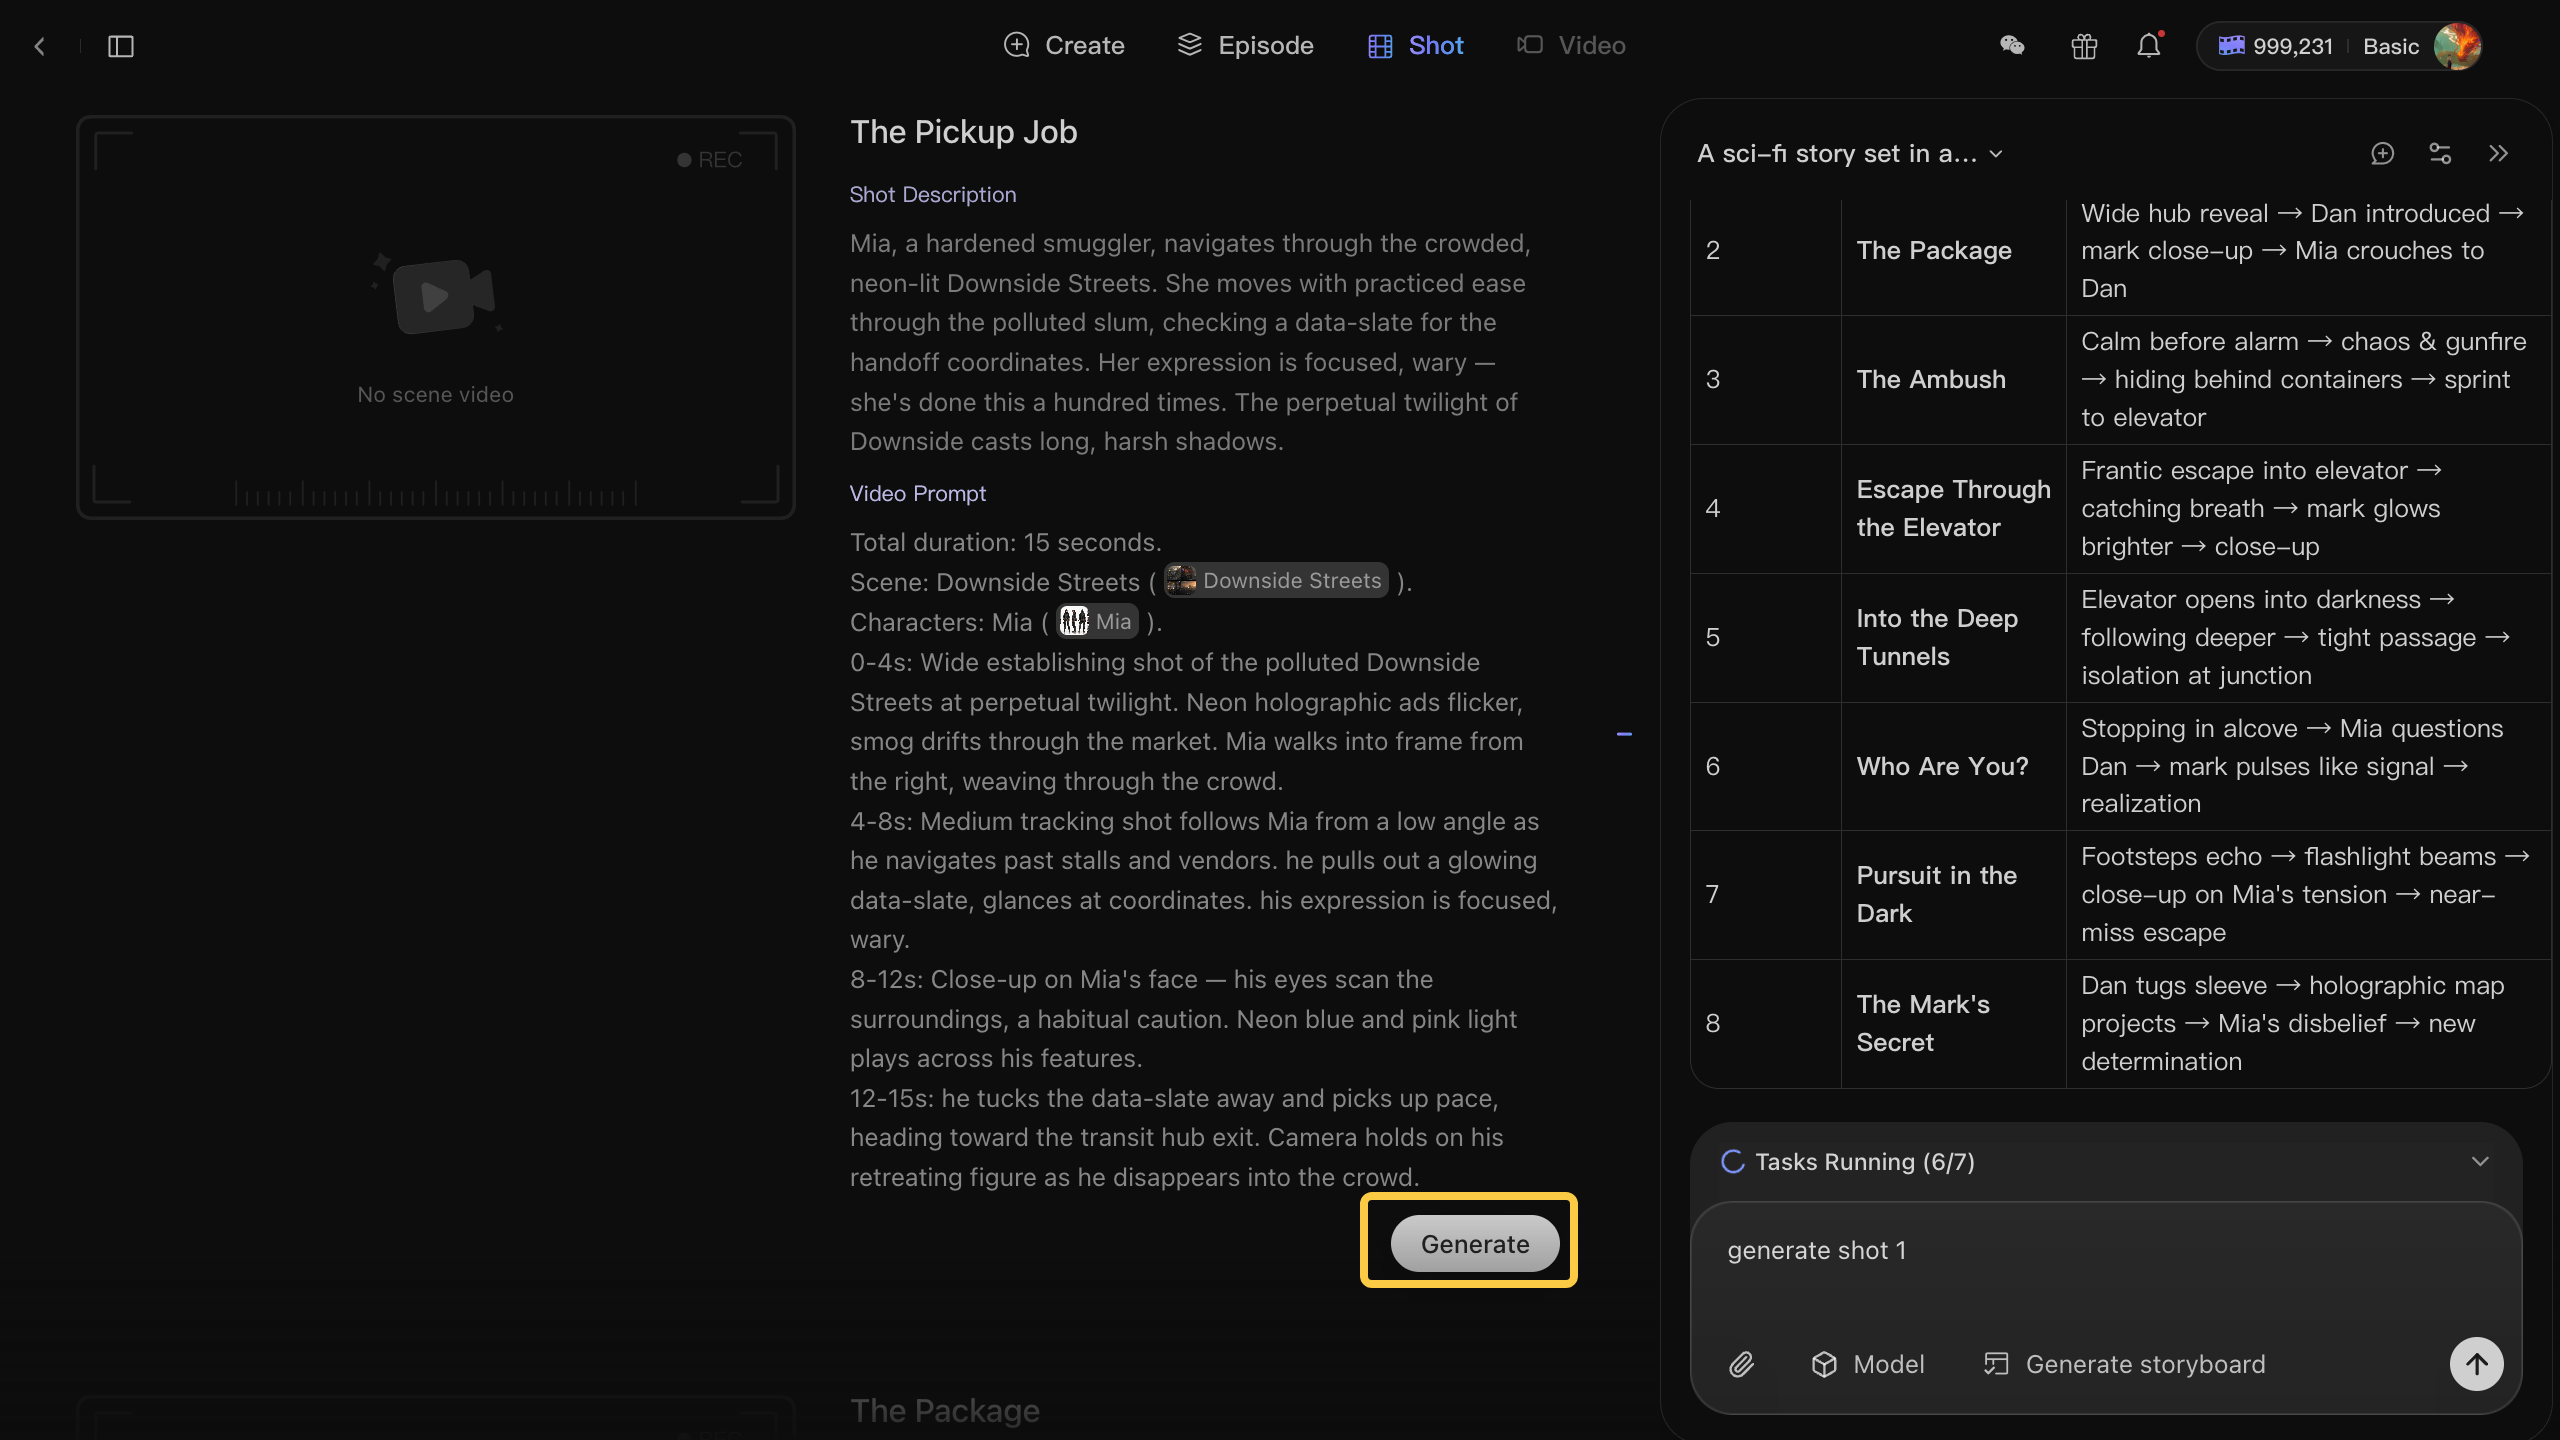
Ask the assistant You can also generate videos from the AI Chat Panel:
Generate video for Shot 1. Generate videos for Shots 1, 2, and 3. Generate all shot videos for this episode.
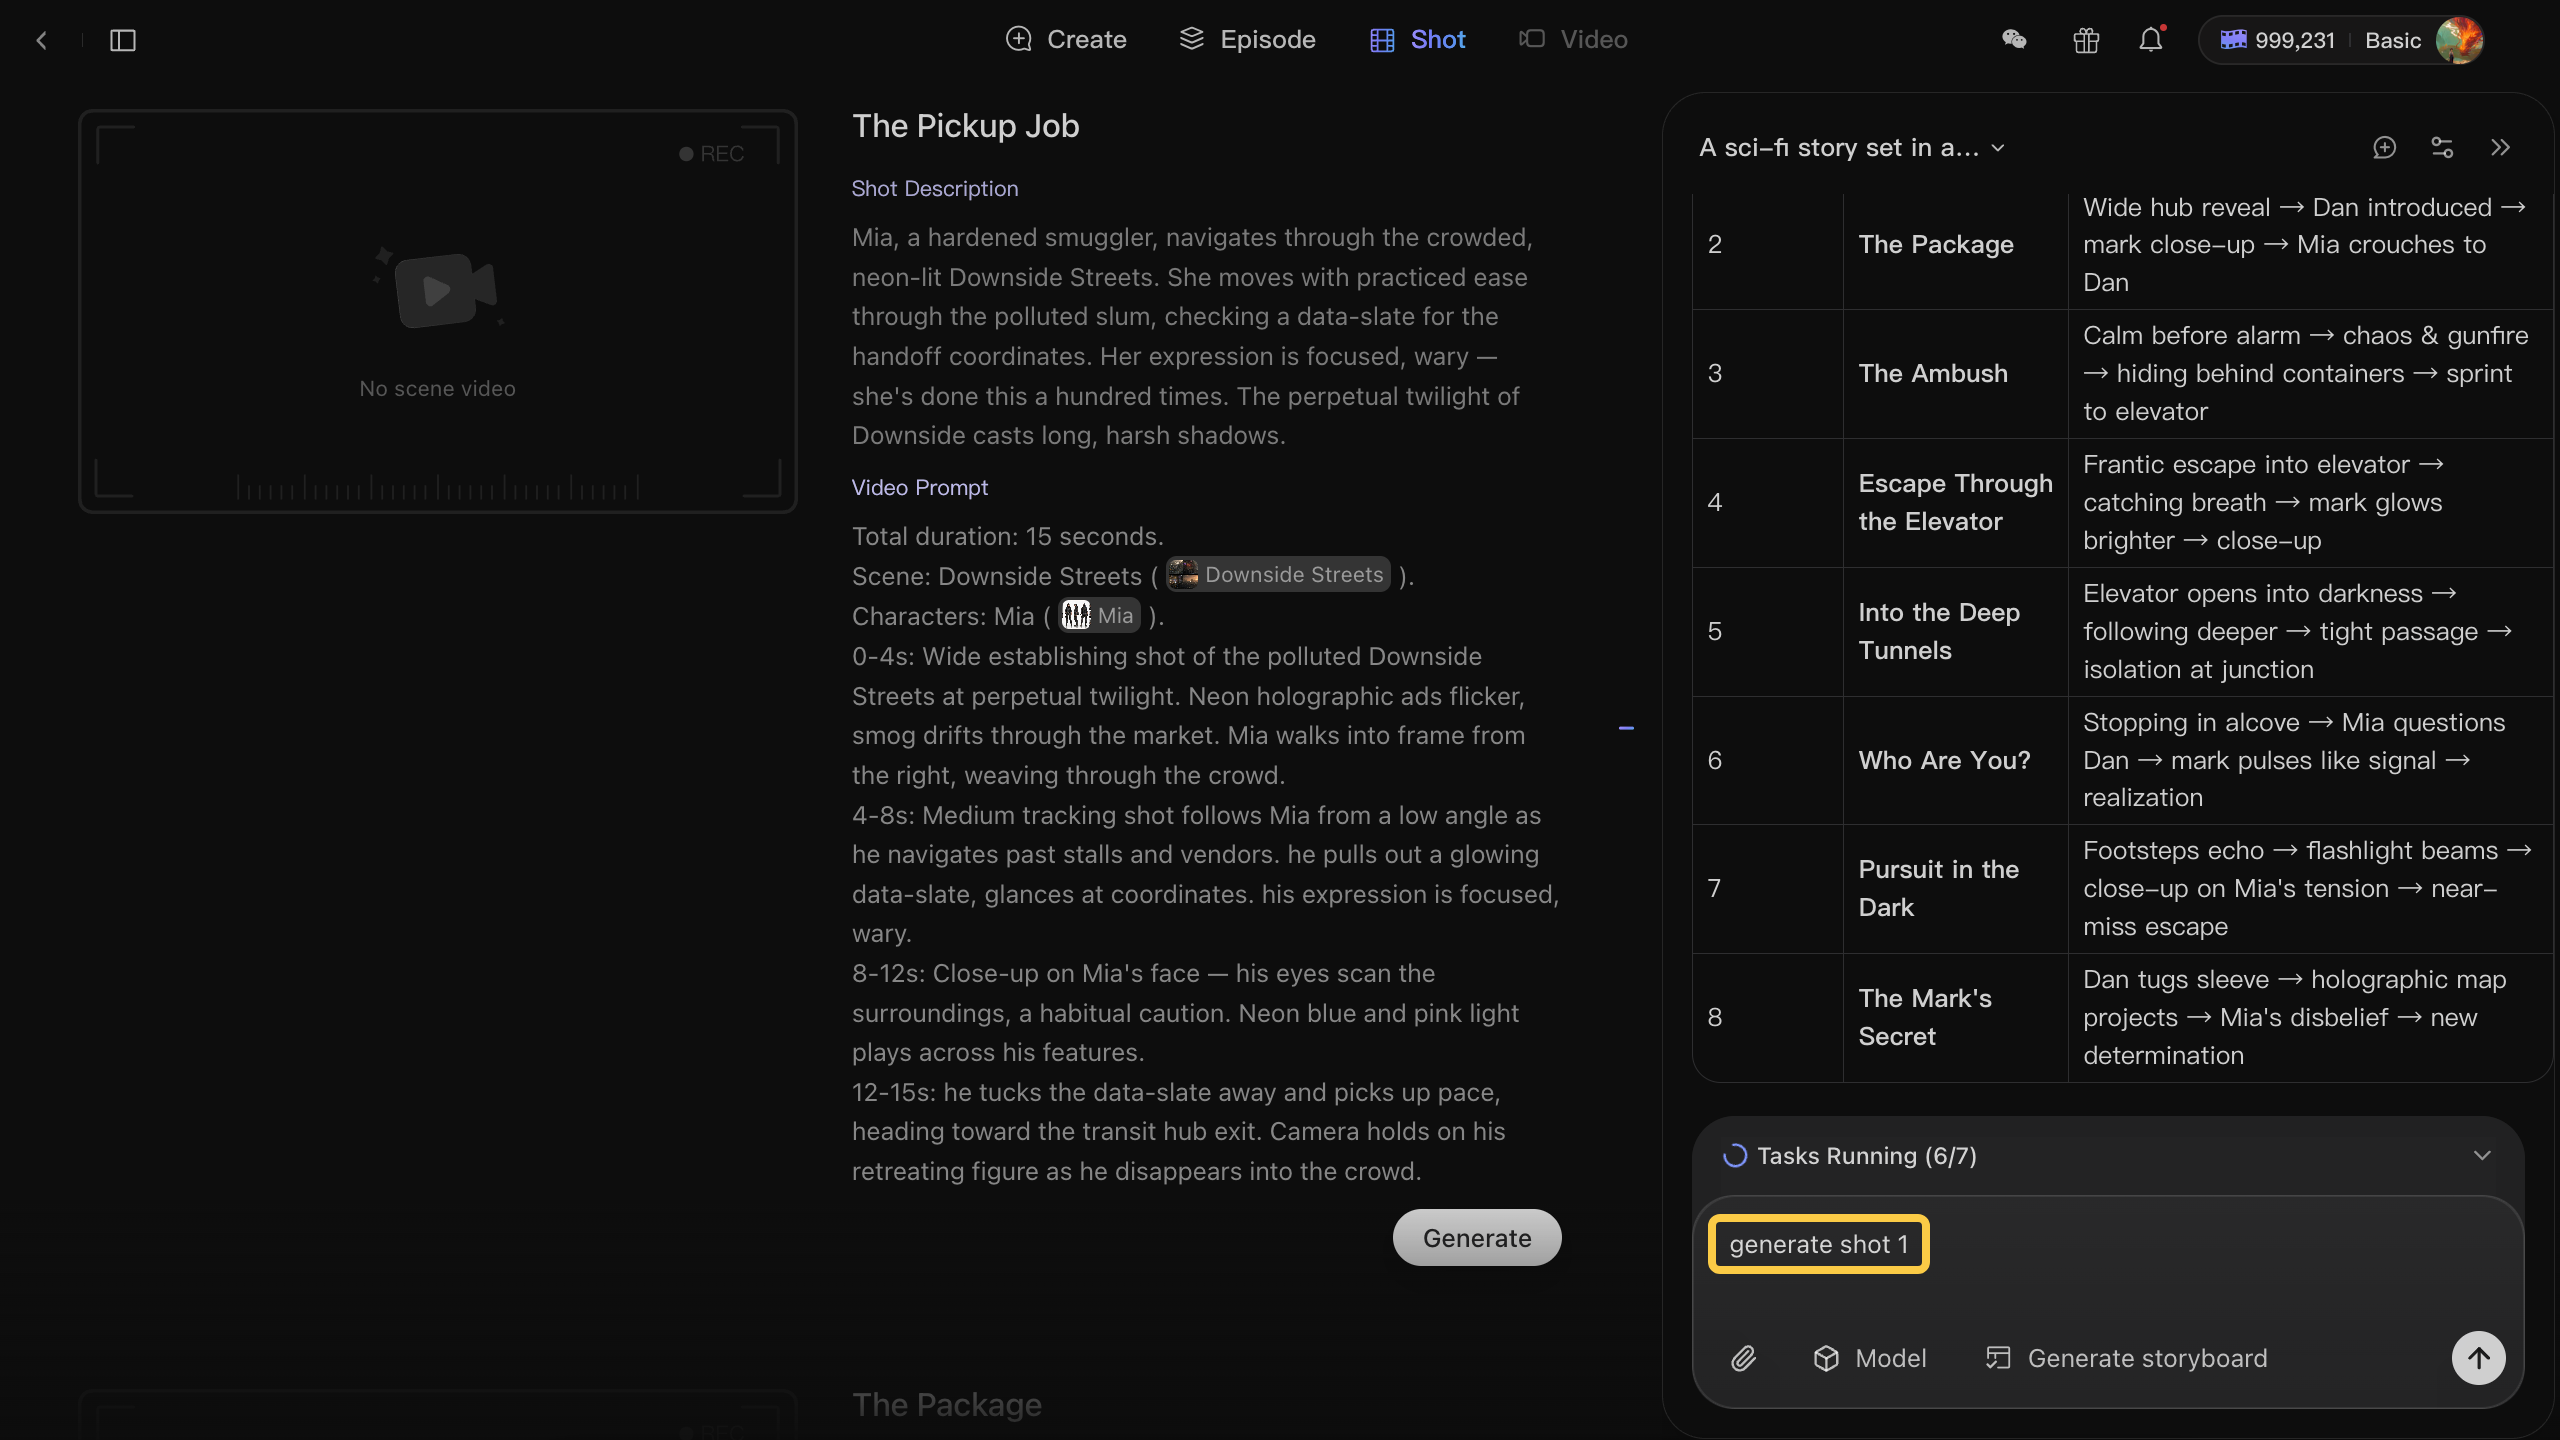
AI Assistant supports multiple video jobs at the same time. You can open the Task Panel above the input box to track every media task in progress.
When a video is ready, it appears in the preview area on the left side of the shot card. Click it to open a larger view and review the result.
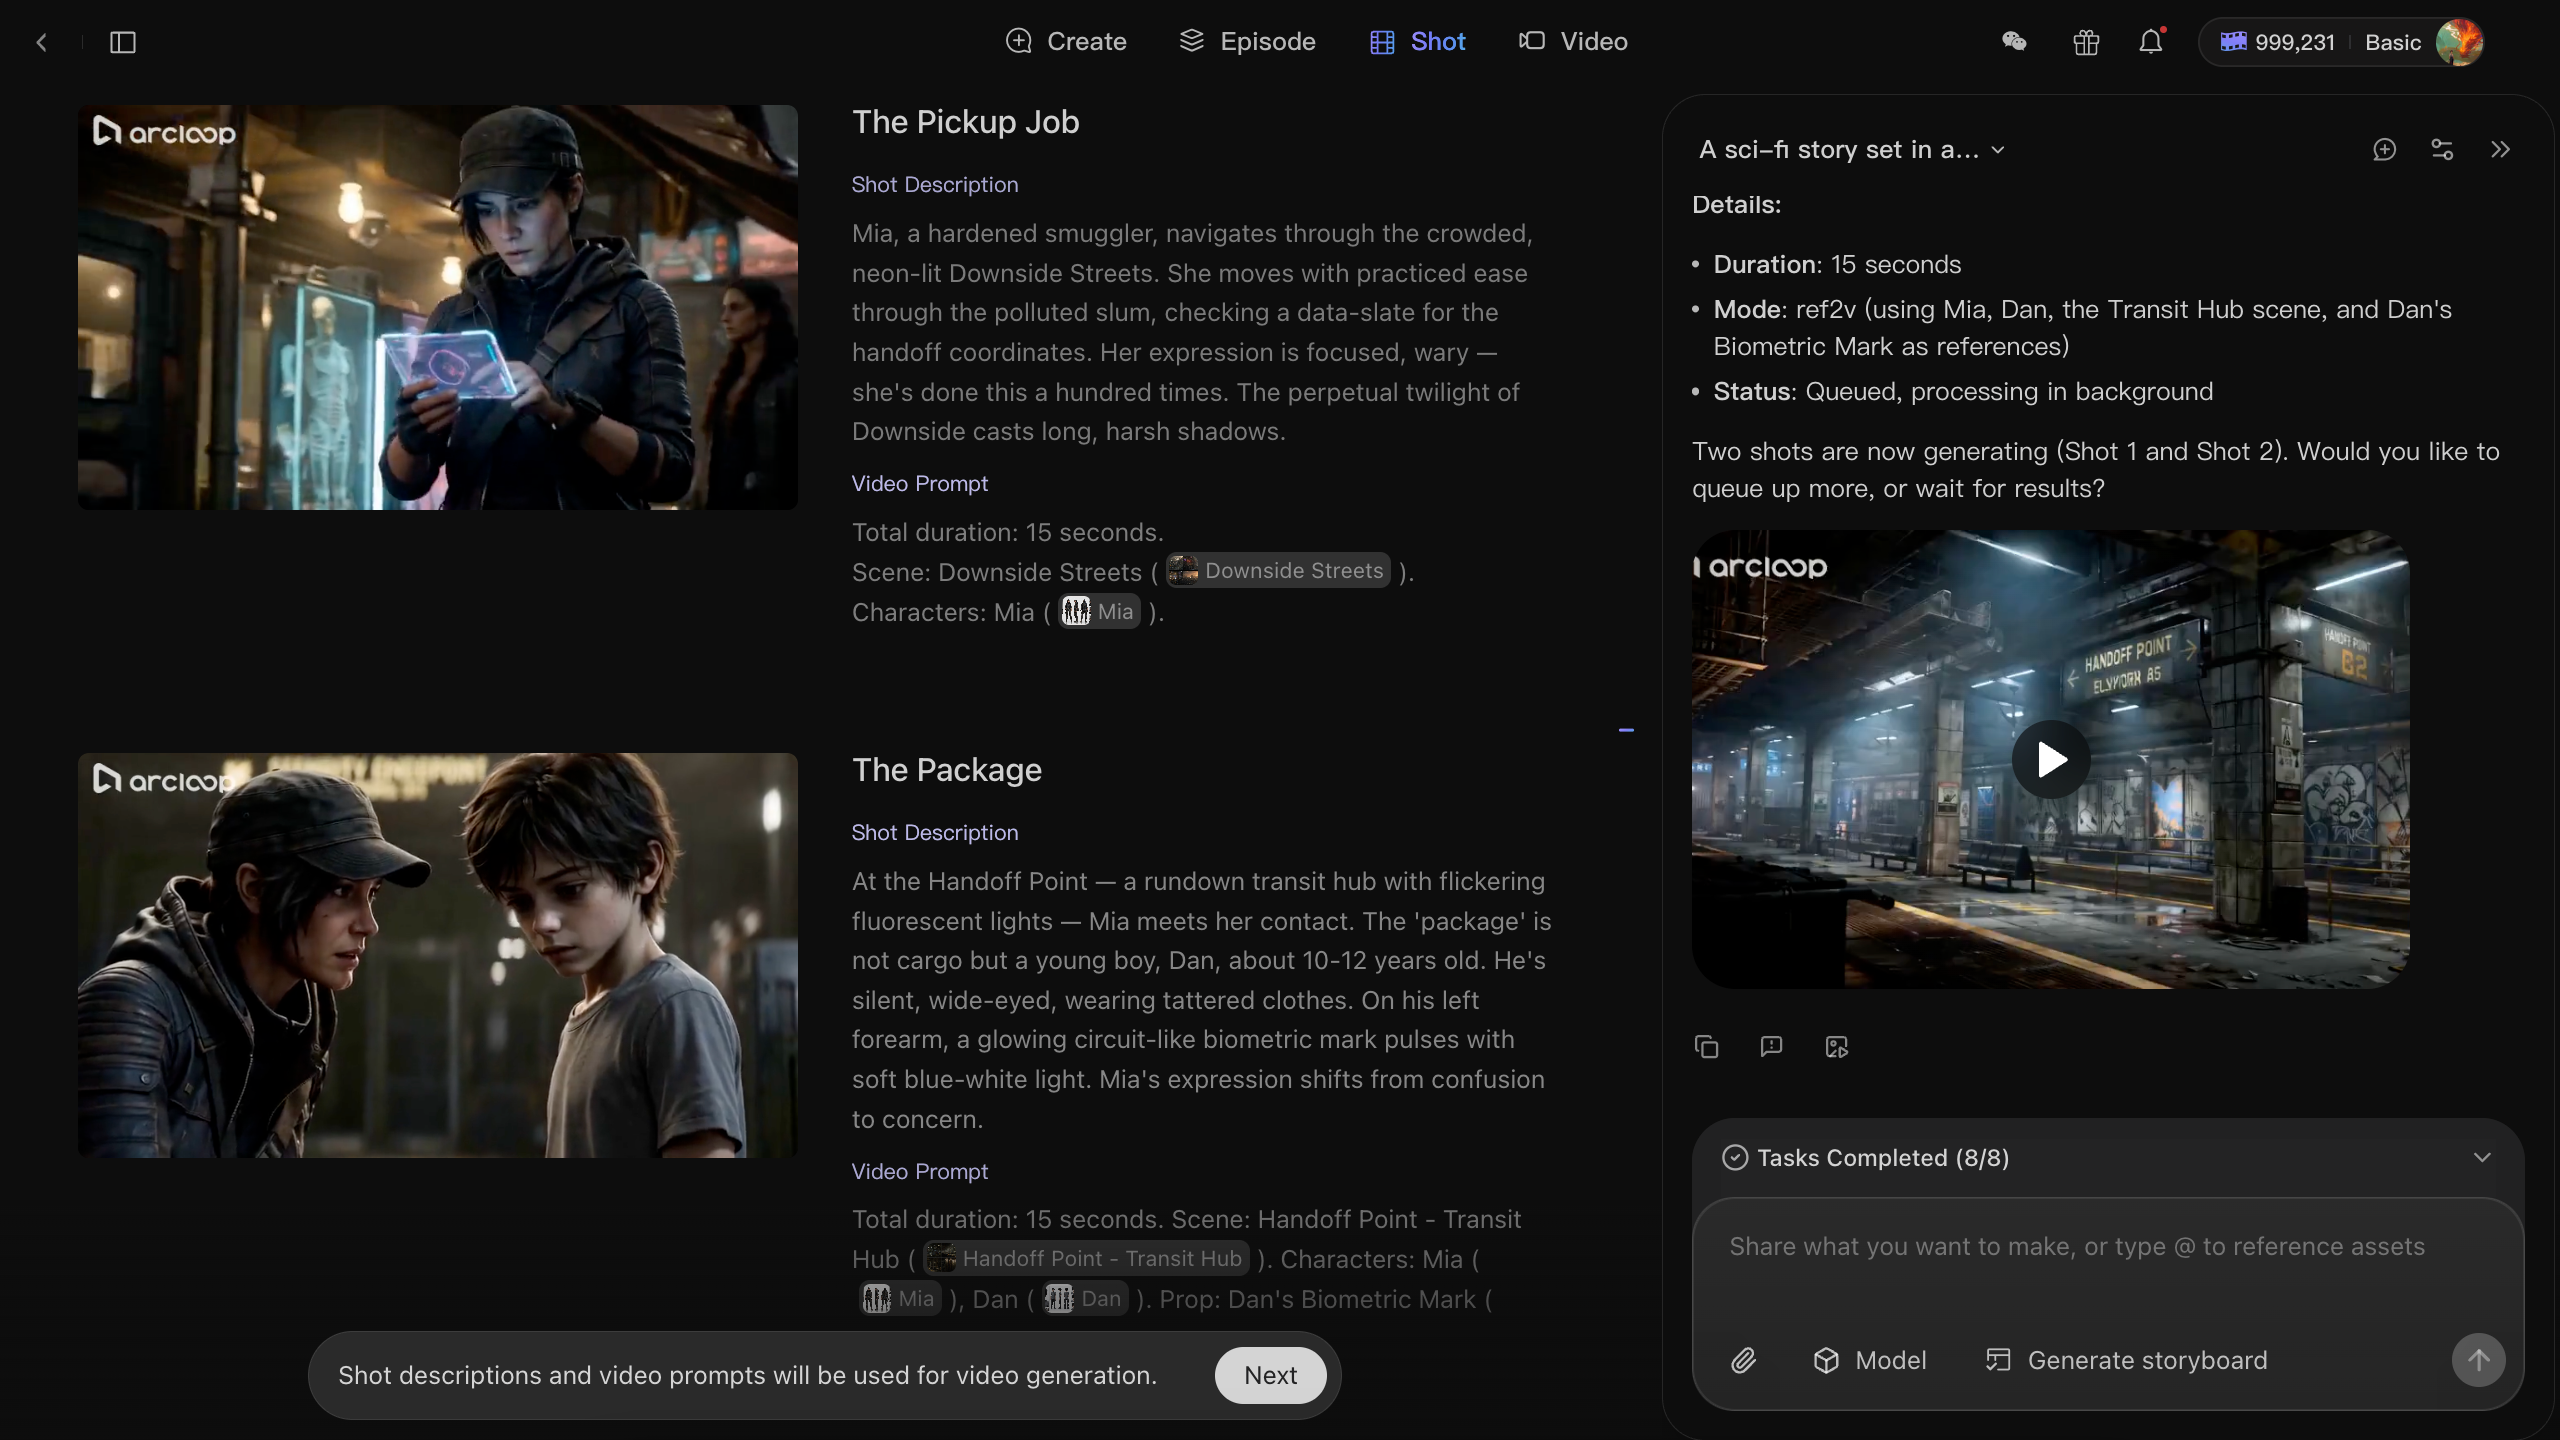
Want a better take? Update the Video Prompt manually or ask the assistant to revise the shot.
7. Edit the Final Episode
On the Edit Page, bring your generated clips together and shape the final cut.
-
Reorder and trim clips — get the pacing and flow just right.
-
Add character dialogue — type lines to generate voice audio and place it on the timeline; scenes feel alive.
-
Add background music — set the mood and enhance the atmosphere.
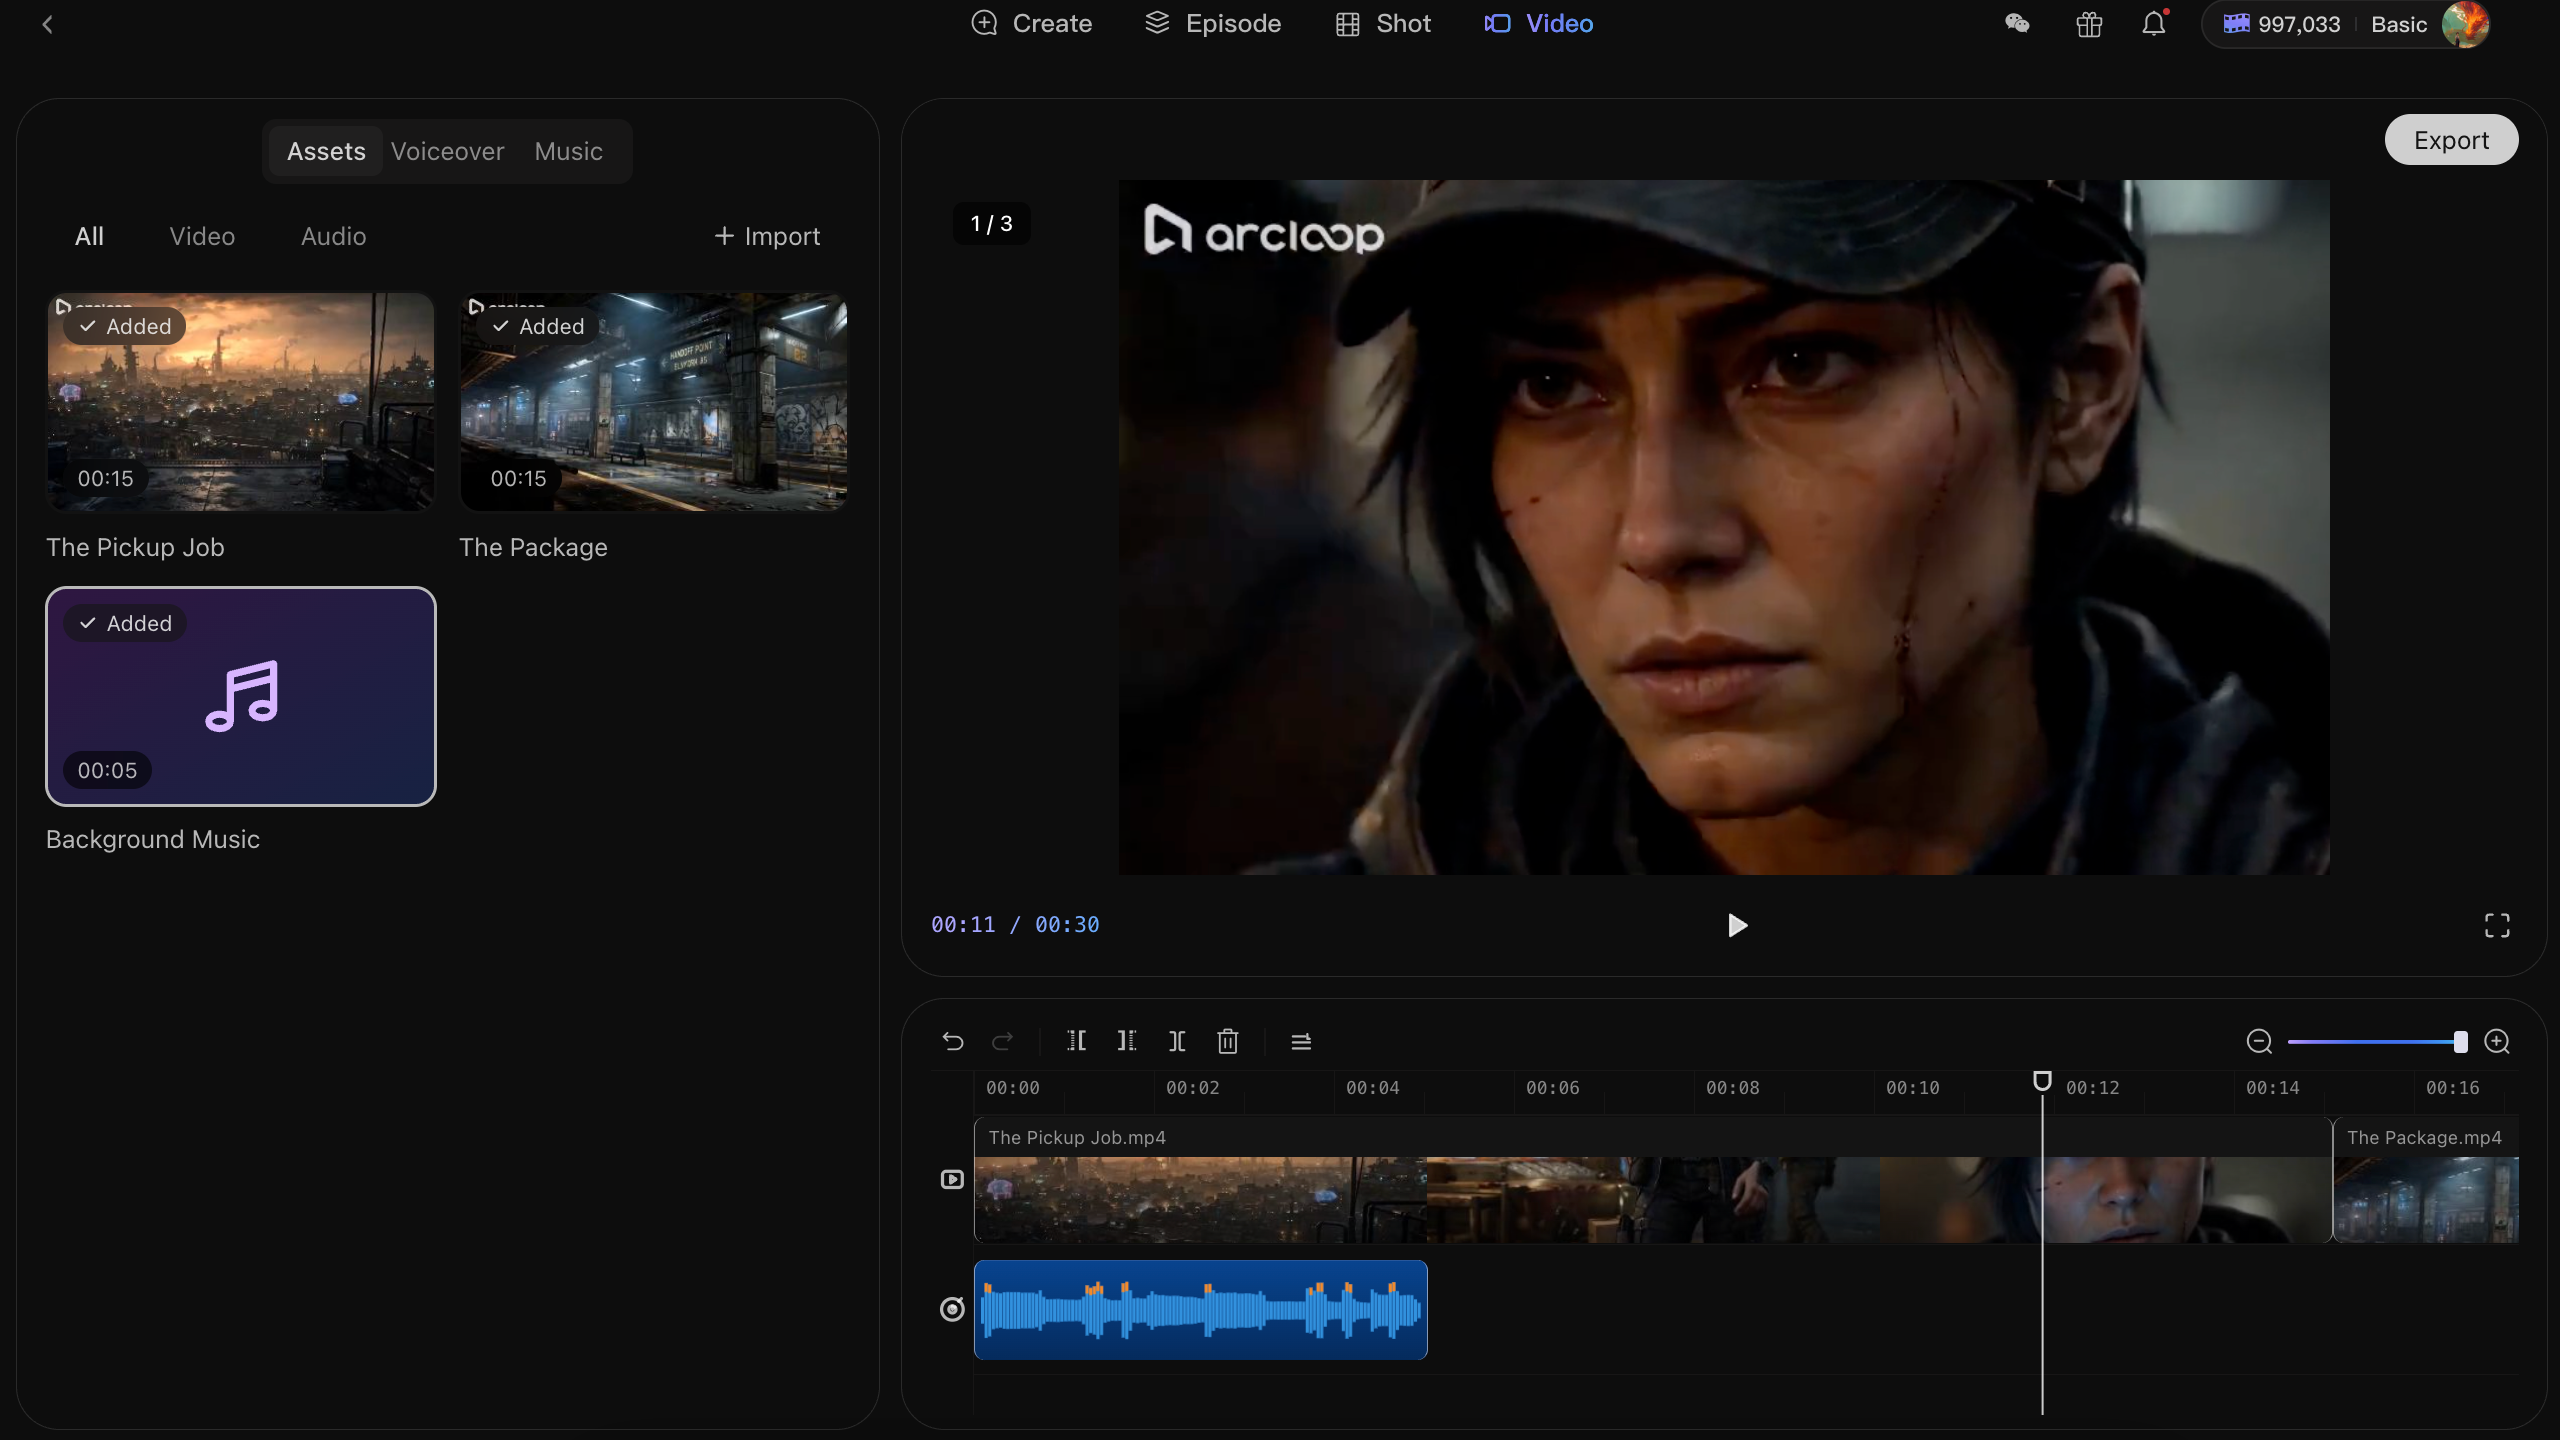
Preview the full episode before you finish. When it looks ready, click Export to download the video.
You can also click Publish to share your work on the platform. Selected works could earn bonus credits.
Ready to bring your ideas to life?
Join Arcloop today and start generating your own stories.