
The Problem With Invisible Rules
You write a fantasy world with a rule you love: a token opens a sealed door, but each use permanently darkens one of its lit segments. On paper the tradeoff feels elegant. In a three-shot scene, it disappears. The door opens, the changed segment goes unnoticed in the dark corridor, and the next shot shows the token fully lit again. The rule exists in your outline. It does not exist on screen.
The fix is not more exposition. It is sequencing: one shot shows the permission, one shows the use and the cost appearing, and one shows the cost constraining the next choice. The sequence gives viewers evidence from which to infer the rule; you still need to check whether the inference is clear. This guide walks through how to explain a fantasy rule through one visible tradeoff in ArcLoop using a single prop asset and clear shot descriptions.
Write one action and one consequence before shooting
Start with one sentence that names the allowed action and one sentence that names the unavoidable consequence. Both sentences should describe something a viewer can see.
Weak version: Vash has a special power that comes with a price.
Usable version: Pressing the Phase Token to a sealed lock opens it and darkens one lit segment. A token with no lit segments cannot open another lock.
The second version gives you a prop (the token), a visible action (pressing it to the lock), a visible cost (one segment darkening), and a limit (a fully dark token cannot be used). For this case, start with three lit segments. Treat that as the fictional rule, not a model specification or a promise that generated details will count correctly.
Write this sentence before you touch any shot card. It is not a prompt—it is a production rule that every shot in this episode has to be consistent with.
Choose a Cost That Stays Visible Without Dialogue
The cost has to survive the cut. If the darkened segment appears at use and then lights up again without a story reason, the tradeoff reads as a visual effect rather than a rule. A cost that persists across shots—a hand that the character holds differently, a prop that now looks different, a scar that is still there in the next scene—makes the rule readable without any character explaining it.
For this story, keep the visible cost on the token itself. Adding a second counter on the character's palm would make the arithmetic harder to review without adding useful information. Prepare compatible token references for three lit segments before use and two afterward. The token is also a physical object the character has to reach for—so every time she faces a locked door, the audience sees her weigh the decision before she acts.
Ask yourself: If I muted this scene and removed all text, would a viewer understand that using this ability costs something? If the answer is no, the cost is not staged yet.
How to Stage Permission, Use, and Consequence With One Prop Asset
Three shots carry the full rule. The first shot shows the character with the prop in a situation where using it would solve a problem—but she has not committed yet. The second shows her using it and the cost appearing. The third is in a different location or moment and shows her holding back because the cost is already visible.
This sequence works because it separates knowing the rule from feeling the rule. The first two shots establish a use and its cost. The third tests whether that cost actually constrains a choice.
In ArcLoop, create a character asset, a prop asset, and appropriate scene assets before you write the shot descriptions. The examples below reference a fictional project built around a courier named Vash, a glass transit token called the Phase Token, and an underground checkpoint gate. These are fictional assets. To use the examples as shown, you would need to create @Vash, @Phase Token, @Checkpoint Gate and @Service Junction in My Assets and bind appropriate references from Library. Review both token states before generating video. These examples and illustrations are proposed staging, not tested outputs.
Shot 1 — Permission
This shot establishes the unused resource and a door that requires it. Hesitation alone cannot explain the cost. Keep the token's starting state visible so the next shot can show an actual change.
Medium shot at @Checkpoint Gate. @Vash raises @Phase Token into the light beside the sealed lock, stopping before contact. All three established segments are visibly lit. Keep the token and the still-closed gate in the same frame so the available resource and obstacle are clear. The camera remains level and static. Dim amber corridor light, no numbers or writing. End on the raised token without pressing it or moving through the door.

Shot 2 — Use and Cost
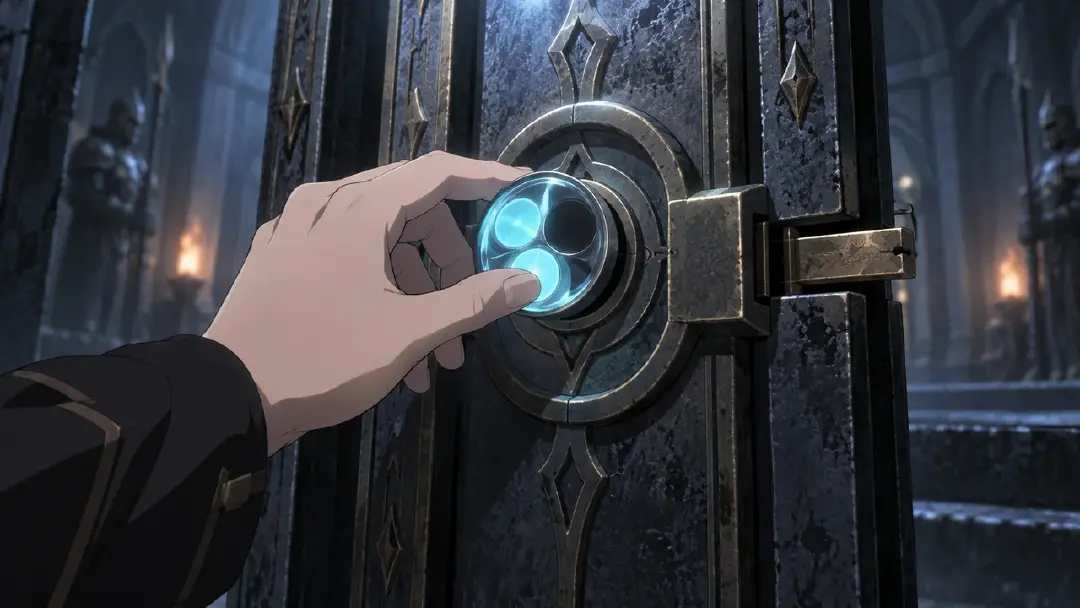
Show one token press and the immediate segment change. Do not combine pressing, passing through a wall and inspecting a palm in one shot. The lock response and changed token should be clear; the character can walk through in a separate connecting shot.
Close shot at the lock of @Checkpoint Gate. @Vash presses @Phase Token against the contact surface once. One of its three lit segments darkens, leaving two lit segments, as the lock's latch releases. Keep the token face readable and the supporting hand steady after contact. Cool overhead light reaches the prop directly. No palm marks, wall crossing or second token use. The single press and its visible consequence occupy the whole shot.
Shot 3 — Constraint
At the Service Junction, a sealed shortcut stands beside an open longer route. The story has established that Vash must keep her two remaining uses for gates farther ahead. She therefore takes the longer passage. Without that prior need, refusing to use the token could be arbitrary; the remaining segments alone do not explain her priority.
Wide shot at @Service Junction. @Vash walks into the open passage beside the sealed shortcut, leaving that shortcut unused. @Phase Token is secured at her side with the same two lit segments that remained after the earlier press. Keep both route openings visible and preserve their established left-right relationship. A steady camera at waist height watches the one departure. Muted corridor light reaches the token; no new segment darkens and no other action interrupts the choice.

Reject Shots That Look Spectacular but Skip the Cost
The most common failure with fantasy rules is a shot that shows the power working beautifully and either hides the cost or delays it to a separate scene where it lands without context. A spectacular opening with no changed token state supplies no visible cost. A dark segment appearing much later without a causal link could instead look like generation drift.
When you review generated shots in the storyboard, ask: Does this shot show the rule or just the result? A shot of Vash standing triumphantly on the other side of a door, token glowing in her hand, is a result shot. It is not the wrong shot—but it needs to be followed immediately by the cost, in the same scene, before the cut.
If the prop is hidden or the count is wrong, revise its framing and the shot description first. Generate and review a still showing the intended token state. Then use the AI Chat Panel for Generate video for Shot 2. Inspect the video too: a correct still does not guarantee the segment state will hold through motion.
The editorial test is simple: after watching only the three shots, could someone explain the rule to a friend? If they could, the tradeoff is working.
What Comes After the Rule Is Established
Once the viewer understands the rule, you can explore further story consequences: a scene where someone else notices the depleted token and asks about it, a moment where Vash has one use left and the audience already knows what it means, a shot where she looks at the token and does not take it out. These scenes can build on the established rule, provided the earlier sequence communicated it clearly. They still require the usual creation and review work.
This is the practical value of staging a rule through a visible tradeoff rather than through dialogue or a title card. It banks audience knowledge that pays off later. For more on building OC rules that translate visually, see OC Creation Needs Mechanics and Relationships.
Open a project from ArcLoop, enter My Assets and create the prop asset, bind a reference image as the Main image, then build your character and scene assets around it. Write the one-action, one-consequence rule sentence before you open the storyboard. Stage permission, use, and constraint as three distinct shot cards—and let the prop carry the rule across the episode.
FAQ
Do I need to show all uses of the rule in one episode? No. Show enough evidence for viewers to distinguish the action, cost and remaining limit. This case demonstrates one use, then a decision to preserve the remaining two. A later depletion may need further setup; do not assume that one example teaches every exception.
What if the cost is not a physical mark but a behavioral change? Behavioral costs work but require tighter staging. Make the behavior change close enough to the triggering action that viewers can connect them, and it needs to be something the character would not do without the cost—avoiding eye contact, favoring an arm, choosing a longer route. The prop still helps because it gives the viewer something concrete to track.
Where should I record the rule for later episodes? Write the rule and the remaining token state in Story Outline, then specify the relevant state in each later shot description. Keep compatible prop references in My Assets. Generate Shots can draft shot cards, but the product does not automatically simulate your fictional rules or maintain a use counter.
What if the generated shot hides the prop in shadow?
Add a lighting note to the shot description: Light reaches the token face directly or Prop in foreground, fully lit. Framing notes like tight on hands and prop also help. Review the generated image before generating video, and revise the shot card before committing to the video generation step.