Why 'anime, cinematic, detailed' isn't a style
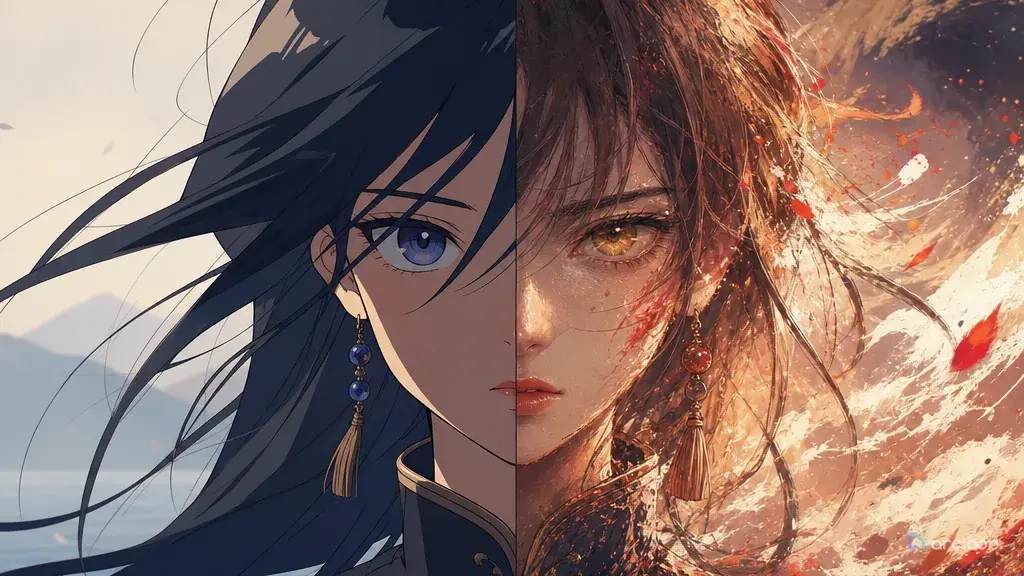
Style switching can make a clip feel like two different projects stitched together. The first seconds look like clean 2D cel animation, then the face becomes semi-realistic. A painted background turns into glossy 3D. Line art thickens halfway through a camera move. The character may still be recognizable, but the shot stops feeling intentional.
The cause is usually a loose style request. "Anime, cinematic, detailed, painterly, high quality" gives the system room to jump between rendering languages. Style repair needs a recipe: line weight, shading method, texture limit, palette rule, background treatment, and negative style boundaries. The goal is not to pile on more style words. The goal is to remove competing instructions.
Use this guide when AI anime clips start in one look and end in another, or when shots in the same sequence no longer match. Start from regional art style guide, test a controlled look with 90s Cel Animation Snapshot, and keep style decisions attached to each project in ArcLoop Worlds.
Rules for a stable visual recipe
Write a style recipe, not a style cloud. A recipe says clean black line art, flat cel shading, limited texture, painted background, soft compositing. A cloud says anime, cinematic, beautiful, epic, detailed, modern. The recipe is easier to follow.
Limit texture. Many style switches happen when the model adds realistic fabric, shiny skin, 3D lighting, or painterly brushwork on top of a cel-shaded character. Decide how much texture belongs in the scene.
Control line weight. Anime style depends heavily on consistent outlines. If the character begins with thin lines and ends with heavy graphic strokes, the shot feels unstable even if colors stay close.
Keep background and character in the same rendering family. A flat cel character on a photoreal alley or a glossy character on a watercolor room will look pasted. The background can be simpler, but it should obey the same production style.
Use negative style constraints precisely. "No photorealism, no 3D render, no oil painting texture, no sudden manga panel effect" is clearer than a long list of every possible bad result.
Do not mix several eras or media in one short clip. A 1990s TV anime look, modern music-video look, paper-cut style, and sketchbook look each need different rules. Pick one for the shot.
How to write a style repair prompt, step by step
Start by naming the switch. Write the visible failure: "face becomes realistic after the turn," "background changes from painted to 3D," "line art becomes sketchy near the end," or "the clip adds comic halftone during the final pose."
Start by naming the switch. Write the visible failure: "face becomes realistic after the turn," "background changes from painted to 3D," "line art becomes sketchy near the end," or "the clip adds comic halftone during the final pose."
Write the recipe in five parts: line art, shading, palette, texture, and compositing. One sentence for each is enough. This beats a giant paragraph of adjectives.
Attach style rules to the whole clip. Say "maintain this style from first frame to final hold" and name any movement that tends to trigger drift, such as a camera push-in, face turn, or lighting change.
Protect identity separately. Style repair should not redesign the character. Repeat the face, hair, outfit, and prop anchors so the fix does not create a cleaner but different person.
Choose the approved style authority. It may be a Visual reference asset, the character asset, a previous shot, or a storyboard frame. In ArcLoop, keep that asset beside the current draft on Canvas so you can compare the new output.
Review the clip at the transition point. Style switching often happens during turns, zooms, hand close-ups, or bright effects. If the switch happens at one moment, repair that moment instead of rewriting the full prompt.
For foundational prompt structure, use How to Write 2D Anime Animation Prompts. For repeated shots, organize style notes with Workflow Templates.
Where to anchor style rules in ArcLoop
ArcLoop keeps style repair practical because the Visual reference assets, character asset, and draft history all stay visible in one project. You can pin the approved style reference on Canvas, compare the current clip, and run a narrow repair without rebuilding the entire scene.
For a series, create a short style contract at the project level. Include line thickness, shading type, background finish, allowed texture, and forbidden rendering modes. Then each shot card only needs to restate the relevant parts.
When a clip drifts, do not chase it with more style names. Remove conflicting terms first. If the prompt says cel-shaded, painterly, realistic, cinematic, sketch, and glossy, the simplest repair is to choose one rendering family and delete the rest.
ArcLoop can also help carry style through sequence planning. A close-up, wide shot, and action cut may use different compositions, but they can share the same line art, palette logic, and texture limit. Keeping those rules inside the project prevents every shot from reinventing the look.
Lock the look before you generate anything. In Story Brief, decide Realistic or Anime once for the project so that choice lives in one place instead of getting retyped into every shot description.
Then open My Assets and build a Visual reference for the line weight, palette, and texture you want the episode to hold, and bind the frame or reference image that shows the treatment clean, before any drift. When a shot in Storyboard starts sliding toward a different rendering style, pull that Visual reference into the shot with @ alongside the character asset instead of stacking more style words. Generate the still image first and check it against the reference on Canvas before you spend a video generation on it. If the frame matches, generate the video for that one shot; if it still drifts, that is the single shot to repair, not the whole episode. Once a few shots hold the same look, batch the rest from the AI Chat Panel — "Generate videos for Shots 4, 5, and 6" — instead of clicking through each one.
Example 1: Teahouse Cel Style Repair
@Anri Pell pours tea in the hillside teahouse kitchen, steam curling off the kettle behind her. She notices the steam form a slow spiral, then lifts her eyes and gives a small smile. Camera pushes in gently, no cut. Match @Anri Pell's bound reference images for line weight and shading so the flat cel look holds through the push-in instead of sliding into painterly or realistic rendering. Kettle steam stays soft and quiet, no dialogue.
Problem to fix: the previous draft starts as clean cel animation but becomes painterly and semi-realistic during the camera push-in. Preserve the same action: Anri pours tea, notices the kettle steam forming a spiral, and looks up with a small smile. Style recipe for the whole clip: clean consistent line art, flat cel shading with one soft shadow layer, muted green and cream palette, simple painted background, minimal paper texture only in the background. Maintain this look from first frame to final hold.
Camera: gentle push-in, no cut. Preserve Anri's hairpin, apron shape, kettle, and face proportions. No photoreal skin, no glossy 3D surfaces, no oil-paint brush texture on the character, no sudden thick outlines, no manga panel effect, no text. This prompt fixes the switch by choosing one style family and naming the texture boundary.
Example 2: Sketchbook Look Without Drift
@Pio Maren lifts a small camera in the empty classroom after club hours, adjusts the lens with both hands, then lowers it as a photo slips out the back. Locked medium shot, late-afternoon window light across the stacked desks. Match @Pio Maren's bound reference images for the sketchbook line and shading so the graphite outlines and paper grain hold through the whole move instead of sliding into glossy cel shading or realistic lens detail. No dialogue, just the camera's soft click.
Style contract: hand-drawn sketchbook anime look with thin graphite-like outlines, light watercolor fills, visible paper grain in the background, and simple facial shading. Keep the same sketchbook treatment on the character, camera, desks, and window light for the full clip. Do not switch into glossy digital cel shading or realistic camera detail.
Action: Pio lifts a small camera, adjusts the lens with both hands visible, then lowers it when a photo slips out of the back. Camera is locked medium shot. Palette stays soft ivory, slate blue, pale yellow light, and black hair. Preserve the cardigan silhouette and camera strap. No 3D render, no thick comic outlines, no photoreal lens reflections, no sudden color saturation, no text or watermark. The style is allowed to be textured, but the texture is defined. That prevents the clip from changing media halfway through.
Example 3: Action Cut Line-Weight Match
Final style verification for a 5-second 2D anime action shot featuring @Kes Wren, a courier fencer. Setting: sunlit rooftop training court with simple painted city shapes in the distance.
@Kes Wren lunges once toward a hanging practice ribbon on the sunlit rooftop training court, taps it with the rapier tip, and lands in a held fencing pose. Camera holds a locked side three-quarter full-body shot, feet and blade both readable. Match @Kes Wren's bound reference images to keep the outlines thin and consistent through the lunge instead of turning heavy and poster-like. Rapier carries one white highlight only, no chrome shine. No dialogue.
This example targets the exact moment where style changes: the lunge. It keeps the action while repairing the rendering.
The most common ways style repair fails
The first mistake is adding more aesthetic labels. If the current prompt already contains conflicting style words, another adjective usually makes the style less stable.
Another mistake is mixing character and background media. A cel-shaded character can sit on a painted background, but both need compatible line, palette, and compositing rules.
Creators often ignore line weight. Even when color and design remain stable, outline changes can make a shot feel like it changed studios halfway through.
Many repair prompts accidentally redesign the character. Style repair should preserve identity anchors, outfit, pose, and camera unless those are explicitly broken too.
Finally, do not wait until final render to catch style drift. Generate a cheap draft and inspect turns, close-ups, and effect moments where the switch usually appears.
FAQ
What causes style switching in AI anime video?
Style switching often comes from conflicting style words, overly broad references, strong camera changes, realistic textures, or effects that introduce a different rendering language mid-clip.
What should a style recipe include?
Include line art, shading method, palette rule, texture limit, background treatment, and negative style constraints. Keep it short and repeat it across related ArcLoop shots.
Can I combine cel shading with painted backgrounds?
Yes, if the compositing rule is clear. Keep the character cel-shaded and the background painted, but make the palette, lighting, and line treatment compatible so the character does not look pasted on.
How do I repair style switching without changing the action?
Tell ArcLoop to preserve the approved action, camera, timing, and character anchors, then repair only the style recipe from first frame to final hold.
When should I make a visual reference?
Make one when several shots need the same look or when drafts keep drifting between rendering modes. A visual reference gives the project one visual source of truth instead of restating the full recipe from scratch.