The Problem With Try-Again Scenes
Two shots of the same character walking up to the same door and getting turned away tells the viewer almost nothing. The second attempt is just a longer wait for the outcome they already expect. The scene has motion but no story movement — and the repeated attempt can feel like delay rather than progression.
Knowing how to stage a failed attempt that actually changes what comes next comes down to one principle: accountability. If the first failure teaches the character something concrete, and if acting on that knowledge costs them a resource, the second attempt becomes a different scene that depends on the first. The new approach should follow from that experience rather than arrive as an unrelated lucky solution.
What Makes a Failed Attempt Story-Useful
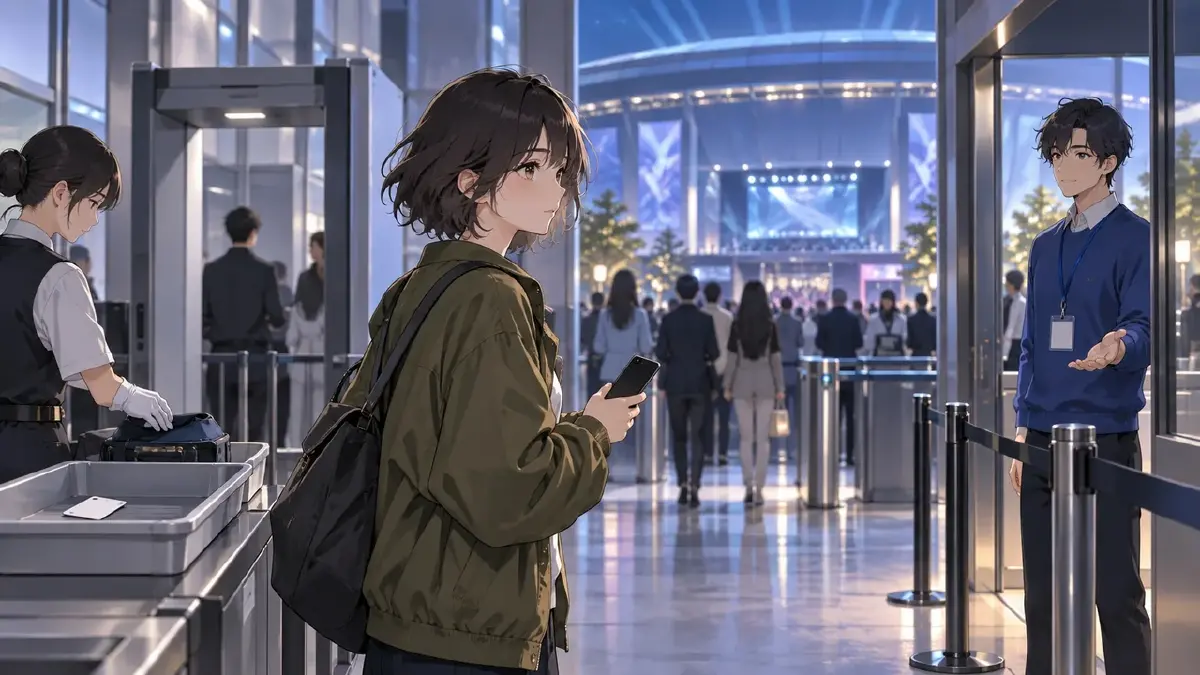
For this kind of retry, ask what the character learns and what opportunity or resource the failure costs. In the fictional case below, Mira tries a former staff pass at a venue. The attendant retains the expired pass and explains that she must enter as a visitor accompanied by a current sponsor. The useful discovery is the entry requirement, not an inference that a red light proves a particular security technology.
Other failure scenes can serve other purposes. Here, those two answers keep the retry connected to a specific experience. It repeats the environment and the character but skips the cause-and-effect that makes drama feel earned. Before you stage any retry scene, write one sentence for each: the learning and the cost.
How to Stage a Failed Attempt That Changes the Next Attempt
Step 1: Name the Learning and the Cost Before You Build Any Shot
Open the Story Outline for your episode and write a note directly into the relevant segment. Two lines are enough:
- Learning: The former staff pass cannot be used; visitor entry requires a current sponsor.
- Cost: The attendant retains the expired pass, and Mira has lost time before her appointment.
This note becomes the brief for every shot in this sequence. Review each proposed beat for how it establishes, responds to or follows from those facts. If you cannot write the note yet, the failure has not been designed — it has only been placed.
Step 2: Build Assets So the Scene Change Is Visual
The environment stays recognizable while something inside it changes. That is an asset problem, not just a writing problem. You need a scene asset for the location and a prop asset for the object the character loses — and suitable references for any visible state that actually changes. An unchanged card does not need a new design simply because a different person holds it.
Create the fictional @Mira, @Gate Attendant and @Sponsor character assets; @East Gate Checkpoint, @Waiting Area and @Visitor Entrance scene assets; and @Access Card and @Phone prop assets. Upload suitable references to Library and Bind them in My Assets. Keep Mira's ordinary appearance the same across the attempts: the new method is asking a sponsor to accompany her, not changing her disguise.
These examples and illustrations are proposed staging, not product-test footage. Use @ for the established assets and put each new action and state in its shot description. References help maintain identity; they do not track authorization or story knowledge automatically.
Step 3: Write the First Attempt as a Scene That Ends With Evidence
End the first attempt with a visible cost and a clear source for the new information. Here, the retained card shows the lost resource. A short line from the attendant supplies the sponsor requirement. A red reader light alone could have several explanations and would not teach Mira the new procedure.
Medium shot across the counter at @East Gate Checkpoint. @Gate Attendant places the already-presented @Access Card into a retention tray beyond @Mira's reach. Mira remains on the visitor side with an empty hand. Keep the tray, card and both sides of the counter visible; no scanner animation or legible writing is needed. The camera stays level under cool venue lighting. Only the attendant moves the card, ending with it clearly on the staff side.
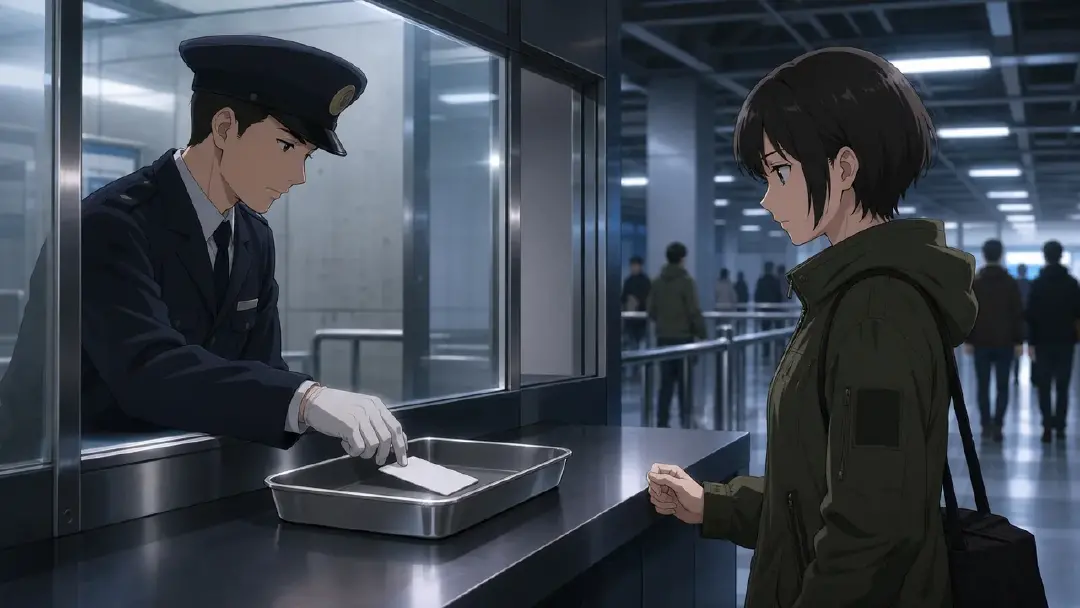
Pair the card-retention shot with a short, clearly attributed attendant line explaining the visitor requirement. Generate Voiceover is available in Edit; check the resulting voice with the image rather than assuming the silent gesture says everything. The card establishes the cost, while the line establishes the learning.
Step 4: Stage the Learning Beat Between Attempts
The gap between attempt one and attempt two is where character change lives. A single shot of the character processing — not reacting dramatically, but thinking — makes the second attempt feel like a decision instead of a repeat. This is also where the cost becomes concrete for the viewer.
Close shot in @Waiting Area. @Mira raises @Phone to her ear to contact @Sponsor, leaving her other hand empty and visible beside her. Frame the handset and her attentive expression without showing its screen. The checkpoint counter remains distant in the background, preserving the connection to the failed attempt. Cool overhead light, steady camera. Do not add typing, a costume change or an exit; end once the phone reaches her ear.

The call shows Mira acting on the new requirement. Establish that the sponsor is available and agrees to meet her before the entry shot; a call alone does not prove consent or permission. Keep that connecting beat brief, but do not make the sponsor appear without a reason.
Step 5: Write the Second Attempt as a Dependent Scene
The second method need not have been physically impossible before the failure. It must be visibly motivated by what Mira learned: she now uses the visitor route with a sponsor rather than trying another staff pass. The agreement and meeting place precede this shot, so the open door is not an unexplained lucky success.
Wide shot at @Visitor Entrance. @Sponsor is already waiting just inside the open doorway while @Mira walks across the threshold toward them. Keep both characters and the separate visitor entry visible so accompaniment, not a recovered staff pass, explains the new method. Mira carries no access card. Camera remains still at corridor height under the same venue lighting. The sponsor and doorway stay stationary; Mira's entry is the only movement in the shot.
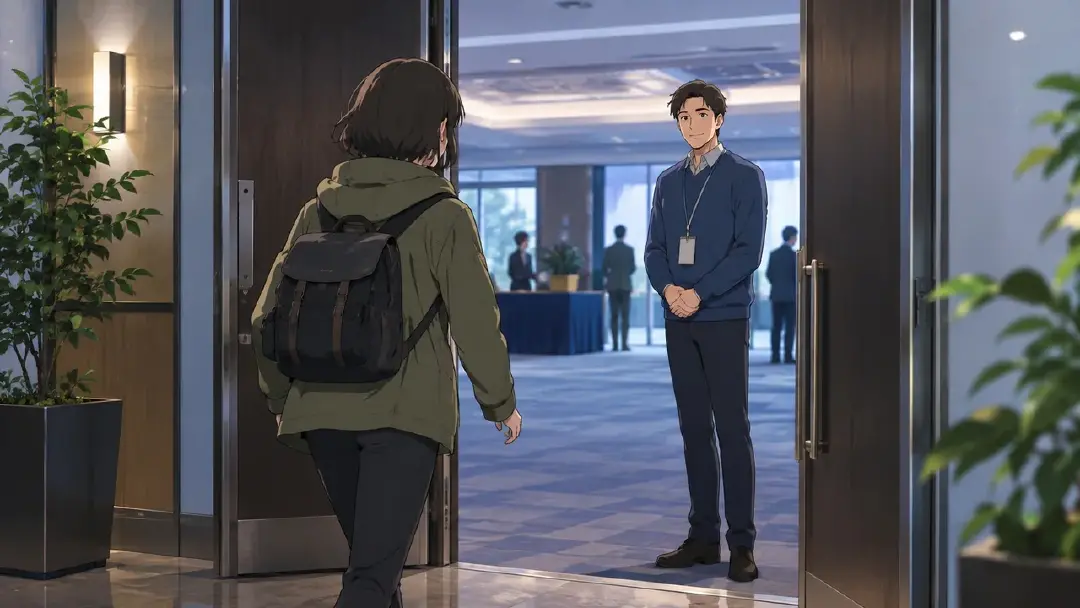
Use the Visitor Entrance scene reference to establish its relation to the first checkpoint. If it is another view of the same place, prepare compatible reference images. Do not assume mentioning a new door makes its geography consistent. The unchanged Mira asset helps the viewer follow the person while the route and accompaniment change.
Step 6: Review Each Shot Against the Two-Line Note
Read the sequence against the two-line note. Can a viewer identify the retained card, understand the sponsor requirement, see Mira request help and recognize the accompanied entry? Inspect the stills before video for ownership, identity and readable location changes.
After those checks, use the AI Chat Panel for Generate videos for Shots 1, 2, and 3, adjusting the numbers if you added a connecting shot. Arrange the clips in Edit. If a viewer who sees the whole scene cannot explain the changed approach, find the missing link rather than making the images more dramatic.
For more on connecting shots across an episode, see Storyboard Continuity and Pacing Control in a Short.
What Goes Wrong: Same Door, Same Angle, Different Outcome
The most common version of this error is a second attempt where the only change is the result. Same angle on the card reader, same body position, but this time the light goes green. That is not a changed method — it is a retry that happens to succeed. The viewer learns nothing about the character, and the first failure has no function except delay.
If your second attempt shot description uses nearly the same verbs and props as the first, go back to your learning note. "She failed" is not learning. "She now knows she needs a current sponsor for visitor entry" names information that motivates the new approach.
Take This Into Your Next Episode
Open your current episode in ArcLoop, find the retry sequence in the Storyboard, and write the two-line note into the Story Outline segment before generating any shots. If you already have shots that feel repetitive, read the descriptions side by side — if the verbs and props are the same in both attempts, that is the layer to revise. Keep character identity consistent, while preparing the scene views and prop ownership that the changed approach needs. Start at /creative/worlds, open the episode, and write the note before anything else.
FAQ
Can I use the same scene asset for both attempts? Use the same scene asset when both attempts occur in the same established space. Add compatible references or a distinct scene asset when the location genuinely changes. Reusing a name alone does not prove that two doors fit the same building.
What if the character gains new knowledge but loses nothing? New knowledge can be enough if it changes a meaningful decision. In this exercise, the retained card and lost time make the consequence easy to inspect; do not invent a permanent loss merely to satisfy a formula.
How specific does the learning note need to be? Specific enough that it forces a different shot description. If you could write the second attempt without referencing the learning, the note is not specific enough.
Do both attempts need to be in the same episode? Not necessarily. The cost and learning can carry across episodes as long as the connection is visible — a prop that appears changed, a route now blocked, a character who acts on knowledge they did not have before. My Assets provides reusable identity references. You still need to record the changed story facts in Story Outline, describe them in later shots and review the results.