Why Vertical Anime Shots Fall Apart at the End
The first draft looks good on a desktop preview: a masked swordswoman jumps from a rooftop, the city lights streak behind her, and the final pose has energy. Then you watch it on a phone. Her boots are cropped, the subtitle covers the hand holding the clue, and platform buttons hide her expression. The shot failed because the vertical frame was never designed.
Vertical composition for AI anime video is not just "make it 9:16." A vertical frame changes where the face belongs, how much body can be visible, where hands should move, where subtitles sit, and how negative space supports a reveal. If the prompt only asks for a cinematic anime scene, the model may compose for a landscape poster and squeeze it into a phone format afterward.
Vertical rules hold up best when they're set before you generate anything, not fixed in post. Set 9:16 in the Story Brief inside your ArcLoop Worlds project so the aspect ratio carries through the whole episode, then write framing details — headroom, subtitle zone, entry space — directly into each shot description alongside the 2D Animation AI templates you're using as a starting point. For longer runs, pair it with The Take Selection Workflow so rejected takes fail for clear frame reasons.
Rules for Vertical Anime Composition
Design the frame around the story action, not the character portrait. A centered face works for a reaction, but fails when the story depends on a letter, weapon, phone screen, door, or entrance. Decide first what the viewer must read.
Use the upper third for eyes when emotion drives the beat. If captions or interface elements may occupy the lower area, keep the face safely above that zone without pushing it so high that hair becomes the only anchor.
Reserve the middle band for hands and evidence: a key, phone message, lowered blade, or breaking cup. Too low, subtitles cover it; too high, it fights the face.
Let negative space have a purpose. Top space can trap a character under signage, side space can prepare an entrance, and lower space can protect captions. Random emptiness reads as a crop error.
Keep motion paths vertical-friendly. A bow, hand raise, elevator door opening, stair descent, or camera push often reads better in 9:16 than a wide horizontal chase.
Design the first and final frames separately. The shot description should name both so a good mid-shot does not end on a cropped elbow.
How to Build a Vertical Shot: From Job to Final Frame
Start by choosing the shot job: hook, reaction, reveal, action beat, dialogue line, prop insert, or ending pose. The job decides the crop.
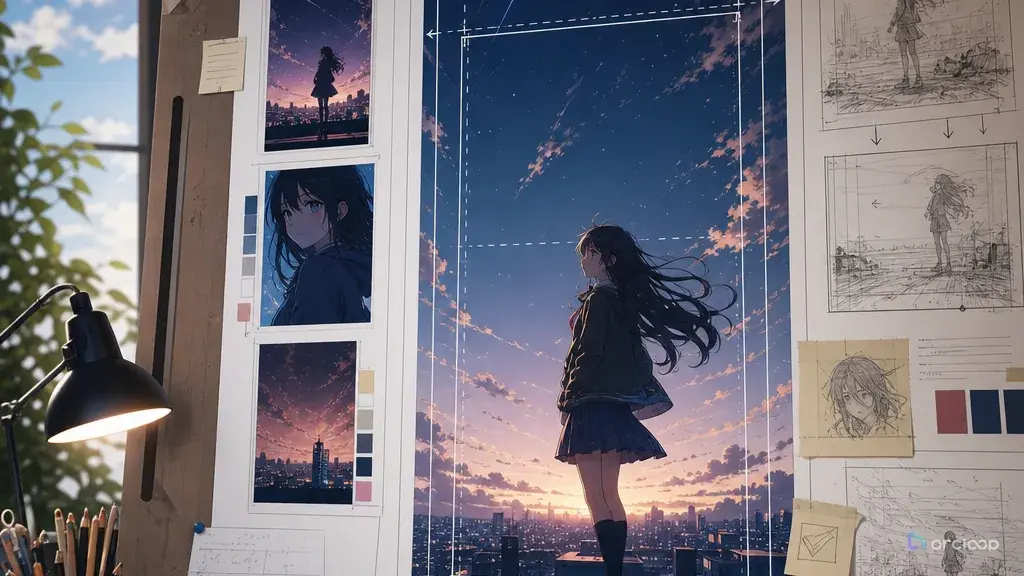
Write a vertical frame map. Divide the frame into top, upper third, center, lower third, and bottom margin. Note what belongs in each zone.
Set safe areas before the prompt. Keep mouths, readable text, and important props away from subtitle and interface zones.
Choose a camera distance that fits the action. Full-body helps dance and fights but shrinks faces. Tight close-ups carry emotion but not complex hand action. Medium vertical shots often work best for short drama.
Turn the map into a shot card with aspect ratio, character anchors, action band, camera movement, subtitle-safe zone, final-frame goal, and reject rules.
Generate a small batch of variants and review at phone size. Can you read the face, action, object, and final pose quickly? If not, fix the frame before detail.
Log the approved rule as a reusable vertical shot description. Future shots can reuse the caption zone, entrance space, and final-frame rule while changing the action.
Aspect Ratio, Shot Description, Canvas Review: Where the 9:16 Rules Actually Live
In ArcLoop, vertical framing belongs on the shot card, not on the character asset. A character asset holds identity — face, costume, reference images — not crop instructions, and the storyboard shouldn't bury subtitle safety inside a paragraph either. Put frame rules — headroom, safe band, entry space — directly on the shot description, where you can review them next to the generated take.
A compact ArcLoop setup for vertical shots draws on four things: the character asset for identity, the storyboard for sequence, the shot description for framing, and Canvas for comparing takes side by side. Together they make revisions precise: lower the phone, keep the face in the upper third, or change a wide run into a stair descent.
Use templates when the shot type is common. Storyboard Hook to Reveal helps with clue and reaction; Single Action Dance Clip helps when full-body readability matters.
Review in phone-viewer order: first frame, face, action, caption zone, final frame. If the action is covered or the final frame is messy, fix composition before polish.
Try it step by step. Open your project at ArcLoop Worlds and confirm the Story Brief shows 9:16 before you touch anything else — every Episode and shot card inherits that setting automatically.
Next, go to My Assets and open the character you plan to use. Check that a Main image is bound and, if the character has a second costume or emotional state relevant to this episode, bind that image as a Reference image too. This is what lets you write @Juno in a shot description instead of re-typing hair color, apron, and earrings every time.
Inside the Episode, click Generate Shots. When the shot cards appear, pick the one where framing matters most and edit its description directly: add the frame map (upper third, center band, subtitle zone), the camera move, and the final-frame goal. Keep the action to one clear beat per shot.
Generate an image first to confirm composition — face placement, prop position, caption clearance — before you spend credits on video. Once the frame looks right, generate the video. For multiple shots, open the AI Chat Panel and type Generate videos for Shots 1, 2, and 3. rather than triggering them one by one.
Drag the approved clips into Edit, arrange them on the timeline, and trim or replace any shot where the final frame is still cropped. Composition fixes happen here, not in post-processing filters.
Example 1: Elevator Confession Vertical Frame
Medium shot of @Juno inside a narrow service elevator, framed vertically 9:16.
Juno's eyes and mouth sit in the upper third. Both hands grip a bent recipe card held at center frame. The lower third stays clear for subtitles. The elevator floor indicator ticks from 3 to 4 in the top margin.
Action: she glances down at the card, exhales slowly, then lifts her gaze toward someone just beyond the opening doors and delivers her line with restrained courage.
Camera: locked vertical medium shot, slight push-in only after the doors begin to part.
Lighting: warm kitchen spill light floods through the door gap; cool fluorescent metal behind her.
Negative constraints: no cropped hands, card must not enter the subtitle zone, no extra passenger, no face redesign, no text except the elevator number.
The scene carries a face, prop, line, and subtitle area without fighting itself.
Example 2: Rooftop Chase in a Tall Frame
Vertical 9:16 side-tracking shot of @Kaito Lorne descending one flight of narrow metal stairs on stacked apartment rooftops, late afternoon.
Frame map: laundry lines fill the top in wind; Kaito's face stays visible in the upper third; torso, hands, and delivery tube hold the center; the stair landing fills the lower third and stays clear for captions.
Action: Kaito drops down the flight, catches the railing with his left hand, swings both feet onto the landing, and turns toward camera in a stable final pose.
Camera: vertical side-tracking shot that descends with him; no horizontal pan beyond the stairwell width.
Style: sharp cel-shaded anime, crisp key poses, controlled smear on the swing.
Negative constraints: no cropped feet during landing, no camera roll, no extra limbs, no windbreaker color change, no text, no watermark.
The prompt uses height, stairs, and a descending camera path instead of forcing a wide chase into 9:16.
Example 3: Kitchen Evidence Insert and Reaction
Tight vertical medium shot of @Ema in a closed noodle-shop kitchen after midnight — stainless counters, hanging ladles, one red emergency light near the back door. @Harl appears only as a blurred shoulder on the left edge.
Frame map: upper third holds Ema's face; center band holds a receipt pulled from under a soup pot; lower third stays empty for subtitles; Harl's shoulder sits on the left edge without his mouth entering frame.
Action: Ema lifts the soup pot, finds the receipt taped underneath, freezes, then slowly raises her eyes toward Harl without speaking.
Camera: slow tilt from receipt up to Ema's face, no cut.
Negative constraints: no readable random text beyond a simple receipt shape, no extra hands, no changed kitchen layout, no dramatic zoom blur, subtitle zone must stay clear.
The evidence stays readable while the reaction sits above the caption area.
Ways Vertical Shots Go Wrong
The most common mistake is treating 9:16 as an export setting instead of a composition choice. If the prompt was designed like a landscape frame, the vertical version will crop the story.
Another mistake is placing important objects in the bottom third, where subtitles and controls collide. Put story-critical hands and props in the center.
Creators also forget that full-body vertical shots shrink faces. For emotion, use a medium shot or close-up. For dance or combat, keep the body readable.
A fourth mistake is adding camera movement to compensate for weak framing. A spinning camera does not fix a badly placed clue. Start with a stable frame, then add only the movement the action needs.
Another failure is leaving no entrance space. If a character, door, object, or light must enter, reserve space in the composition.
Finally, review drafts on the device shape they are meant for. A clip that looks balanced in a wide editor preview may fail on a phone feed.
FAQ
Should every vertical anime shot put the face in the upper third?
No, but it is a strong default for dialogue, reaction, and character hooks. Action, dance, and prop inserts may need the center or full body to become the priority.
How do I keep subtitles from covering the story?
Reserve the lower third before generation. Put mouths, hands, phone screens, documents, and reveal props above the caption zone.
Can ArcLoop generate vertical anime video directly from a shot card?
Yes. Set 9:16 in the Story Brief, then write the shot description with the framing, action, camera move, and @ references to the character assets in the shot. ArcLoop generates drafts straight from that shot card, and you can compare them in Canvas before picking one to keep.
What should I check before final polish?
Check first frame clarity, face placement, action readability, prop visibility, caption-safe area, and final pose. Polish only after those frame checks pass.
Is vertical composition different for anime than live action?
Yes. Anime often relies on strong silhouettes, eye acting, readable hand poses, and stylized negative space. A vertical anime prompt should protect those graphic elements instead of only describing a camera crop.