Why Every Gaze Needs a Target
The shot looks emotional until the characters stop meeting each other. A mechanic confesses across a glass elevator, but her eyes aim above the listener's shoulder. The listener's reaction shot points toward empty wall space. A close-up is beautifully lit, yet the two people feel like they were filmed in different rooms. Viewers notice that kind of false contact at once. The person assembling the scene may only see clean faces and miss the broken gaze.
Eyeline direction is one of the smallest details with the biggest effect. A dialogue scene does not need constant eye contact, but every gaze needs a reason: person, prop, door, floor, clue, or avoidance target.
In AI anime, eyelines fail because every shot may become a self-contained portrait. The fix is not "make eyes better." The fix is to connect gaze to blocking, camera, and story.
This guide covers gaze targets, screen direction, over-shoulder shots, object looks, review checks, and examples. For related continuity work, use Camera Continuity Errors, Multi-Character Same-Frame Prompt Guide, and Creative Worlds.
Rules for Eyeline Direction
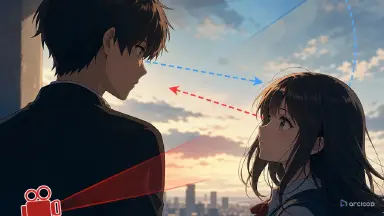
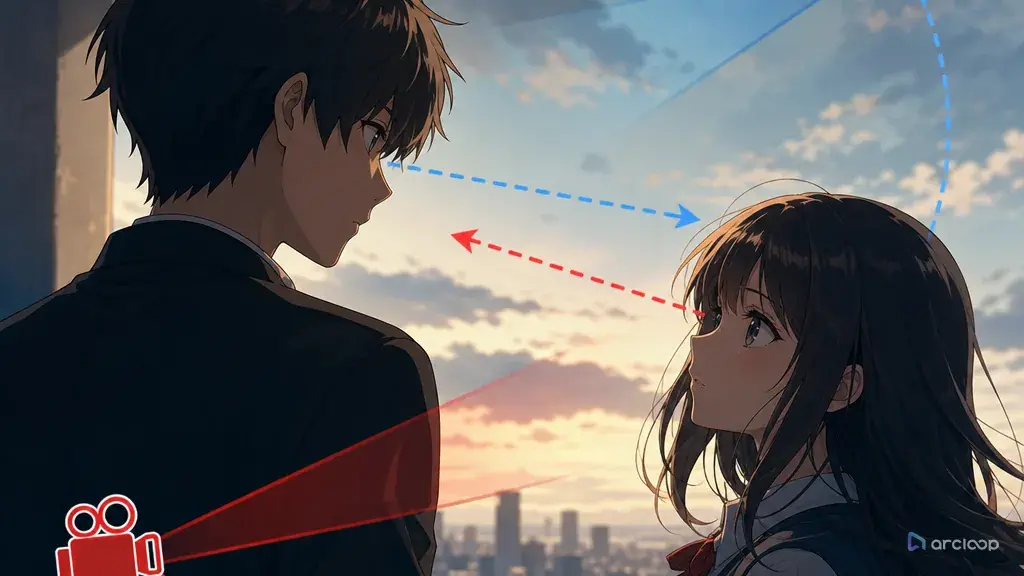
An eyeline is a vector, not an adjective. "Intense eyes" describes style. "Looking down-left toward the sealed envelope in Vale's hand" describes direction. Direction gives the shot an edit relationship.
The listener must have a known location even when offscreen. If shot one places the listener frame right, a close-up of the speaker should aim slightly right or down-right depending on height. Offscreen characters still occupy space.
Avoiding eye contact is still an eyeline choice. A guilty character looking at the floor, a proud character looking past the listener, or a frightened character watching the door can be more expressive than direct gaze. Name the avoidance target.
The camera axis controls believable glances. If two characters face each other across a table, the camera side determines whether their eyes travel left or right in close-ups. Do not let every close-up default to direct front-facing portrait framing.
Use eye level for power. A seated character looking up, a standing character looking down, and two characters meeting at equal height all tell different stories.
Give props their own gaze beats. A clue, cup, phone, blade, map, or badge becomes readable when a character looks before touching it.
Review eyeline in sequence, not frame by frame. A single image may look fine, but the cut fails if shot A points left and shot B answers from the wrong side.
How to Plan Eyeline Shot by Shot
Start with the blocking map. Write where each character stands, sits, or leans. You cannot give a useful eyeline until the target has a position.
Name the primary gaze target for each shot. Use exact labels such as "looks to Amara at frame right" or "glances down to the cracked badge in his own palm."
Decide whether the gaze is direct, avoided, interrupted, or delayed. Those four labels cover most dialogue beats.
Attach the camera side. For close-ups, say whether the character looks frame left, frame right, slightly above lens, slightly below lens, or past camera. This keeps the shot from becoming a centered portrait.
Use head turn and eye movement separately. A character may keep their head still and move only the eyes, or turn the head while avoiding contact.
Write listener reaction shots as answers. If the speaker looks frame right, the listener usually looks frame left, adjusted for height.
Reserve one gaze shift for the key beat. Too many darting looks can make a scene feel nervous by accident.
Review the cut without sound. If viewers can tell who speaks to whom and what prop matters, the eyeline plan works.
Put this into the product instead of a planning doc. Build Tesh and Amara — or your own two leads — as character assets in My Assets first, and bind a Main image plus a couple of Reference images that show each face from a slightly different angle. That identity then carries into every shot automatically.
Open the episode and click Generate Shots to get shot cards for the scene. In each card, reference both characters with @ and only add what's new for that one shot: the gaze target, head angle, and camera side you worked out in the blocking map. Skip re-describing hair, jacket, or face — the asset already carries that.
Generate the image first and check the eyes land where you planned before you spend a video generation on it. A wrong gaze is cheaper to catch on a still frame.
Once a batch of shots reads correctly, generate video for the set at once from the AI Chat Panel — "Generate videos for Shots 1, 2, and 3" — instead of one at a time.
In Edit, drop the shots into the timeline and check the cut without sound. If one gaze answers from the wrong side, replace only that shot instead of rebuilding the sequence.
Write the Gaze Target Into Every Shot
Track eyeline the same way you track any other shot detail — write it into the shot description instead of treating it as a prompt flourish. Put the gaze target next to character position, camera side, dialogue owner, and prop state so the eyeline is stated explicitly for that one shot, not left for the model to guess.
Build the scene in Creative Worlds. Keep identity in Character Asset References, then use AI Short Drama guides or three-shot continuity template to attach eyelines to a hook, reaction, and reveal.
For dialogue, use a simple table: shot number, speaker, listener position, camera side, gaze target, gaze change, reject condition. Reject conditions should be concrete. "Reject if Tesh looks into the lens instead of toward Amara" is better than "make eye contact natural."
When a shot is close but wrong, repair the gaze layer only. Do not rewrite character, costume, lighting, and background if only the eyes aim too high.
Example 1: Glass Elevator Confession
Close-up on @Amara inside the glass elevator, camera set on @Tesh's side of the cab. Amara's eyes stay down-left on the folded route map in her hand as the confession line starts, then lift left to find @Tesh's face right as it lands. Hold on the moment their eyes meet for one beat before she drops her gaze again. Soft blue city light sweeps up through the glass floor and across both faces. Keep the elevator hum low under the dialogue, and let it drop out for the half-second their eyes connect.
This prompt creates hesitation by controlling where the eyes land before and after the line.
Example 2: Seed Library Suspicion
Medium two-shot of @Corvin and @Nessa across the desk, camera at desk height between them. Both keep their eyes on the silver seed box, then lift together — Corvin's gaze drifting left, Nessa's drifting right — until their eyes cross for one tense beat over the box before both look back down. Neither reaches for it. Dim greenhouse light filters through the hanging shelves, throwing thin chain shadows across both faces. Hold the silence; only the faint creak of the chains plays under the shot.
The suspicion comes from delayed eye contact. The prop gets the first gaze because the prop carries the threat.
Example 3: Lantern Ferry Farewell
Wide two-shot of @Halven on the dock, frame left, and @Iriska on the ferry deck above him, frame right, camera at dock level. As the ferry horn sounds, Halven lifts his eyes up-right and finds Iriska already looking down-left at him, and their gazes hold across the widening gap between dock and deck. Neither waves. The pole lantern swings gently between them, casting warm light across the dusk. Let the horn and creaking rope carry the beat instead of dialogue.
This keeps the fix narrow so a good costume or background is not lost.
The Breaks That Kill the Cut
The most common eyeline mistake is asking for "deep eye contact" without saying where the other character is.
Another mistake is using centered portrait shots for both sides of a conversation. If everyone faces the camera, the scene becomes profile cards, not interaction.
Creators sometimes forget vertical distance. A seated rival, balcony speaker, or stairwell scene needs an upward or downward gaze.
Object glances are often skipped. When a prop matters, the character should look at it before the viewer is expected to care about it.
Some cuts fail because every shot uses direct eye contact. Real scenes use approach, avoidance, interruption, and return.
Finally, do not repair eyeline by rewriting the whole shot. If face, costume, and lighting pass, change only gaze target, head angle, and camera side.
FAQ
What is eyeline direction?
Eyeline direction is the planned direction of a character's gaze toward a person, prop, exit, clue, or avoidance target.
Should characters always look at each other?
No. Avoiding eye contact can be meaningful. The key is to define what they look at instead, such as the floor, a letter, a door, or a clue.
How do I write eyeline in a prompt?
Use position language: "looks frame right toward Nessa," "glances down-left at the ticket," or "keeps head still while eyes lift toward the balcony."
How do I check eyeline continuity?
Compare paired shots. If one character looks right toward the listener, the listener should usually answer left, adjusted for height and camera side.
How do I keep eyelines consistent across the storyboard?
Yes. Put gaze target, listener position, and camera side on the shot card, then review against those fields before final polish.