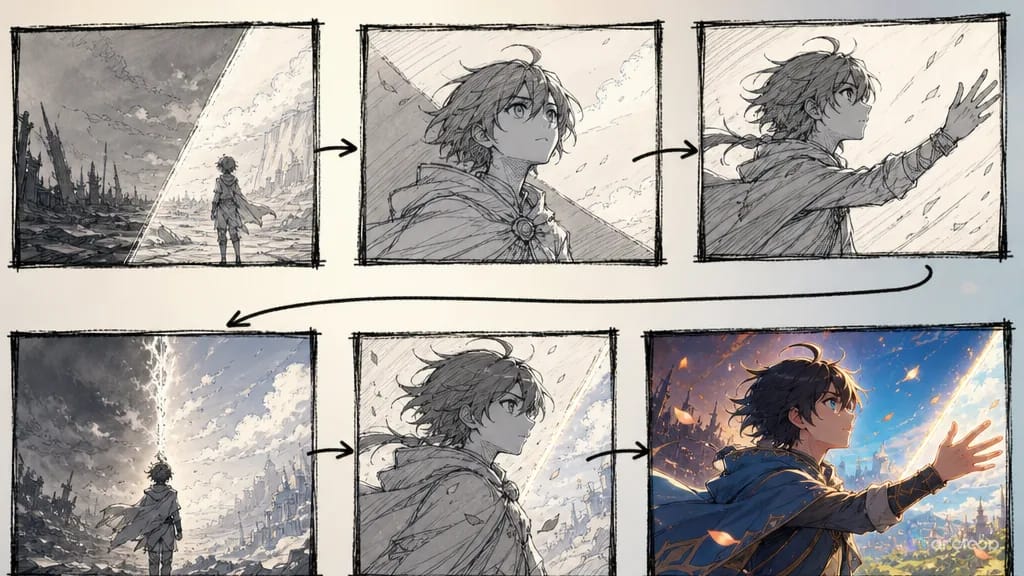
A shot list turns one scene into a set of individual shots — what the audience needs to see, where the camera sits, how it moves, and where each shot ends. A good AI video prompt pushes that plan one step further, spelling out action, framing, focus and timing in language a model can follow.
Use this guide to pick a camera setup for a story beat, then rewrite the prompt for your own characters and location. The 108 prompts are grouped by movement, framing, viewpoint and transitions, and twelve generated examples show a selection of them in motion.
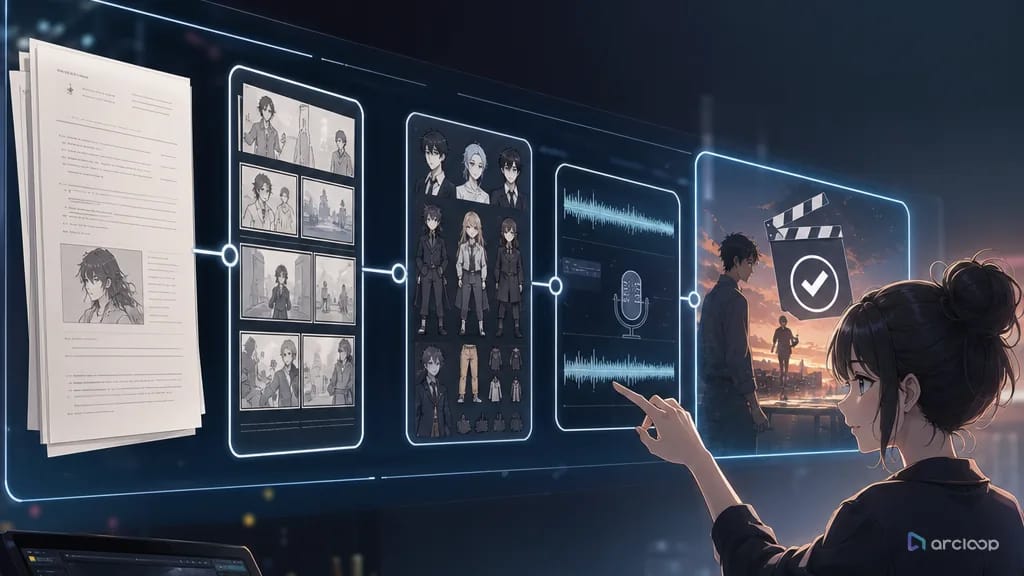
If you're building a narrative project, start with Arcloop’s AI Short Drama Generator to turn a story into characters, scenes and shots, then use the prompts below to sharpen the camera direction on each one.
How to Turn a Scene into a Shot List
Start with what the scene has to communicate. Establish the space, cover the important action, and decide whose reaction matters. Then give every planned shot an ID, a subject or action, a shot size, an angle, a camera move, an estimated duration, and any focus or continuity notes. You can regroup by setup when you build the shooting schedule; while you're planning coverage, keep the story order intact. Adobe's shot list guide explains how planning camera setups helps a crew capture the coverage an editor needs.
Pick a camera move because it reveals something, follows an action, or shifts the audience's relationship to the subject. Sometimes a locked-off shot serves the scene better than any movement at all.
For a moving shot, describe the start, the change and the finish. One structure that keeps working:
Starting frame + subject action + camera move + timing + ending frame + essential constraints.
Here's a woman opening a door onto someone she didn't expect to see:
| Time | Shot direction | Story purpose |
|---|---|---|
| 0–3 s | Eye-level medium shot from behind. Place her on the right third of the frame as she approaches the door. | Establish her position and the direction of her attention. |
| 3–5 s | Slowly dolly toward her hand on the handle. Keep the handle in focus. | Direct attention to the action before the reveal. |
| 5–8 s | As the door opens, tilt up past her shoulder to reveal the person beyond it. | Reveal the new information with the character. |
| 8–11 s | Settle into an over-the-shoulder close-up of the other person. Hold the composition. | Give the audience time to read the reaction. |
That's one continuous-shot plan. If the scene needs clearer coverage, break the hand insert, the reveal and the reaction into separate shots, and adjust the timing to your scene and your clip length.
How to Use the Prompts and Videos
Treat the table prompts as reusable starting points. Swap in your subject, location and action, then pick a duration long enough for the movement to read. When camera movement, subject movement and a focus change happen together, describe each one separately.
The videos were generated with Seedance 2 Fast at 1280 × 720, 24 fps, roughly 10 seconds each. All of them are silent, including the dialogue example. Their scene-specific prompts expand on selected entries below, and the table timings are not a transcript of the finished clips. Example numbers 01–12 label the videos; prompt IDs 01–108 label the library entries. Notes beside each video point out where the result departs from the intended shot.
108 Camera Prompts for Your Shot List
01 | Dolly In and Dolly Out
What these shots do: Pushing the camera toward a subject pulls attention to a realization, an expression or a clue. Pulling away can reveal the setting, or turn an intimate moment into one of distance and isolation. The emotional effect depends on the scene, the performance and the composition. A dolly changes the camera's position in space; a zoom changes focal length from a fixed position.
How to write them in a shot list: Note the starting size, the cue that triggers the move, its path and pace, and the final composition. Something like “MS; begin a slow dolly in when she hears the door; finish on her reaction in CU” is enough to shoot from. Add focus instructions when the subject has to stay sharp as the distance changes.
Example 01: Slow Dolly In · Prompt 01
The framing tightens as the camera approaches the character. Watch how the background changes with the move.
Example 05: Pullback Reveal · Prompt 05
A single-character variation: the close framing opens out to show the empty warehouse around him.
| ID | Shot | Adaptable prompt |
|---|---|---|
| 01 | Slow Dolly In to a Close-Up | Start in a medium shot and slowly dolly toward the subject at a constant focal length. From 0–2 s, move to a chest-up framing; from 2–4 s, continue into a facial close-up. Keep the move smooth and steady, with no sudden acceleration or cut. |
| 02 | Dolly In to a Detail | Slowly dolly forward from a wide shot toward a letter on a table. Begin the move during 0–1.5 s; reach a close framing of the hand and letter during 1.5–4 s. Follow a straight path without lateral sway or a change in focal length. |
| 03 | Accelerating Push-In | Begin in a medium shot. As the character's emotion intensifies, accelerate the dolly in from a chest-up framing to an extreme close-up of the eyes. Move slowly during 0–2 s, then accelerate during 2–3.5 s. Avoid an abrupt stop. |
| 04 | Slow Dolly Out | Start on a facial close-up and smoothly dolly backward to reveal the setting. Reach a chest-up framing during 0–2 s, then continue to a medium wide shot during 2–5 s. Keep the movement steady, without a sudden increase in speed or rotation. |
| 05 | Pullback Reveal | Begin with a close framing of two people. Hold for 0–1.5 s, then slowly dolly backward during 1.5–5 s to reveal the empty room around them. Keep the retreat straight and even, without sideways drift. |
| 06 | Rapid Pullback to an Extreme Wide | Hold a facial close-up for 0–1 s, then rapidly dolly out during 1–3.5 s until the character is small within an extreme wide shot. Keep the path straight and the horizon steady. |
| 07 | Dolly In with a Rack Focus | Dolly forward while shifting focus from a foreground character to a background character. Hold foreground focus during 0–1.5 s; combine the move and smooth focus transition during 1.5–3 s. Avoid an abrupt focus jump or a cut. |
| 08 | Lingering Push-In | From a frontal medium shot, dolly very slowly toward the character over 0–5 s, finishing in an extreme close-up of the eyes. Keep the camera facing the character throughout, with a constant pace and no sideways drift. |
| 09 | Angled Dolly In | Start at an oblique angle in a medium shot. Dolly toward the character during 0–2 s; during 2–3.5 s, continue closer while gently adjusting the camera's orientation toward a more frontal view. Keep the transition smooth. |
02 | Pans, Tilts, and Lateral Moves
What these shots do: A pan or tilt redirects attention from a fixed camera position. A lateral move carries the camera sideways through the space, changing the relationship between foreground and background. Both can follow a glance or reveal information, but they produce different spatial effects. A camera that travels around a subject follows an arc; that movement is distinct from a pan.
How to write them in a shot list: Identify the opening subject, the direction, the action cue and the final composition. For a lateral move, describe the camera's route and say whether the subject's size or screen position should stay constant. Record any deliberate hold: “Pan right on his glance; pause at the empty chair; continue to the doorway.”
Example 09: Pan Right · Prompt 10
The view turns from the character toward a sculpture. The model also added a tripod near the opening edge of frame; it is incidental to the movement being demonstrated.
| ID | Shot | Adaptable prompt |
|---|---|---|
| 10 | Slow Pan Right | From a fixed camera position, slowly pan from left to right to reveal the setting. Complete the move over 0–3 s at a constant speed. Keep the horizon level, without an abrupt stop or vertical wobble. |
| 11 | Tilt Up | Keep the camera position fixed and slowly tilt upward from the character's feet to their face over 0–2.5 s. Maintain a smooth pace, without panning sideways or accelerating. |
| 12 | Pan Following a Glance | The character turns their head during 0–1 s. During 1–2.5 s, pan in the direction of their gaze to reveal what they are looking at. Let the camera follow the glance without anticipating it or lagging noticeably behind. |
| 13 | Lateral Move to Reveal the Space | Truck smoothly from left to right over 0–3 s, keeping the camera height and focal length constant. Show the relationship between the character and the setting. Avoid forward or backward drift and keep the horizon level. |
| 14 | Moving Through a Crowd | Move smoothly through a gap in a crowd on a shallow diagonal path. Establish the movement during 0–2 s and pass between people during 2–4 s. Let surrounding figures fall out of focus while maintaining a clear route. Do not stop or turn abruptly. |
| 15 | Diagonal Camera Move | Move the camera on a smooth diagonal path so the composition travels from lower left toward upper right over 0–2.5 s. Keep the movement even and deliberate, without turning it into a straight push-in or a bumpy rise. |
| 16 | Pan with an Intentional Hold | Start panning from left to right during 0–1 s. Hold a clear composition during 1–2 s, then resume the pan during 2–3.5 s. Make the pause intentional rather than a stutter. |
| 17 | Lateral Reveal of Two Characters | Begin beside Character A and move laterally toward a frontal view of Character B. Establish the move during 0–2 s and arrive at B during 2–4 s, revealing their positions relative to each other. Keep the height and pace consistent. |
| 18 | Half-Circle Arc Shot | Move the camera in a smooth horizontal arc around the subject, from the front through a side view to the back. Complete a half-circle over 0–4 s while keeping the subject framed. Follow a curved path rather than a straight lateral move; avoid vertical bobbing. |
03 | Tracking Shots and Crane Moves
What these shots do: A tracking shot accompanies a character through a space, letting the audience discover a route, an obstacle or a destination with them. A rising or descending move changes the viewing height and can reveal the setting around the subject. Following from behind, leading from the front and tracking alongside each create a different relationship to the action.
How to write them in a shot list: Establish the character's blocking first, then record the camera's position, its route, the starting and ending sizes, and any change in distance. For a rise or descent, state the starting and ending heights and whether the camera also tilts or travels forward. On a live-action shoot, list the equipment you'll need in the production notes.
Example 02: Side Tracking Shot · Prompt 20
The camera travels alongside the walking character as station columns and benches pass through the frame.
Example 06: Crane-Up Reveal · Prompt 23
The rising viewpoint reveals the courtyard layout. This result starts at a high angle and also widens; it is a combined reveal rather than a pure vertical pedestal move.
| ID | Shot | Adaptable prompt |
|---|---|---|
| 19 | Following Shot from Behind | Follow behind the walking character in a medium shot over 0–4 s. Match their pace and maintain a consistent distance. Stay behind them without overtaking or drifting from side to side. |
| 20 | Side Tracking Shot | Track alongside the walking character in a side-on medium shot over 0–3.5 s. Match their speed so their size and screen position remain consistent. Avoid moving closer, falling behind, or bobbing vertically. |
| 21 | Leading Shot | Move backward in front of the character as they walk toward the camera. Maintain a frontal medium shot and a consistent distance over 0–3 s. Keep the retreat smooth, without a sudden stop or lateral drift. |
| 22 | Running Follow Shot | Follow a running character from slightly behind and to one side, with restrained footfall movement. Establish the follow during 0–1 s; gradually close the distance from a medium shot to a close-up during 1–3.5 s. Keep the action readable. |
| 23 | Crane-Up Reveal | Start close to the character. Hold during 0–1.5 s, then smoothly raise the camera during 1.5–5 s, adjusting its downward angle as needed to reveal the wider setting from above. Keep the ascent controlled, without sideways sway or sudden acceleration. |
| 24 | Descending Reveal | Start high above the scene in a wide shot. Hold during 0–1.5 s, then descend smoothly toward the character during 1.5–4.5 s, finishing in a medium shot. Keep the subject framed without lateral drift. |
| 25 | Crane Up and Dolly In | Begin low on a detail, then combine a rising camera move with forward travel. Establish both movements during 0–2 s; continue during 2–5 s to reach an elevated view of the key area below. Coordinate the rise and approach smoothly. |
| 26 | Following Shot with a Push-In | Follow the character from behind in a medium shot during 0–2 s. During 2–4 s, continue following while gradually closing the distance to a tighter view. Maintain a smooth walking rhythm without a sudden stop or lateral drift. |
| 27 | Tracking Arc Around a Moving Subject | Follow the walking character while arcing from a frontal view to a side view over 0–3 s. Keep the character framed as both the subject and camera move. Use a gradual arc without interrupting the follow or spinning rapidly. |
04 | Close-Ups, Inserts, and Macro Shots
What these shots do: A close-up isolates an expression or detail that would disappear in a wider composition. An insert gives an action or object its own shot — a hand turning a key, for instance. Macro photography earns the name when a small subject needs real magnification; it isn't a synonym for every close-up.
How to write them in a shot list: Name the exact detail, action and moment that must be readable. Record the continuity that matters — which hand, the object's orientation, how far through the action you are. Add the focus target, the depth of field you want, and how long the shot holds. For macro work, allow for the narrow focus range and for how much a small movement will shift.
Example 10: Key-Turning Insert · Prompt 35
The tight framing makes the key-turning action readable. The key is already in the lock at the start, so this does not demonstrate the complete insertion stage.
| ID | Shot | Adaptable prompt |
|---|---|---|
| 28 | Extreme Close-Up of the Eyes | Frame the character's eyes in an extreme close-up with very shallow depth of field. Keep the irises and lashes sharp, with surrounding features soft. Hold steadily for 0–1 s. Avoid excessive blinking or drifting down toward the nose. |
| 29 | Extreme Close-Up of the Lips | Frame the lips in an extreme close-up with very shallow depth of field. Keep their texture sharp while the rest of the face falls soft. Hold for 0–1.5 s without drifting toward the chin or swaying sideways. |
| 30 | Hand Insert | Frame the hand's action in close-up with shallow depth of field and a soft background. Follow its small movement during 0–2 s while keeping the fingers and important action clear. Stay on the hand without a sudden pullback. |
| 31 | Macro Detail of an Object | Show a small object on a table in macro close-up. Keep its texture crisp against a soft background. Reveal the surface detail gently over 0–2 s, with a stable frame and no pullback. |
| 32 | Tear Insert | Frame a tear on the character's cheek in extreme close-up with shallow depth of field. Let it begin to fall during 0–1 s, then follow its path during 1–2 s. Keep the tear readable without an abrupt move or acceleration. |
| 33 | Shadow Detail | Frame the character's shadow on a wall in a medium close-up. Keep the silhouette and gestures legible as they change during 0–2 s. Hold the camera still and remain on the shadow rather than cutting to the person. |
| 34 | Close-Up of Breathing | Frame the character's chest in close-up to show a subtle rise and fall with each breath. Hold the composition during 0–3 s. Keep the motion restrained without camera shake or a pullback. |
| 35 | Key-Turning Insert | Frame a key and lock in a tight detail shot, using macro magnification if needed. Insert the key during 0–0.5 s, then turn it during 0.5–2 s. Keep the lock and key action sharp, with a steady camera and no reframing. |
| 36 | Close-Up of Subtle Lip Movement | Frame the lips in extreme close-up as they gently part and move over 0–2 s. Use shallow depth of field, keeping the surrounding face soft. Stay on the lips without pulling back. |
05 | Full Shots, Wide Shots, and Establishing Shots
What these shots do: Wider framing shows where the action happens, where people stand, and how they can move through the setting. It can also make a character feel isolated, or establish scale. A full shot includes the entire body; a wide or extreme wide leans harder on the environment. “Establishing shot” describes a shot's job in introducing a scene.
How to write them in a shot list: Identify the people, entrances, landmarks and routes the audience has to understand, and specify the subject's size and placement. If the shot establishes a location, state what it must communicate; if it covers a complete action, describe the blocking. Carry that spatial plan into the closer coverage. The pullback example in Section 01 shows a moving shot ending on exactly this wider context.
| ID | Shot | Adaptable prompt |
|---|---|---|
| 37 | Extreme Wide Establishing Shot | Show the setting in an extreme wide shot, with the character small in the frame. Hold for 0–4 s, or add a barely perceptible dolly in. Emphasize the scale of the space without a fast move or a cut to a close-up. |
| 38 | Full Shot | Frame the character from head to toe, occupying roughly two-thirds of the image height with the surroundings visible. Hold for 0–3 s, or add a very slow lateral move. Avoid pushing closer or shaking the frame. |
| 39 | Wide Ensemble Shot | Frame several characters in a wide composition that clearly establishes their positions. Hold for 0–4 s, or slowly move laterally to include everyone. Keep the group relationship readable rather than isolating one person or pushing in. |
| 40 | Isolating Extreme Wide | Place the character very small within a broad landscape or large environment. Hold the frame steadily for 0–5 s to emphasize their separation from the surrounding space. Do not push in or sway sideways. |
| 41 | Pullback to an Extreme Wide | Begin close to the character and hold for 0–1 s. During 1–3.5 s, rapidly dolly backward to an extreme wide shot, making the figure much smaller. Keep the path straight and controlled. |
| 42 | Aerial Establishing Shot | Look down from high above in an extreme wide view, with the setting laid out below and people appearing small. Hold for 0–4 s, or rotate very slowly. Avoid a sudden descent or lateral wobble. |
| 43 | Wide Shot of a Crossing | Hold a fixed wide shot as a distant character walks from one side of the frame to the other over 0–5 s. Keep their movement small within the setting. Do not follow or push closer. |
| 44 | Wide Shot of an Empty Room | Frame a large, mostly empty room with a character in a distant corner. Hold steadily for 0–4 s, allowing the empty space to dominate the composition. Avoid a push-in or lateral move. |
| 45 | Approach in a Locked-Off Wide | Hold a fixed wide shot as a character walks from the distance toward the camera over 0–5 s, gradually reaching a medium framing. Let the subject's approach change their size; keep the camera still. |
06 | High-Angle, Low-Angle, and Overhead Shots
What these shots do: Camera height and angle shape the audience's relationship to a subject. A high angle can reveal a layout or make a person look small; a low angle can stress scale, authority or threat. Either may also follow another character's eyeline. Meaning comes from the scene, not from a fixed emotional rule.
How to write them in a shot list: Record whether the camera sits above or below the subject, what it faces, and the framing you need. Say whose viewpoint the angle represents when that matters. Use angle measurements when they help a crew or a generation prompt; skip the false precision. Record a change in camera height separately from a tilt.
Example 11: Low-Angle Shot · Prompt 50
The camera looks upward at the character, using the building behind him to reinforce height and scale.
| ID | Shot | Adaptable prompt |
|---|---|---|
| 46 | Slight High Angle | Place the camera slightly above the character, looking down at approximately 15 degrees in a medium shot. Hold for 0–3 s with a quiet, restrained performance. Keep the height and angle consistent. |
| 47 | Overhead Shot | Position the camera directly above a character lying on the floor or sitting at a table. Hold the top-down view for 0–2.5 s, or rotate very slowly. Maintain the overhead viewpoint rather than shifting toward eye level. |
| 48 | High-Angle Extreme Wide | Show the entire setting from high above, with the character small in the composition. Hold for 0–4 s, or move laterally very slowly to reveal the layout. Keep the height consistent and the frame steady. |
| 49 | Slight Low Angle | Position the camera slightly below the character, looking up at approximately 15 degrees in a medium shot. Hold steadily for 0–3 s. Keep the low-angle view without an abrupt change in height. |
| 50 | Pronounced Low Angle | Place the camera close to ground level and look up at the character at roughly 45 degrees or more. Emphasize their height and presence. Hold for 0–2.5 s without shifting to eye level or changing the camera height. |
| 51 | Tilt Up a Building | From a low camera position, tilt up from the base of a tall building to its upper levels over 0–3.5 s. Emphasize its height while keeping the move smooth. Do not pan sideways. |
| 52 | High Angle on a Vulnerable Character | Look down on a character with their head lowered and body drawn inward. Hold for 0–3 s, allowing the performance and surrounding space to convey vulnerability. Keep the angle consistent without pushing into an extreme close-up. |
| 53 | Low-Angle Hero Shot | Frame a standing character from a low angle, with backlight outlining their silhouette. Let their posture convey resolve. Hold for 0–3 s without raising the camera to eye level. |
| 54 | High-Angle Running Shot | Look down at roughly 45 degrees as a character runs toward the top of the frame over 0–3 s. Keep the elevated viewpoint consistent and the movement readable. Avoid descending toward eye level. |
07 | Slow Motion and Freeze Frames
What these shots do: Slow motion makes a brief action easier to study, or gives an emotional beat more screen time. A freeze frame stops the image at a chosen instant. Decide whether the audience needs to watch an action unfold or sit on a single frame.
How to write them in a shot list: Specify the action, the point where the speed changes, the intended screen duration, and where normal motion resumes. On a live-action shoot, record capture and playback frame rates where they matter. For a freeze frame, name the exact moment, the hold duration, and whether sound continues. In an AI prompt, keep slow subject motion distinct from a slowly moving camera.
| ID | Shot | Adaptable prompt |
|---|---|---|
| 55 | Slow-Motion Turn | Hold a fixed medium shot as the character turns at approximately one-quarter of normal speed. Let the turn unfold over 0–3 s, without speeding up midway. Keep the camera still. |
| 56 | Slow-Motion Rain | Show raindrops falling slowly in a fixed close-up, with a soft background and a cool color palette. Let the fall unfold over 0–3 s. Keep the frame steady and the droplets moving in slow motion. |
| 57 | Hair Moving in Slow Motion | Hold a medium close-up as wind lifts the character's hair in slow motion over 0–3.5 s. Use shallow depth of field and keep the camera still. Avoid rapid movement or a pullback. |
| 58 | Freeze Frame Within an Action | Show an action underway during 0–1 s. Freeze the entire image on a selected frame during 1–3 s, then resume normal motion during 3–4 s. Keep the pause distinct from the moving portions. |
| 59 | Slow-Motion Tear | In an extreme close-up, show a tear slowly sliding from the corner of the eye down the cheek over 0–3 s. Keep its highlights visible and the face framed consistently. |
| 60 | Slow-Motion Embrace | Hold a fixed medium shot as two people approach and embrace at approximately one-third of normal speed. Let the movement unfold over 0–4 s without a sudden acceleration. |
| 61 | Slow-Motion Look Back | In a side-on close-up, show the character slowly turning their head to look back over 0–3 s. Let the hair respond subtly. Keep the camera steady and avoid a quick head turn. |
| 62 | Slow-Motion Falling Object | Frame a cup near the edge of a table. Let it begin falling during 0–1 s, then follow its slow descent during 1–3 s in close-up. Stay with the cup without cutting to the floor. |
| 63 | Slow-Motion Raindrop Splash | Look down in close-up at a puddle. Show a raindrop falling into it and a small splash unfolding in slow motion over 0–3 s. Keep the camera fixed and the framing tight. |
08 | Handheld Shots
What these shots do: Handheld work gives the camera a sense of bodily presence. Subtle breathing and small corrections can feel intimate or observational; heavier footfall can carry urgency or physical effort. The amount of movement should serve the scene while preserving the action the audience needs to read.
How to write them in a shot list: Pair “handheld” with a task: “Follow from rear three-quarter; keep the upper body readable.” Specify position, framing, the intensity of the movement, and the action that matters. Note any deliberate lag in following a reaction. For AI generation, give the camera a controlled behaviour instead of asking for undirected shaking.
Example 07: Handheld Following Shot · Prompt 64
Follow the character through the street and around the bend. Watch the full clip to judge the handheld rhythm.
| ID | Shot | Adaptable prompt |
|---|---|---|
| 64 | Handheld Following Shot | Follow a walking character in a medium shot over 0–4 s. Add restrained footfall movement and small natural adjustments, giving the camera an observational presence. Keep the subject readable without violent shaking. |
| 65 | Handheld Move Through a Doorway | Move slowly forward through a doorway or a gap in a crowd over 0–3 s, using a medium close framing. Retain subtle handheld movement without large sideways swings or an overly floating feel. |
| 66 | Handheld Reaction Close-Up | Frame the character's reaction in close-up over 0–2.5 s. Add small, controlled handheld adjustments while keeping the face readable. Avoid heavy shaking. |
| 67 | Handheld Running Follow | Follow a running character with visible but controlled footfall movement. Establish the follow during 0–1 s, then gradually widen from a medium to a full shot during 1–4 s. Keep the action legible. |
| 68 | Observational Handheld Shot | Watch the character from a distance in a medium wide or long shot over 0–4 s. Use slight natural handheld movement to suggest an observer's presence. Maintain the distance without approaching or shaking aggressively. |
| 69 | Handheld Reframe on a Head Turn | Hold a medium shot. The character turns their head during 0–0.5 s; let the handheld camera follow the turn during 0.5–2 s with a slight, natural delay. Keep the adjustment controlled. |
| 70 | Tense Handheld Close-Up | Frame a tense character in close-up over 0–3 s, using shallow depth of field and restrained handheld movement. Let breathing and small camera adjustments contribute to the tension while keeping the face clear. |
| 71 | Handheld Street Tracking Shot | Track alongside a character on a street in a medium shot over 0–4 s. Use natural light and subtle handheld movement for an observational feel. Keep the subject readable without an overly smooth glide or violent shake. |
| 72 | Handheld Running Close-Up | Follow a running character in close-up over 0–3 s. Show the effort in their face and breathing, with visible but controlled footfall movement. Keep facial features readable as the camera travels with them. |
09 | Over-the-Shoulder and POV Shots
What these shots do: An over-the-shoulder shot uses part of a foreground character to anchor their relationship with someone beyond them. A point-of-view shot shows what a character sees. Both align the audience with a person, but their framing and viewpoint should be recorded separately.
How to write them in a shot list: For OTS coverage, name the foreground character and the person in focus, and describe how much shoulder or head stays in frame. Check eyelines and screen direction across reverse angles. For POV, identify the viewpoint character, what they look at, and any action visible in frame, then connect it to the matching look or reaction shot.
Example 08: Over-the-Shoulder Dialogue Shot · Prompt 73
The soft foreground shoulder anchors the clear view of the person opposite. This is the recast version. The clip has speaking gestures but no audio.
Example 12: POV Opening a Door · Prompt 80
The hand opens the door from the viewpoint character's eye position, revealing the bookshop interior without cutting to an outside angle.
| ID | Shot | Adaptable prompt |
|---|---|---|
| 73 | Over-the-Shoulder Dialogue Shot | Position the camera behind one character's shoulder and frame the person opposite in a medium close-up. Keep the foreground shoulder soft and the other person's face sharp. Hold for 0–4 s without changing to a frontal single or pushing into an extreme close-up. |
| 74 | OTS Push-In | Begin in an over-the-shoulder medium shot. Hold during 0–2 s, then slowly dolly toward a close-up of the person opposite during 2–4 s. Maintain the established viewing direction without pulling back or moving sideways. |
| 75 | Point-of-View Shot | Show the scene from a character's first-person viewpoint over 0–4 s. Let their hands enter the frame occasionally as appropriate to the action. Maintain the viewpoint without showing their face or cutting to an external angle. |
| 76 | POV Look to the Side | From a first-person viewpoint, begin turning toward a new part of the setting during 0–1 s and reveal it during 1–3 s. Make the view follow a natural head turn, without anticipating the action or shaking aggressively. |
| 77 | POV Looking Down at the Hands | From the character's first-person viewpoint, look down at their hands as they perform an action near the bottom of the frame over 0–2.5 s. Stay on the hands without cutting to an external view or looking up. |
| 78 | Reverse Over-the-Shoulder Shot | Film the complementary OTS angle from behind the other character's shoulder, looking back toward the original foreground character. Hold for 0–2 s. Preserve the established eyelines and screen direction without cutting to a frontal extreme close-up. |
| 79 | Oblique Over-the-Shoulder Two-Shot | Frame the exchange from an oblique OTS angle, showing the characters' profiles and the distance between them. Hold for 0–3 s, maintaining the relationship in the composition without moving to a frontal view or pushing closer. |
| 80 | POV Opening a Door | From a first-person viewpoint, reach for the door handle during 0–1 s. During 1–3 s, push the door open to reveal the space beyond. Keep the movement natural and remain in the character's viewpoint without a cut. |
| 81 | Quick POV Head Turn | From a first-person viewpoint, begin a quick head turn during 0–0.5 s and arrive at the new direction during 0.5–1.5 s. Allow brief directional motion blur while keeping the movement controlled. |
10 | Arc Shots, Orbits, and Camera Rolls
What these shots do: An arc shot moves the camera around a subject, continuously changing the background and the viewing angle. It can give a moment energy, intimacy or unease. A roll rotates the image around the viewing axis for a different kind of imbalance. Match the path and pace to the scene.
How to write them in a shot list: Specify the subject, the starting side, the direction of travel, the arc covered, the distance and the ending frame. Define a directional reference if you're using clockwise or counterclockwise. Describe any change in height or distance separately. When an arc crosses a dialogue axis, work out how the new screen positions connect to the coverage that follows.
Example 03: Slow Orbit · Prompt 82
The viewpoint and background change around the subject. The generated arc is larger than the requested 90 degrees; use it as an orbit example rather than a precise angle reference.
| ID | Shot | Adaptable prompt |
|---|---|---|
| 82 | Slow Orbit | Slowly move around the character on a horizontal arc, traveling from the front through a profile view to the back over 0–5 s. Keep the subject framed and the movement steady. Avoid acceleration or a change in camera height. |
| 83 | Orbit with a Push-In | Begin orbiting the character in a medium shot during 0–1.5 s. During 1.5–4.5 s, continue the arc while gradually moving closer to a close-up. Keep the movement continuous without pulling away or stopping. |
| 84 | Full 360-Degree Orbit | Circle the character once at a consistent height and distance, beginning and ending at the frontal view. Complete the full orbit over 0–6 s in a medium shot. Maintain a steady pace without vertical bobbing. |
| 85 | Low-Angle Orbit | From a low camera position, arc halfway around the character over 0–4.5 s while maintaining an upward view. Keep the subject framed and the camera height consistent. Avoid rising to eye level. |
| 86 | Arc Around Two Characters | Begin facing two characters during 0–1 s. During 1–4 s, arc around them through a side view toward a rear view, revealing their spacing and relationship. Keep the motion measured without pushing closer. |
| 87 | Disorienting Camera Roll | Roll the camera around its viewing axis over 0–2.5 s to suggest a character's dizziness. Let the image rotate with directional motion blur. Keep the rotational motion continuous without an abrupt stop. |
| 88 | Orbit Through a Change of Expression | Slowly orbit the character over 0–5 s as their expression changes from neutral to a restrained smile. Maintain the framing while the expression develops, without stopping the arc or cutting closer. |
| 89 | Descending Spiral | Start high above the character and descend on a smooth spiral path over 0–5 s, gradually arriving in front of them. Coordinate the descent and orbit so the subject remains readable. Avoid a straight drop or a break in the rotation. |
| 90 | Ascending Spiral | Start above the character and rise on a smooth spiral path over 0–5 s until the wider setting is visible below. Keep the ascent and orbit continuous rather than rising straight upward. |
11 | Zooms and Focus Changes
What these shots do: A zoom changes framing through focal length. A rack focus moves the plane of sharp focus between subjects to shift attention. From a stationary camera, a zoom does not produce the change in perspective a dolly does. Keeping a moving subject sharp is a third job — following focus, rather than deliberately handing attention to someone else.
How to write them in a shot list: For a zoom, state the fixed or moving camera position, the starting and ending sizes, and the pace. For a rack focus, name the initial and final focus targets and the cue: “On the letter hitting the table, rack from her face to the doorway.” If the camera also moves, describe that path independently.
Example 04: Rack Focus · Prompt 93
The foreground envelope falls soft as the background character becomes sharp, with the composition largely unchanged.
| ID | Shot | Adaptable prompt |
|---|---|---|
| 91 | Zoom In | Keep the camera fixed and smoothly zoom from a wide shot to a close-up over 0–3 s. Change framing through focal length rather than moving the camera. Avoid a repeated in-and-out zoom. |
| 92 | Zoom Out | Keep the camera fixed and smoothly zoom from a close-up to a wide shot over 0–3.5 s, revealing more of the surroundings. Do not move the camera or reverse the zoom repeatedly. |
| 93 | Foreground-to-Background Rack Focus | Hold focus on a foreground character during 0–0.5 s. During 0.5–2 s, smoothly rack focus to the character in the background, letting the foreground soften as the background becomes sharp. Keep framing and focal length unchanged. |
| 94 | Rack Focus Between Dialogue Partners | In a layered dialogue composition, hold focus on Character A during 0–1 s, then smoothly transfer it to Character B during 1–2.5 s. Keep the focus change deliberate rather than snapping back and forth. |
| 95 | Rapid In-and-Out Zoom | From a fixed camera position and medium framing, rapidly zoom in and out several times over 0–2 s to create a restless visual rhythm. Keep the effect optical rather than moving the camera. |
| 96 | Rack Focus to a Prop | Hold focus on the character's face during 0–0.5 s, then smoothly shift to the object in their hand during 0.5–2 s. Let the face soften as the prop becomes sharp. Keep the framing fixed. |
| 97 | Subject Approaches into Shallow Focus | Begin with the character and some background detail readable during 0–1 s. During 1–2.5 s, let the character step closer while focus follows them, so the background becomes softer. Keep the camera position and focal length unchanged. |
| 98 | Gradual Defocus | Hold a clear image during 0–1.5 s, then gradually let the entire frame fall out of focus during 1.5–3.5 s to suggest fading vision. Make the transition smooth without suddenly snapping to blur or returning to sharp focus. |
| 99 | Fast Zoom-Out Reveal | Keep the camera fixed. Hold a close-up during 0–1 s, then rapidly zoom out to a wide shot during 1–3 s to reveal the setting. Avoid moving the camera or reversing the zoom. |
12 | Transitions and Matching Shots
What these shots do: A transition can connect spaces, actions or ideas, or deliberately set up a contrast. An occlusion wipe, a whip-pan, a match cut and a J-cut each rely on a different relationship between the outgoing and incoming shots. A match cut is often just a hard cut; its continuity comes from whatever matches across the edit.
How to write them in a shot list: Plan both sides of the edit. Record the outgoing final frame and the incoming first frame, including movement direction, subject placement, and the matching action or shape. For a sound bridge, note where incoming sound starts or outgoing sound carries over. Leave handles for editing, and put fades, freezes or audio overlaps in the post-production notes.
| ID | Shot | Adaptable prompt |
|---|---|---|
| 100 | Occlusion Wipe | During 0–1 s, let a person move close to the lens. During 1–2 s, their body fully covers the frame. Reveal the new setting during 2–3 s as the obstruction clears. Hide the edit within the complete occlusion, without a visible dissolve. |
| 101 | Whip-Pan Transition | Begin a fast whip pan during 0–0.5 s. Use directional motion blur during 0.5–1.5 s to bridge the edit, then settle on the new setting during 1.5–2.5 s. Match the pan direction across the transition. |
| 102 | Match on Action | Show an action beginning in the outgoing shot during 0–1.5 s, then cut to the incoming shot during 1.5–3 s as the same action continues. Match its direction, position, and timing so the movement carries across the edit without a pause. |
| 103 | Graphic Match Between Objects | Show a clearly framed object during 0–2 s. During 2–3.5 s, transition to a similarly shaped object in a new setting, matching its screen position and size. Use the shared shape to connect the images. |
| 104 | J-Cut | Keep the outgoing scene on screen during 0–1.5 s while sound from the next scene begins. During 1.5–3 s, cut the picture to that next scene. Let the sound introduce the new space before the visual change. Plan this across picture and sound. |
| 105 | Fade Through Black | Fade the outgoing image to black during 0–1 s. Hold black during 1–2 s, then fade into the new scene during 2–3.5 s. Keep the fade gradual rather than a brief black flash. |
| 106 | Fade Through White | Let the outgoing image bloom gradually to white during 0–1 s. Hold white during 1–2 s, then reveal the next scene during 2–3.5 s. Make the change smooth rather than an abrupt flash. |
| 107 | Mirror Transition | Frame a mirror. During 0–2 s, let its reflection change into the next setting; during 2–4 s, move through the reflected space until the new scene fills the frame. Treat this as a designed visual effect with a continuous reveal. |
| 108 | Circular Graphic Match Cut | Frame a circular object in the outgoing shot during 0–1.5 s. Cut during 1.5–3 s to another circular object in the next scene, matching its position and size. Use a clean, deliberate cut rather than a dissolve. |
From a General Idea to a Usable Camera Prompt
An emotion is a starting point. What makes it visible is framing, action and movement.
| General direction | More specific camera direction |
|---|---|
| “Move closer.” | Start in a medium shot and slowly dolly toward a facial close-up over 2 seconds. Keep the focal length constant and the move straight. |
| “She feels alone.” | Place her small in the center of an extreme wide shot of an empty room. Hold for 4 seconds, with a barely perceptible push-in. |
| “Make it tense.” | Hold a close-up with shallow depth of field. Let restrained handheld adjustments and the character's visible breathing carry the tension. |
Before you generate, check five things: starting position, direction, extent, timing and ending frame. Add only the constraints that protect the behaviour the shot depends on. For example:
Eye-level medium shot from behind, with the character on the right third. Dolly forward slowly from medium to close framing over 0–2 s, then settle on the hand at the door handle during 2–3.5 s. Keep the focal length fixed and the camera path straight. No cut or lateral drift.
A live-action shoot also needs workable blocking, equipment and continuity in the shot list. For AI video, check the output against the plan instead: did the camera move, did the subject move, did the focus change when you wanted it to? Keep the examples that communicate a technique clearly, and flag any departures before you treat them as precise references.